Architecture photography and cityscape photography can be very similar because you will find most buildings or constructions within the cities. As far as I’m concerned, however, cityscapes can also include city life. While for pure architectural photography, I focus on isolated buildings or constructions. Sometimes it is interesting to show a building or structure within the framework of the city.
Interior photography could also be part of architectural or estate photography. Still, in this blog, I limit myself to the exteriors of buildings and other constructions like bridges, stairs, and monuments. Interior photography is on my list as a future blog.
1. Composition in architecture photography
Composition is the first thing you will notice when looking at an architectural picture. It can make or break a photograph. Have a look at my specific blog on composition.
Symmetry or not?
When we look at a building while composing our image, we consciously decide between a symmetrical or an asymmetrical composition. The standard approach is to avoid putting our main subject in the centre. But rules can be broken, and there are photos of symmetrical buildings where the image can become more potent by centring it. Reflections usually work very well when using symmetry. You decide what effect you want to achieve as an architectural photographer or fine art artist. Symmetry can be powerful, but going off-centre could bring more dynamism to your picture. As often, there is no right or wrong answer.
Thirds and diagonals in architecture photography.
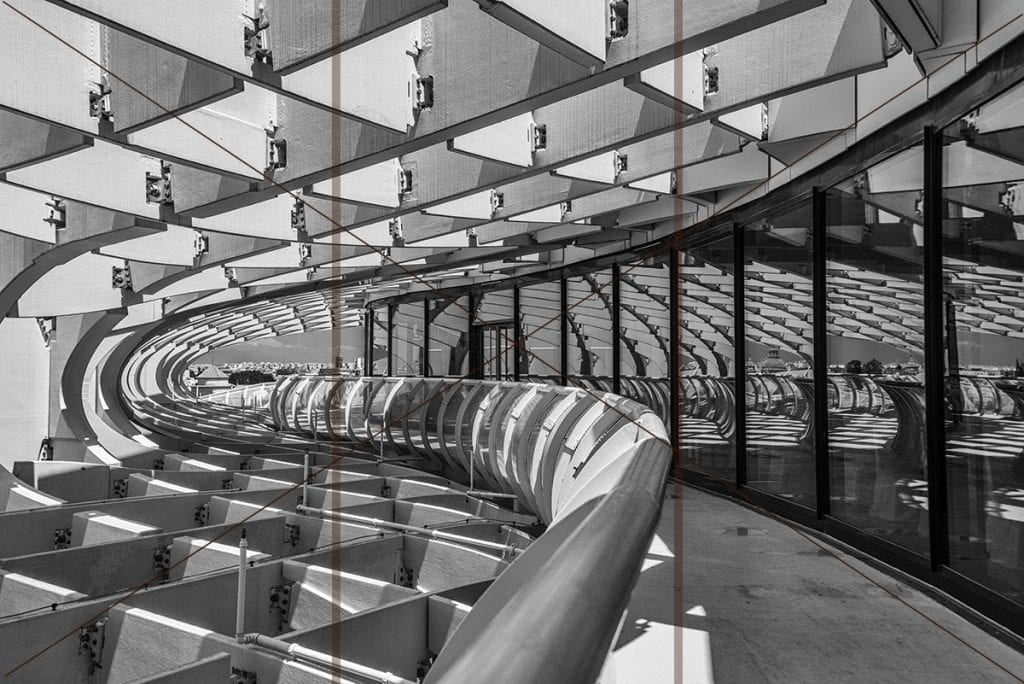
When we choose asymmetry, taking into account the rule of thirds is a perfect starting point to build up our picture. In most cases, this will prove to be a good choice. Arranging our subjects on a diagonal line draws attention to the focal point. Playing with leading lines, patterns, breaking patterns, shadows and light, and positive and negative space opens many creative opportunities.
Architectural volumes
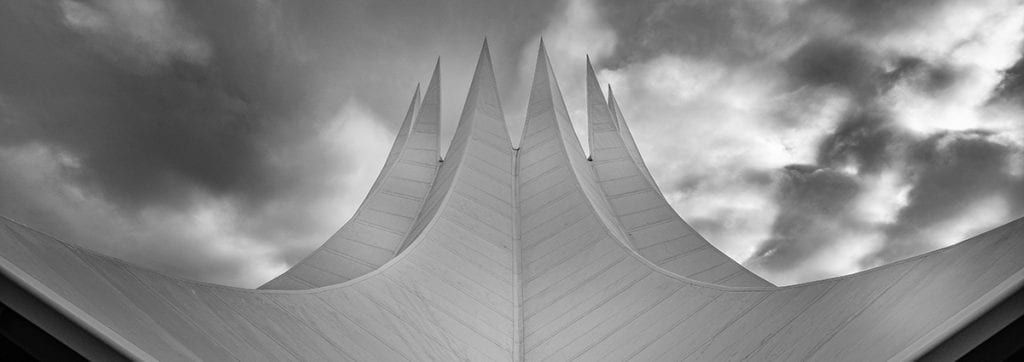
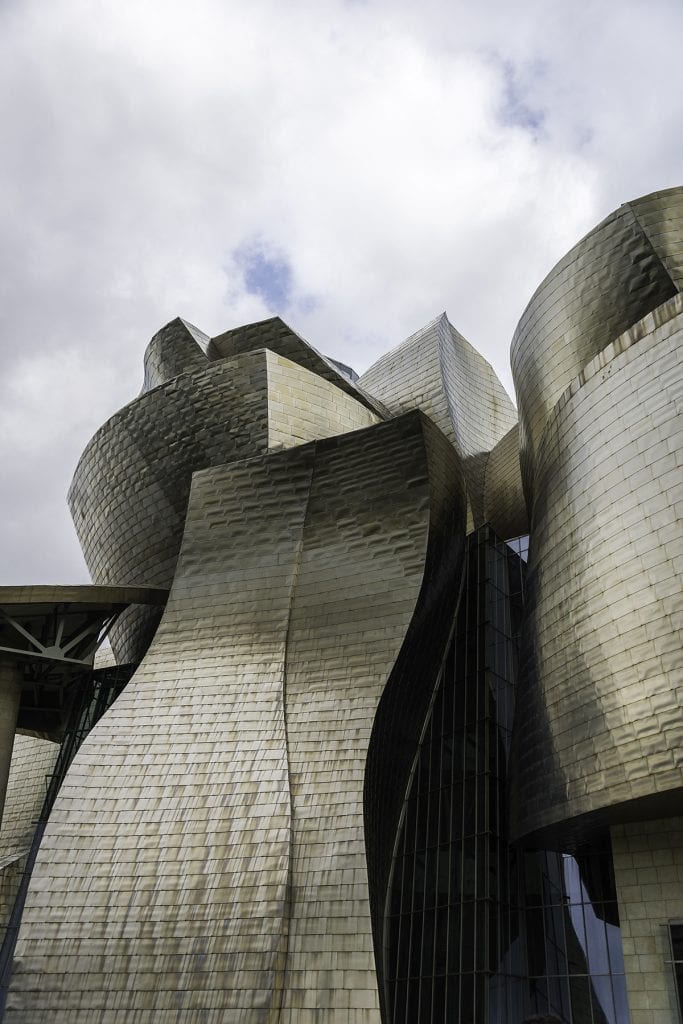
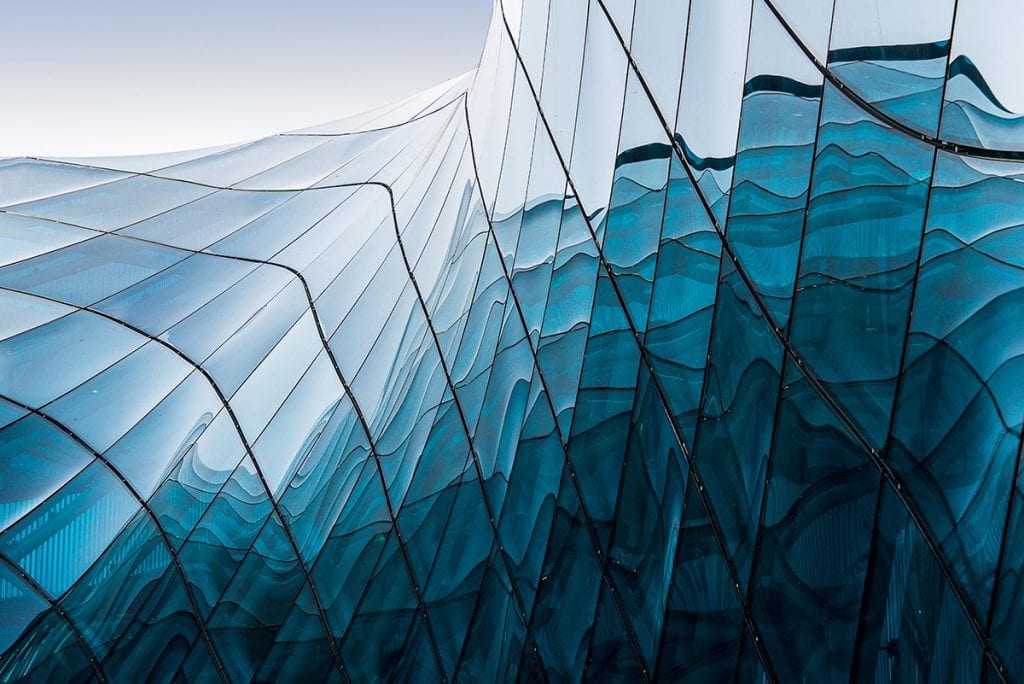
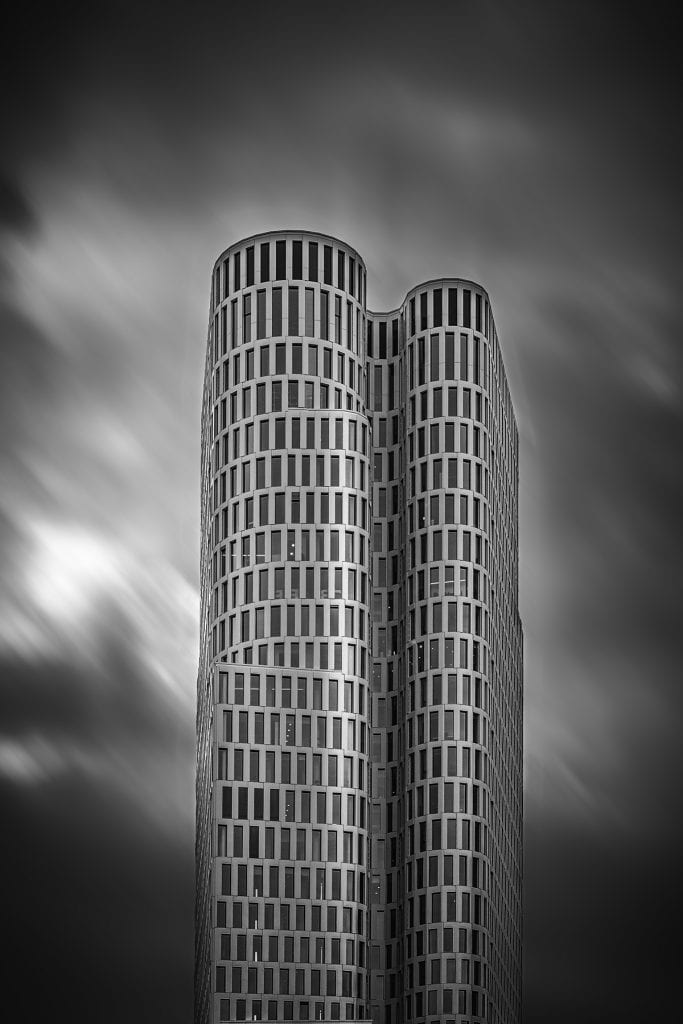
In architectural photography, we look for volumes and light effects. The light on the building creates shape, colour, and texture in the materials. Intersections of lines and surfaces, overlapping volumes or shapes, complete one another or contrast with one another.
Buildings can have complex structures, but depending on the light, we can reduce them to simple stacked volumes. We try to find dominant lines in those structures, leading us to a harmonious composition. As explained in other blogs, photographers have to produce a 2-dimensional picture of a 3-dimensional reality. With the help of light, we recreate the suggestion of volume and depth.
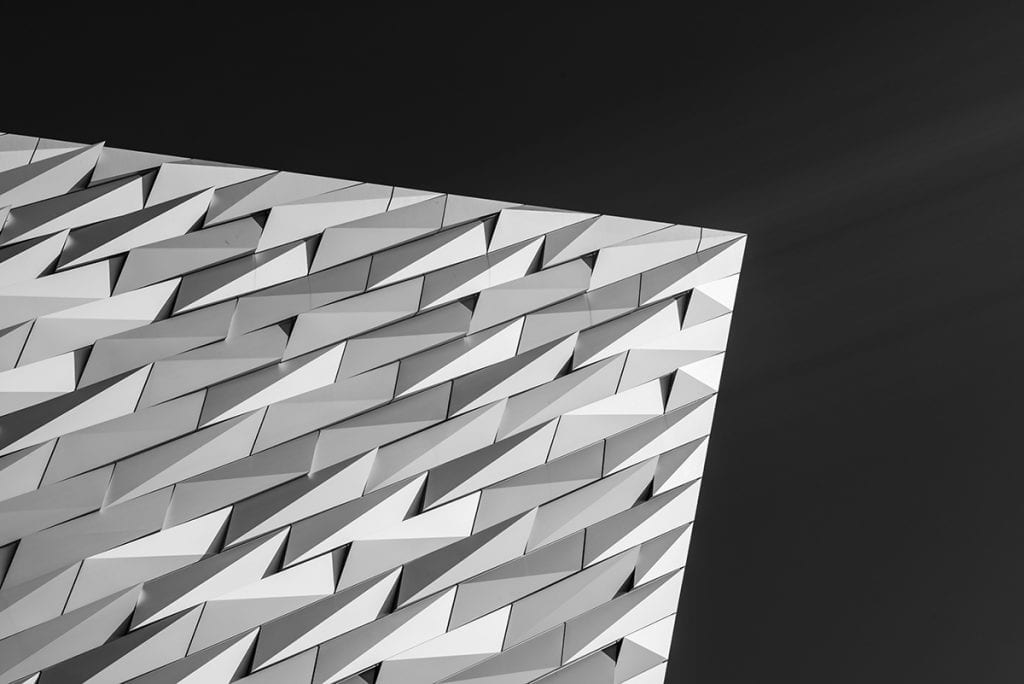
Abstract architectural photography
Focusing on specific building or construction details can make our photo abstract. Converting the image into black and white can enhance this effect.
2. The importance of light and architecture photography
In previous blogs, I already emphasised the importance of light. Light is not a constant factor. Different types of light and different directions of the light will define the effects. It will create different looks or moods in your pictures. Have also a look at my blog about the weather.
On overcast days, we will have softer light, which also means there will be less contrast and/or drama in the details of the construction and background. Early morning or late afternoon light brings more golden colours and much longer shadows. Floodlights from the left or right will create shadows and a three-dimensional feeling.
The light is harsh during the middle of the day. The interplay between light and shadows could create exciting contrasts. Most of the time, however, harsh light causes details to fade away.
Later in the evening, we get the opportunity to combine the fading natural light with artificial light.
3. What camera settings for architectural photography?
One can shoot buildings with any camera, but I prefer my full-frame Nikon.
Buildings do not move or run away, so you can take your time and work with lower ISO settings.
As for any photo shoot in RAW, there is so much more detail available in your files.
A cable release, off-camera shutter release system, or remote control helps avoid mirror or camera shake.
A spirit level can be beneficial. Straight lines are essential in architectural photography. There are small gadget spirit levels you can put on your camera. Sometimes, they are built into your tripod. Most modern cameras now have built-in electronic spirit levels. So, use them to the fullest.
When you continue reading, it will become evident that a tripod is indispensable.
4. Do you need filters in architectural photography?
I do not see many people using them, but a polarising filter is handy. It removes unwanted reflections from the shiny surfaces of the buildings, boosts the intensity of the sky and clouds, and increases overall contrast and saturation.
Although buildings do not move, long exposures with the help of neutral density filters (ND) will bring extra drama to the sky. When wind moves the clouds, pleasing lines can be created against a darker sky.
Long exposures can help when you cannot avoid the presence of moving people in front of your lens. With several-minute-long exposures, you can miraculously eliminate commuters and tourists.
A special nightscape filter can be helpful when shooting at night, which might be challenging because of the artificial light inside or outside the buildings. This filter will remove the light spectrums and colour cast by light pollution and sodium lamps.
5. Tilt-shift lenses and architecture photography
We all know the effect of tilting our camera and lens upwards when photographing tall buildings. Our picture will show converging lines instead of straight lines. Our eyes and brains automatically compensate for this effect; we see verticals on the spot.
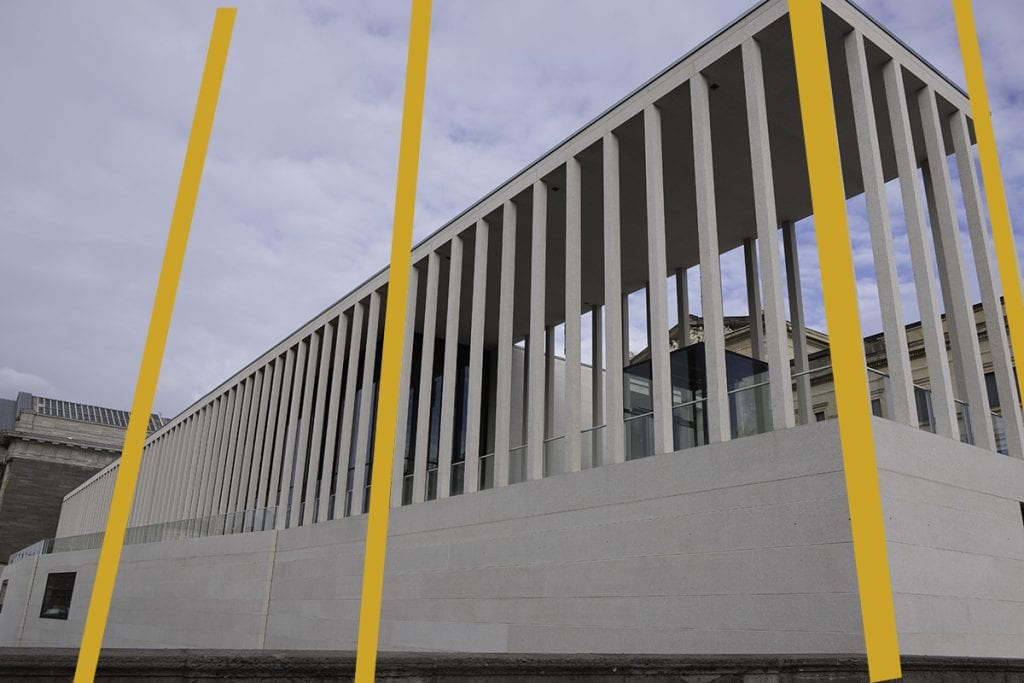
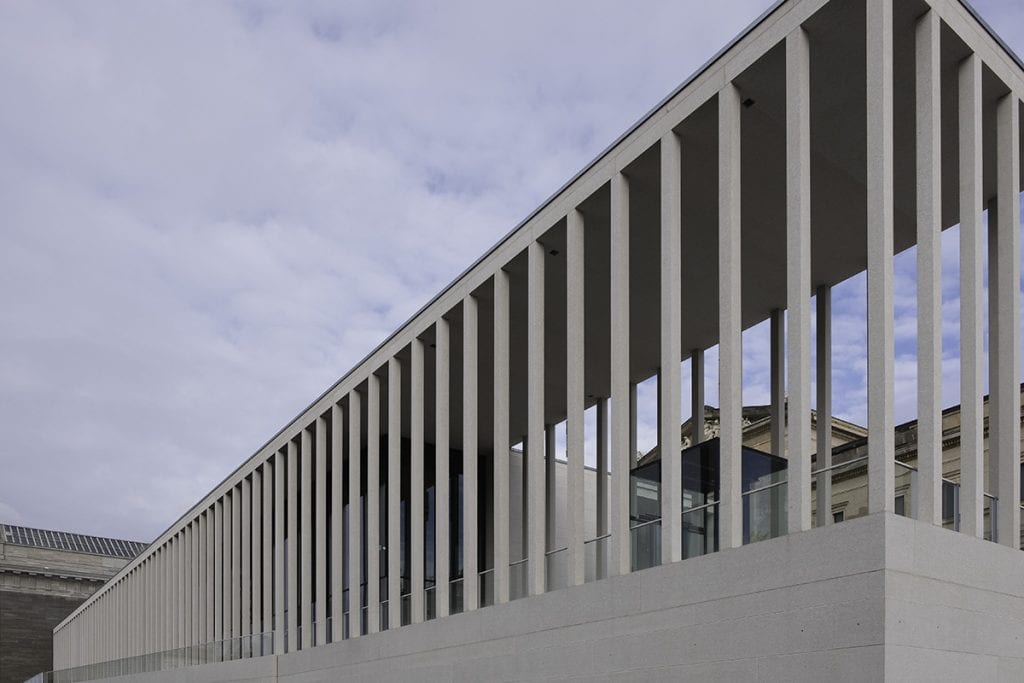
To avoid this converging line problem, tilt-shift lenses were created for architectural photographers. A tilt-shift lens is very different from a regular lens. These relatively expensive lenses have a unique structure that allows you to move the lens in front of your camera, straightening the vertical lines in your architectural photo.
The tilt-shift lens allows one to modify the lens plane independently from the camera sensor plane by tilting. This means swing movements (rotating relative to the sensor plane). Shifting means moving parallel up and down (or left and right) relative to the sensor plane. (Most tilt-shift lenses can be rotated 90 degrees.)
The best first step is to place the camera on a tripod in a parallel position with the plane of the building (perfectly vertical). Then, we start composing the image so that the verticals are parallel while slowly shifting the lens upwards so that the entire building comes into our frame without the verticals convergent.
I needed some practice to get used to this type of lens. If you are unfamiliar with this lens, much information is available online. Why not google the “Scheimpflug Principle”? The name sounds exotic, but this will clarify the principle of the tilt-shift lens much better.
Some creative photographers use it the opposite way, to create or exaggerate distortions. But that, of course, is the artist’s free choice. Converging verticals can deliberately add dynamics to an architectural photo, but the standard in architectural and interior photography is that the lines must be straight. This makes a photo calmer.
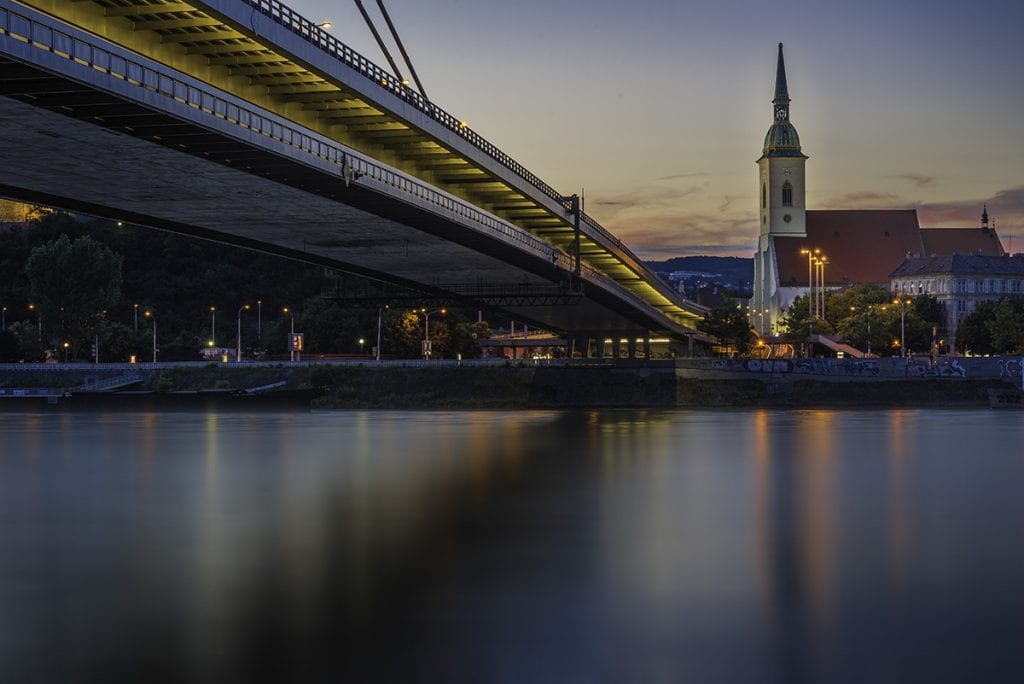
6. Should we include people in architectural photography?
Whether we include or exclude people in architectural photography depends on what we want to achieve with your pictures. Or what your client expects from them. This is the freedom of choice for the artist. In more abstract pictures, you will rarely see people. However, when we include people in our images, we add a sense of scale and show how humans interact with the object. Remember that the viewers will automatically focus on the people in the image. It could be your choice to make the picture more engaging. If you include people, do not forget to ask their permission and pay extra attention to their body language.
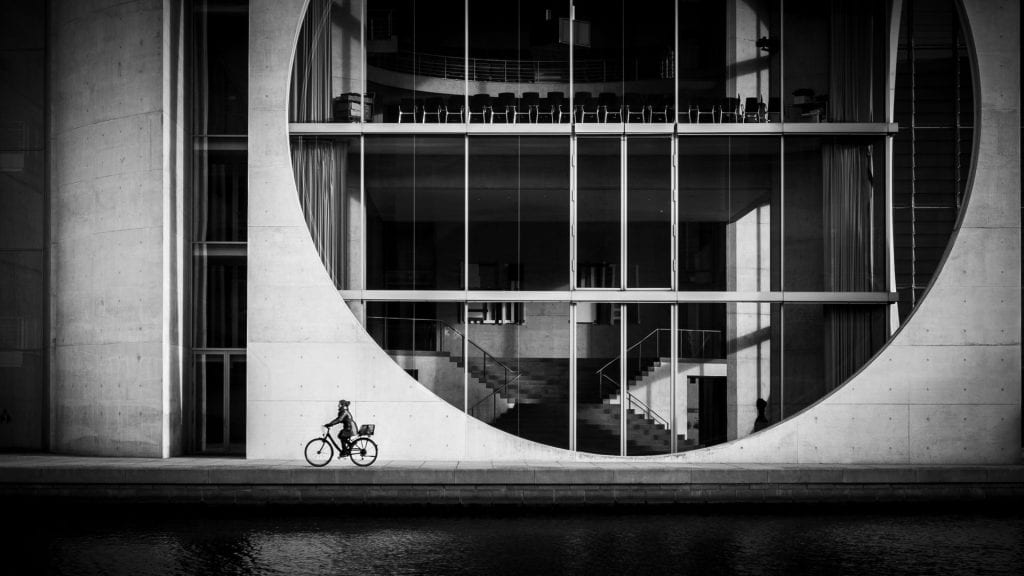
As already mentioned, you could exclude people by using ND filters for long exposures. If you do not make the shutter time too long, you could leave some ghostly streaks where they passed to create a unique atmosphere and dynamic in the picture.
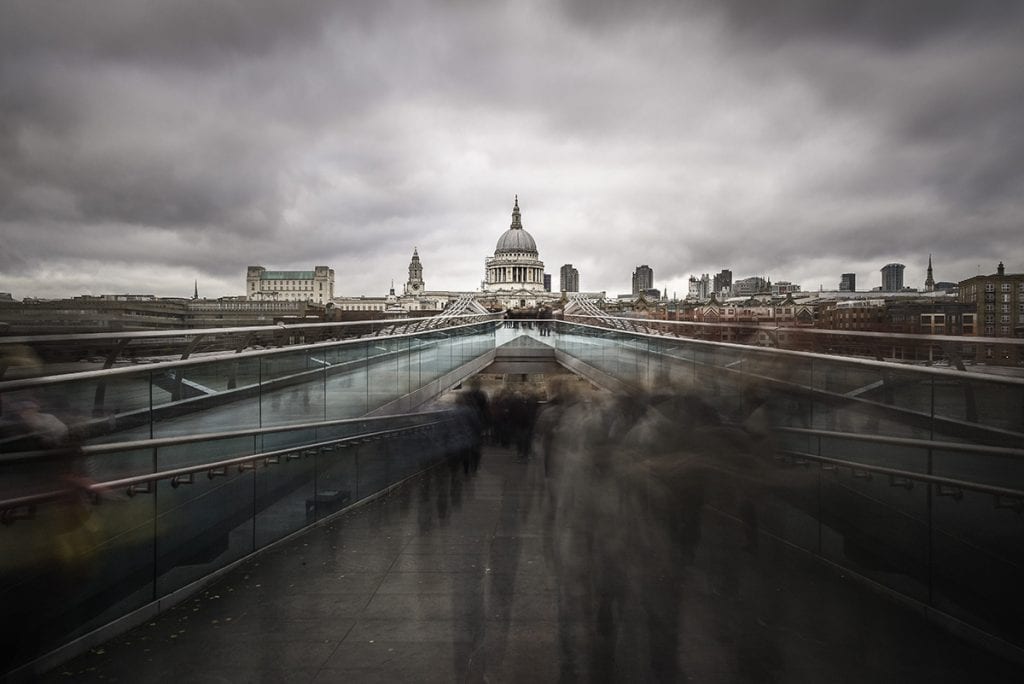
The photo above of the Millennium Bridge in London with streaks of people could be seen as a cityscape. Here, one considers the interaction of moving people, the bridge, and the Cathedral in the background.
7. Post-processing and architectural photography
The first assignment for photographers is to get the picture right in the camera as much as possible. Besides the basic tweaking of your RAW image (contrast, sharpening, white balance), post-processing opens a window of opportunity for a second creative process. Turning it into black and white and playing with dodging and burning can make you a fine art artist.
If you do not own a tilt-shift lens, Photoshop or Lightroom also have advanced features to straighten buildings in post-processing.
One of the simplest things to do is convert your pictures into black and white. This simplifies the image.
I might elaborate more on the post-processing process in a future blog.
As always, please leave your comments or questions below!
Leave a reply