Letting yourself go and neglect every possible rule you ever learned in photography can give surprising results, like thinking out of the box. And why not try this in landscape photography?
Sharp, sharper, sharpest
To my knowledge, landscape photographers always strive for the highest possible sharpness in their photos. They do this by using the focal distance or even by focus stacking (combining different images with a different focus distance), cameras or lenses with in-body stabilisation, tripods, wire release, remote controls, folded mirrors, etc. And surely, a photo out of focus may not be appreciated by the viewer. But introducing the intended blur in your picture opens a new door to creative pictures.
The use of blur in landscape photography
The intended use of blur and indeed motion blur can produce very creative and surprising results. Motion blur can be used in various ways This can be done by photographing moving objects in the landscape with slow shutter speed, for example, vehicles, people or animals moving through the image. Also, moving clouds, water, leaves, and crops are part of this technique. I will write a specific blog on long-exposure landscapes soon. The extent to which the object, person or animal fades can contribute to the mystical atmosphere of the image.
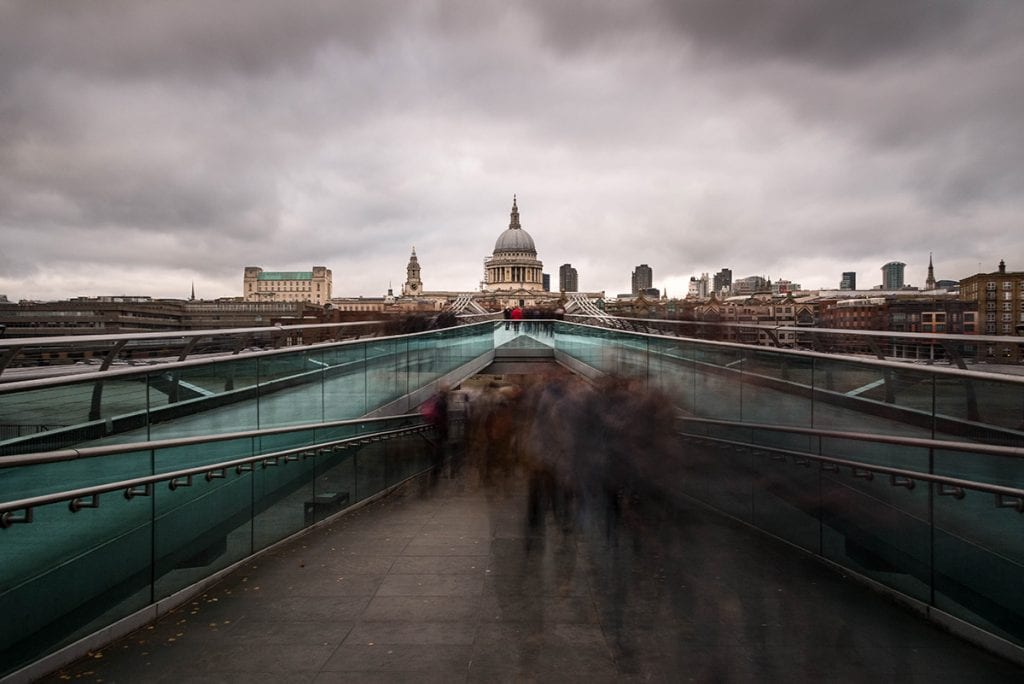
London City movement, Guy 2017, (long exposure blur)
Camera movement
On the other hand, with a static subject, you can also move the camera while the photo is taken. So, move the device up or down while the shutter button is pressed or move from left to right or vice versa. In all these cases, we speak about intentional camera movement (ICM) instead of unwanted camera movement.
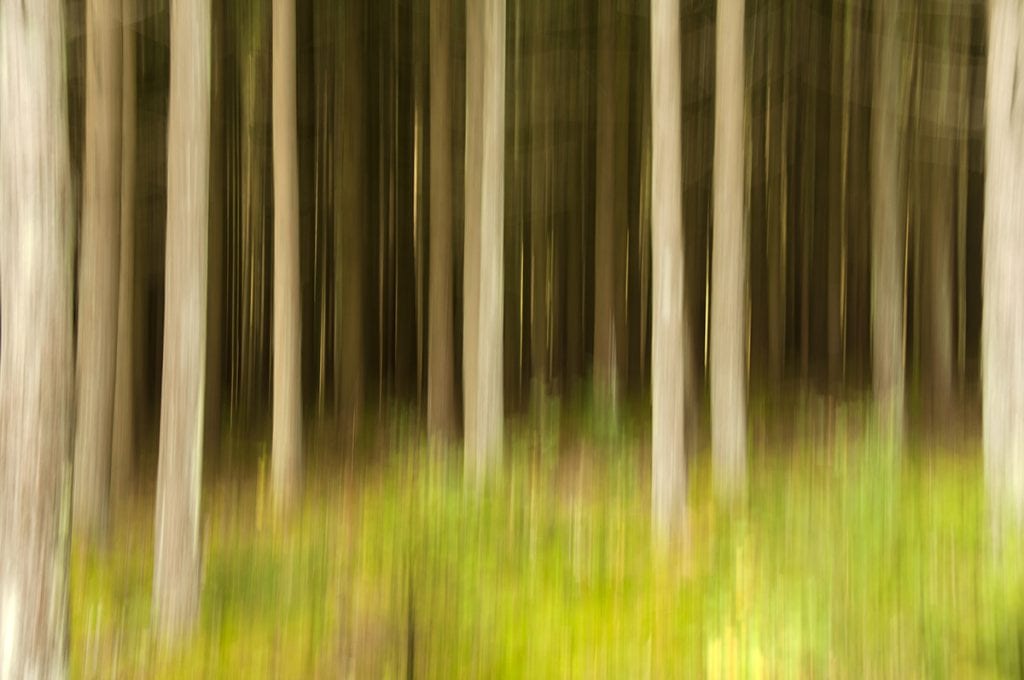
The forest through the trees, Guy 2012 (vertical camera movement)
Another creative idea is to combine two images of the same scene. One completely blurred and one without blur. With the help of masks in photoshop, you reveal a sharp tree, branch, shrub or flower.
Panning
Panning (moving the camera horizontally) with moving objects or animals sometimes gives exciting images. At the same time, the background will blur, and there is some sharpness in the object or animal you followed. If you want the lines or stripes to be straight, do this on a tripod. If you do it handhold, it can add a natural swing.
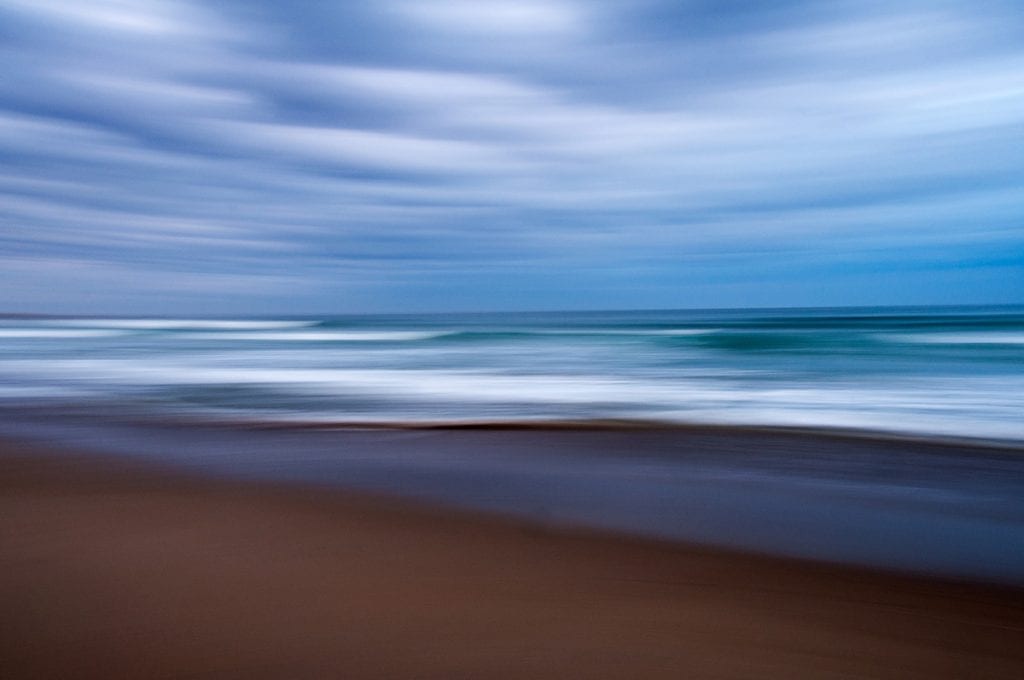
Morning grey, Guy 2013 (handheld horizontal camera movement, panning)
Handheld blur
A third possibility is to manually hold the camera with a slow shutter speed so that a kind of artistic blur is captured in the image by the camera’s vibration. Probably you already did this by accident when your camera was set with a longer exposure time. The first reaction of most of us is to delete such photos as fast as possible. However, sometimes you could get lucky and end up with a photo that gives the dreamy impression of being painted.
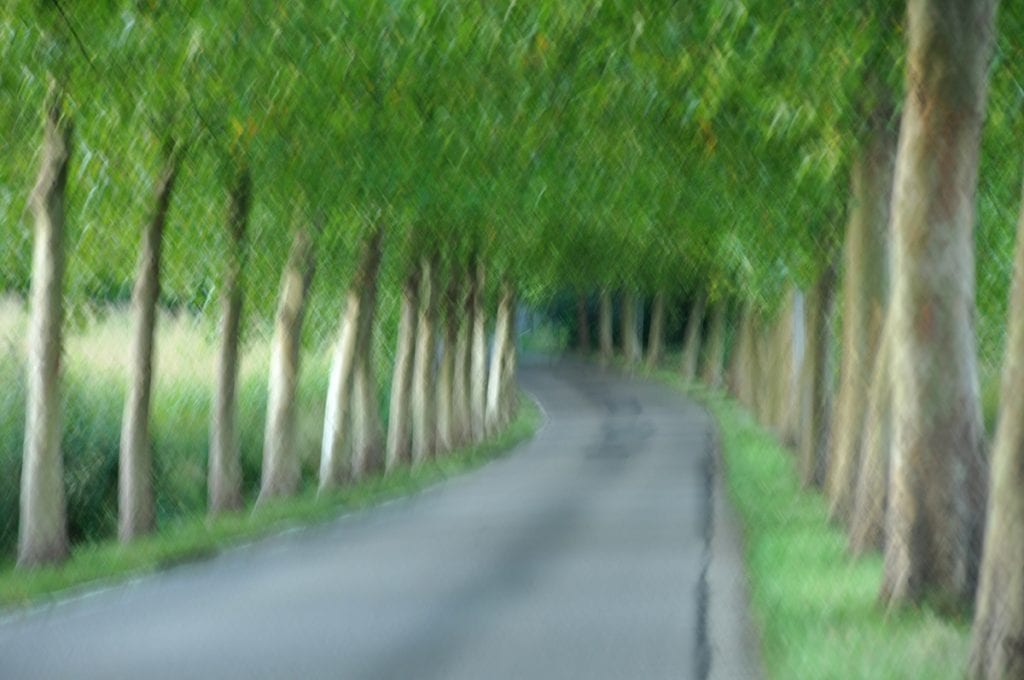
On the way to your dream, Guy 2012 (handheld vibration)
Zoom blur
Finally, another technique that may be used less in landscapes but more often in cityscapes is zooming in and/or out while pushing the release button, causing some radial distortion.
Trial and error
Most of the techniques mentioned above are based on the movement of the camera or lens. With this kind of creative landscape, it is often a matter of trial and error to get a satisfactory effect. Of course, these techniques can also be combined with, for example, black-and-white conversions to end up with more abstract pictures. See my blog on abstract and minimal photography
Use of lines and patterns
You can also be creative by looking for vivid details, lines, forms or patterns in objects or in nature. Graphic lines in nature can help to produce a balanced and enchanting picture. By focusing on specific details, you can invite the spectator to guess what he is seeing, and he might see something different from what you saw.
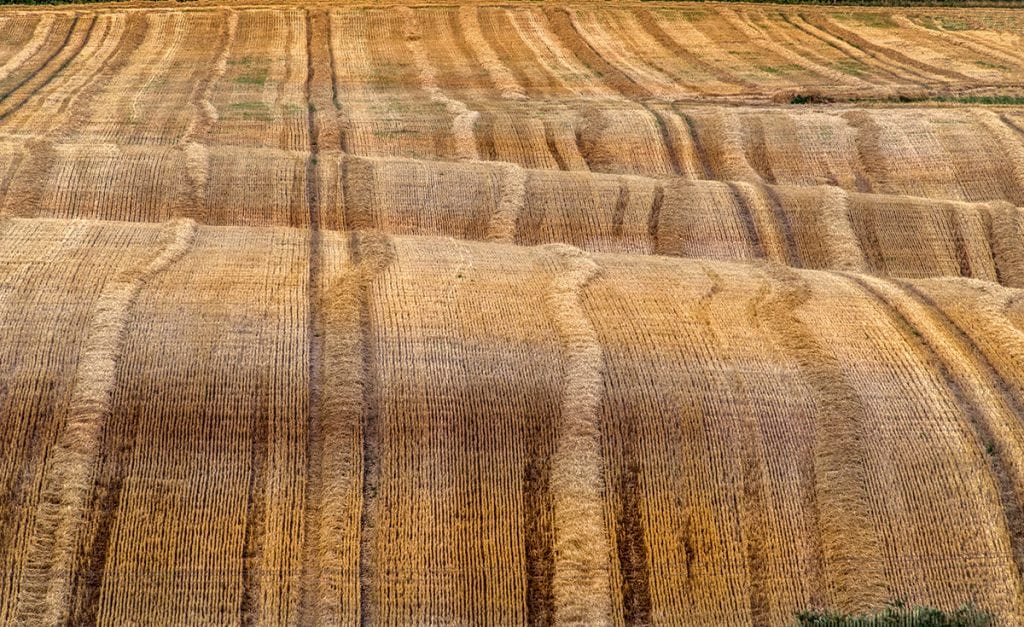
After the harvest, Guy, 2015 (lines and patterns)
High-key landscape photography
High-key photography is maybe less used in landscape photography itself, but it is regularly used in nature and macro photography.
“High key” could simply be described as very bright images. High-key imagery focuses on the majority of your image pixels in the highlight range of your histogram. In your histogram, you would completely expose to the right. You can add light up to 1,2, or even 3 stops with the exposure compensation. This might need some experimenting with trial and error because, of course, we cannot overexpose our entire picture completely. We still need some hints of contrast, even in the brightest parts.
This technique can make your colours very light and fresh. This style was used intensively in portraiture, but nowadays, several good nature photographers use this technique for butterflies, delicate flowers, etc.
This gives a soft, ethereal and surreal feeling to the image. Bright, white backgrounds like snow or a flat cloudy sky will help to obtain high-key exposures, as do low-contrast lighting conditions like cloudy, foggy, flat-light days. With back-lit subjects, you can overexpose the background and fill in the subject with fill-flash, reflected light, or a torch.
In this case, spot or centre-weighted metering of the subject will help you to find a good exposure of the subject but with a blown-out background. Using the Live-view feature of your camera can come in handy at times, as you can see your exposure and lighting effect before you press the shutter.
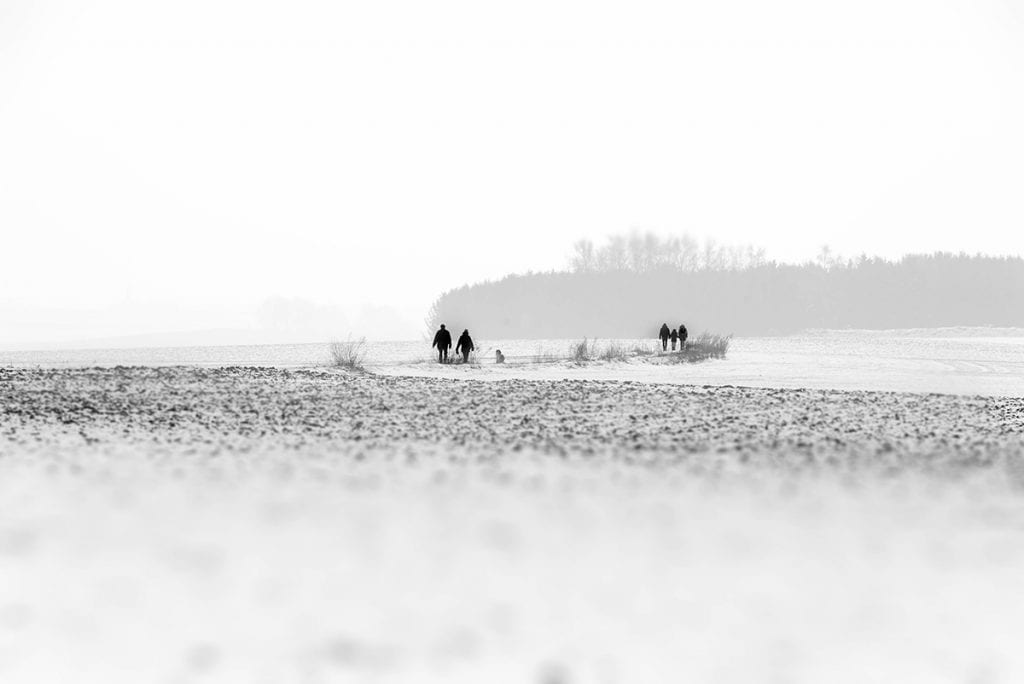
Snowy fields, Guy, 2018, (high key landscape)
Low-key landscape photography
Low-key photography is, of course, the complete opposite of high-key. With this technique, you will try to underexpose as much as possible, even several stops. This results in darker and very dramatic-looking pictures, maybe even a bit mysterious.
So, you utilize predominantly dark tones, but you do not want just to produce a dark image. You want to use the lighting selectively so that only specific portions of the image are illuminated. Even in the darkest parts, you still want to find some finer details. The contrast makes you look at the illuminated parts of the picture. This technique is also used to produce silhouettes.
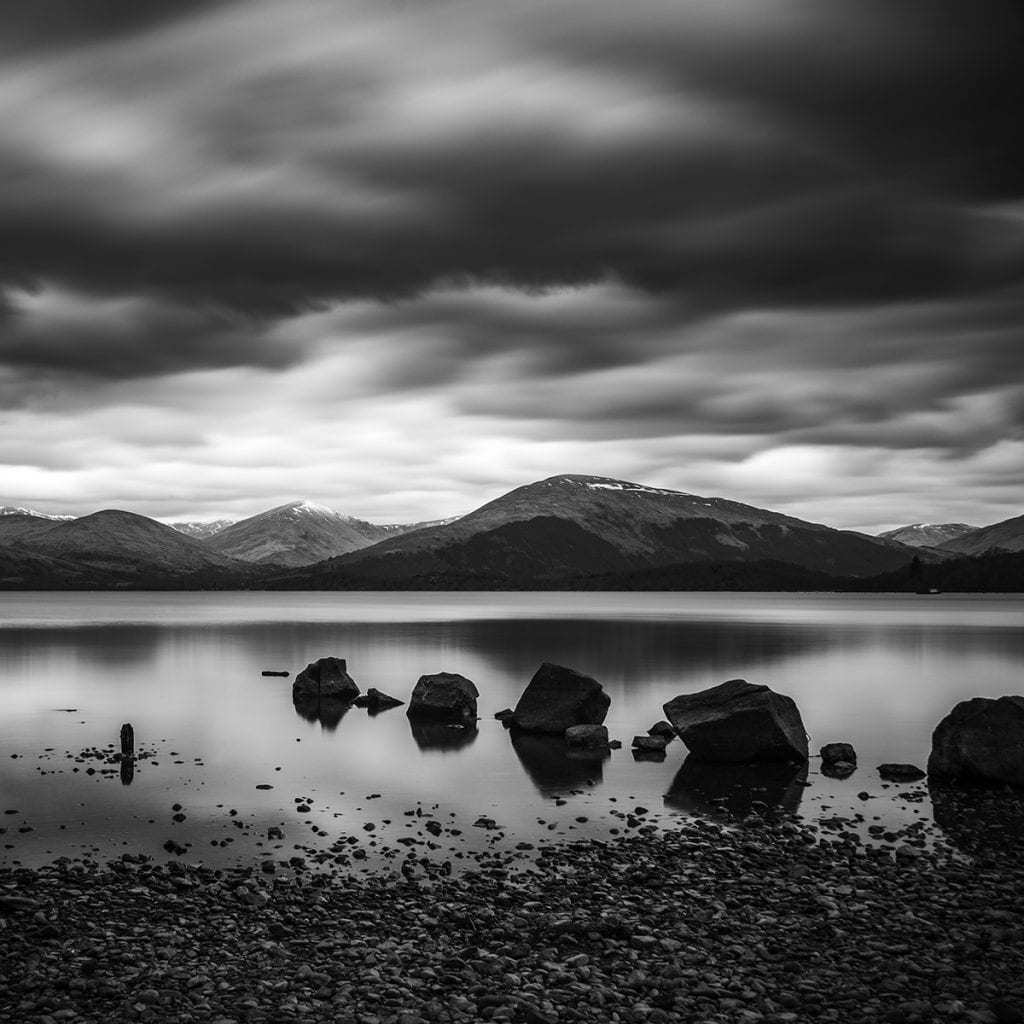
Scottish skies, Guy, 2018 (low key)
What’s next? Creative with colour?
This is not the end of creative possibilities. In the near future, I will publish a blog specifically dedicated to the creative use of colour in landscape photography. So, stay tuned on my website.
As always, I would like to invite you to leave a comment here below and tell me about your creative projects.
Leave a reply