When I publish this blog, the holiday season is not yet there. But maybe you have already started planning for your next city trip or holiday. Would you like to learn more about travel photography and prepare yourself for a new photographic adventure?
I have been travelling worldwide with my camera for years, shooting many photos, and now I’d like to share some experiences in 22 tips to take your travel photography to the next level.
Use these tips during your next holiday, short break or city trip and come home with something better than just snapshots. With some practice, you can create beautiful travel photos that will cherish your memories forever.
Travel photography and vacation photos are taken while travelling, but the two differ.
Travel photography is a more creative and artistic form of photography. Travel photographers try to capture the beauty and uniqueness of a destination. They often seek unique viewpoints and perspectives and experiment with different techniques and styles. Travel photography can be used to tell a story about a destination or evoke a sense of beauty and wonder. The point of travel photography is also to make the viewer want to be there.
Vacation photos, on the other hand, tend to be more personal and informal. Vacation photographers try to capture their memories of a trip. They often look for photos showing their family and friends how they spent their time on vacation. And there is nothing wrong with that. Vacation photos may include people, places, food, activities, or whatever interests the vacationer. For many, holiday photos prove “I’ve been there.” The quality of the images is often not that important. Of course, it is more interesting to take an interesting photo because of its quality. You can naturally add a monument to a portrait through pose, viewpoint or perspective.
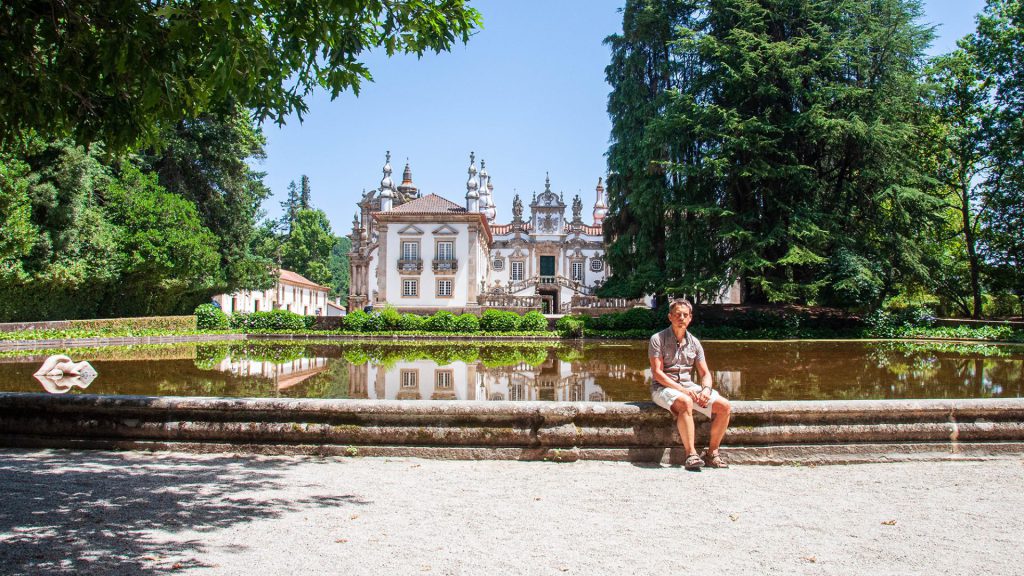
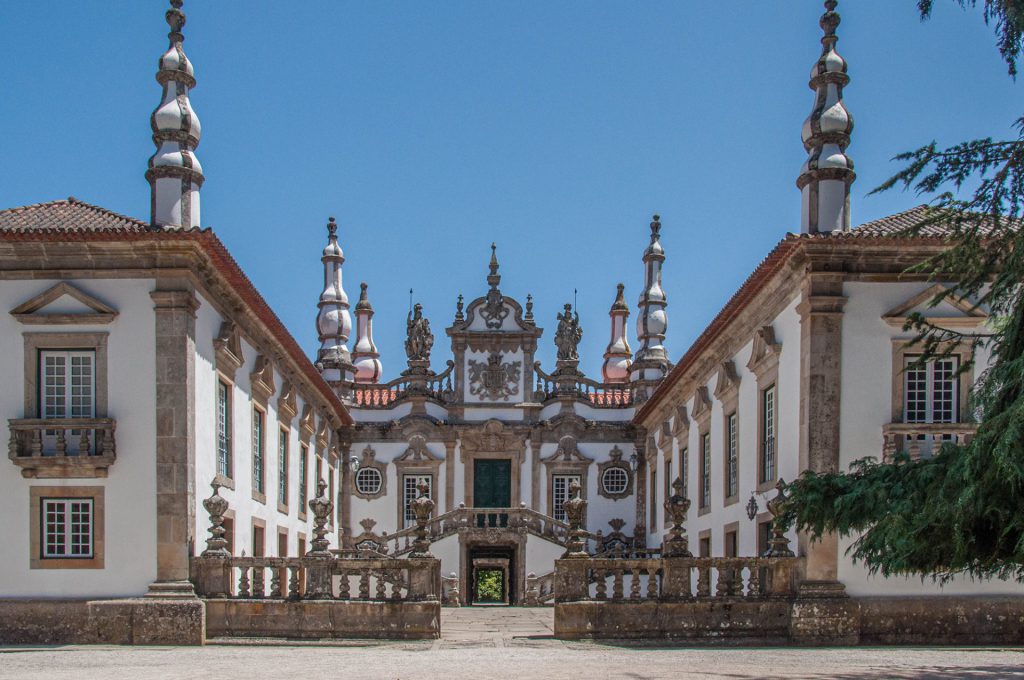
“I was there” (Palacio de Matheus Portugal), but the photo respects the monument, its surroundings and the rule of thirds. Of course, we had to wait until some tourists left the view. (Guy, 2010)
Of course, there can also be overlapping elements between travel photography and vacation photography. Some vacationers are interested in taking artistic or narrative photos of their travels, and some travel photographers also take pictures of their family and friends during their travels.
Nothing is better than looking back at travel photos and dreaming away of those beautiful landscapes, colourful fields, interesting buildings, beautiful views or city scenes.
This means that travel photography can cover many things, such as
- Natural landscapes, such as mountains, lakes, forests and beaches.
- Cities and towns, including their architecture, people and activities.
- People, both individually and in groups.
- Cultural traditions, customs and lifestyles.
If you are a nature person, you will likely encounter landscapes or nature while travelling. At the same time, if you are more of a city and culture person, you will discover more cityscapes, people and architecture (historical and modern). On several travels, you will mix the countryside with cities.
Travel photography requires several skills and knowledge, including a basic understanding of photography, such as exposure, composition, and aperture; the ability to react quickly to changing conditions; and creativity and the ability to develop one’s unique style.
Travel photography can be an enriching experience. It is a great way to explore the world and express your creativity.
If you are a beginner photographer, visit my blog for some essential tips: 11 Tips for the novice landscape photographer.
If you want inspiration for your seascape photography, visit my blog: 34 Tips for Better Seascape Photography.
If you are looking for tips on architecture photography, visit my blog, What You Want to Know About Architectural Photography.
Content
- Tip # 1. Research your destination:
- Tip # 2. Take the right gear
- Tip # 3. Travel light
- Tip # 4. Check your equipment before departure
- Tip # 5. Know your camera
- Tip # 6. You Plan your shots
- Tip # 7. Capture the local culture
- Tip # 8. Use natural light:
- Tip # 9. Take pictures at the right time
- Tip # 10. Experiment with composition:
- Tip # 11. Try different angles or a different perspective
- Tip # 12. Search for color
- Tip # 13. Look for patterns and structure in the chaos
- Tip # 14. Look for details in the city
- Tip # 15. Capture movement in the city
- Tip # 16. Pay attention to the background
- Tip # 17. Tell a story
- Tip # 18. Shoot in RAW
- Tip # 19. Edit your photos
- Tip # 20. Zoom with your feet
- Tip # 21. Take some time for yourself and enjoy
- Tip # 22. Don’t look your entire journey through the camera; go and experience things, too
- Conclusions
Tip # 1. Research your destination:
Travel photography starts when you are still at home and have just planned or booked your holiday. Research your destination and get inspiration for your upcoming trip.
Here are some suggestions on how to research your destination for travel photography:
- Start with a list of places you’re interested in visiting. This list could be based on your personal preferences, such as your favourite landscapes or cultures, or it could be based on your research into the best places to photograph. Do you already know which places you will visit during your holiday? Then, you can search more precisely or with more focus.
- Do some online research. Many websites and blogs can provide information about destinations, including their best photo spots, weather patterns, and tourist seasons. An exciting app for finding photo locations is Locationscout.net; it is one of the world’s largest platforms for photographers and travellers, sharing all these beautiful places with exact geographical positions, photography tips, travel information, and much more.
- Look for travel photography books and magazines. These can be a great source of inspiration and information, and they often feature stunning photos that can help you visualise the places you’re interested in visiting. By looking at pictures of a destination online, we make ourselves comfortable for the next trip and find the most beautiful places. In this way, you can have fun thrice: once during the preparation phase, once on the spot, and once when you process your photos. Looking at others’ pictures doesn’t mean that you have to copy them. Touristic hot places have already been photographed millions of times. But once we are at the spot, we will try to find our perspective and mood to give it a personal touch.
- Talk to other photographers. If you know any other photographers who have been to the places you’re interested, ask them for their advice and recommendations.
- Use social media. Instagram, Flickr, and 500px are great places to find inspiration and see photos of different destinations. You can also use these platforms to connect with other photographers who can help you plan your trip.
- Take note of your points of interest. Did you find some great scenes? You can create documents with photos or use some apps like inRoute – Intelligent Routing App to make waypoints on your future travel itinerary. Whenever I see an exciting point in a book, a magazine, TV, online, YouTube, Instagram, Pinterest or wherever, I always make a note in the App because otherwise, it would be very challenging to remember and find all those strange names in different languages in different countries. And whenever I travel in that direction, I already have a selection of exciting points available on my smartphone or tablet.
- Check the weather forecast. This is especially important if you’re planning to photograph landscapes or wildlife. You’ll want to ensure you’ll be there during the best time of year for photography.
- Consider the time of day. The time of day can significantly impact your photos. For example, sunrise and sunset are often the best times to photograph landscapes.
- Be flexible. Things sometimes go differently than they are planned. The weather can suddenly change, or road diversions can prevent you from reaching your destination. So, it’s essential to be flexible when you’re travelling. Be prepared to change your itinerary or adjust your expectations if necessary.
- Be open to the unexpected. Unless you want to capture a specific subject, such as a temple or a market, it is good to walk around a village, town, beach or forest for a few hours and see what comes your way. After all, spontaneous photos are often the best, but that perfect result usually still requires good preparation. Before going out the door, we prepare our photographs to know precisely what we want to capture or where we think we can find an exciting location.
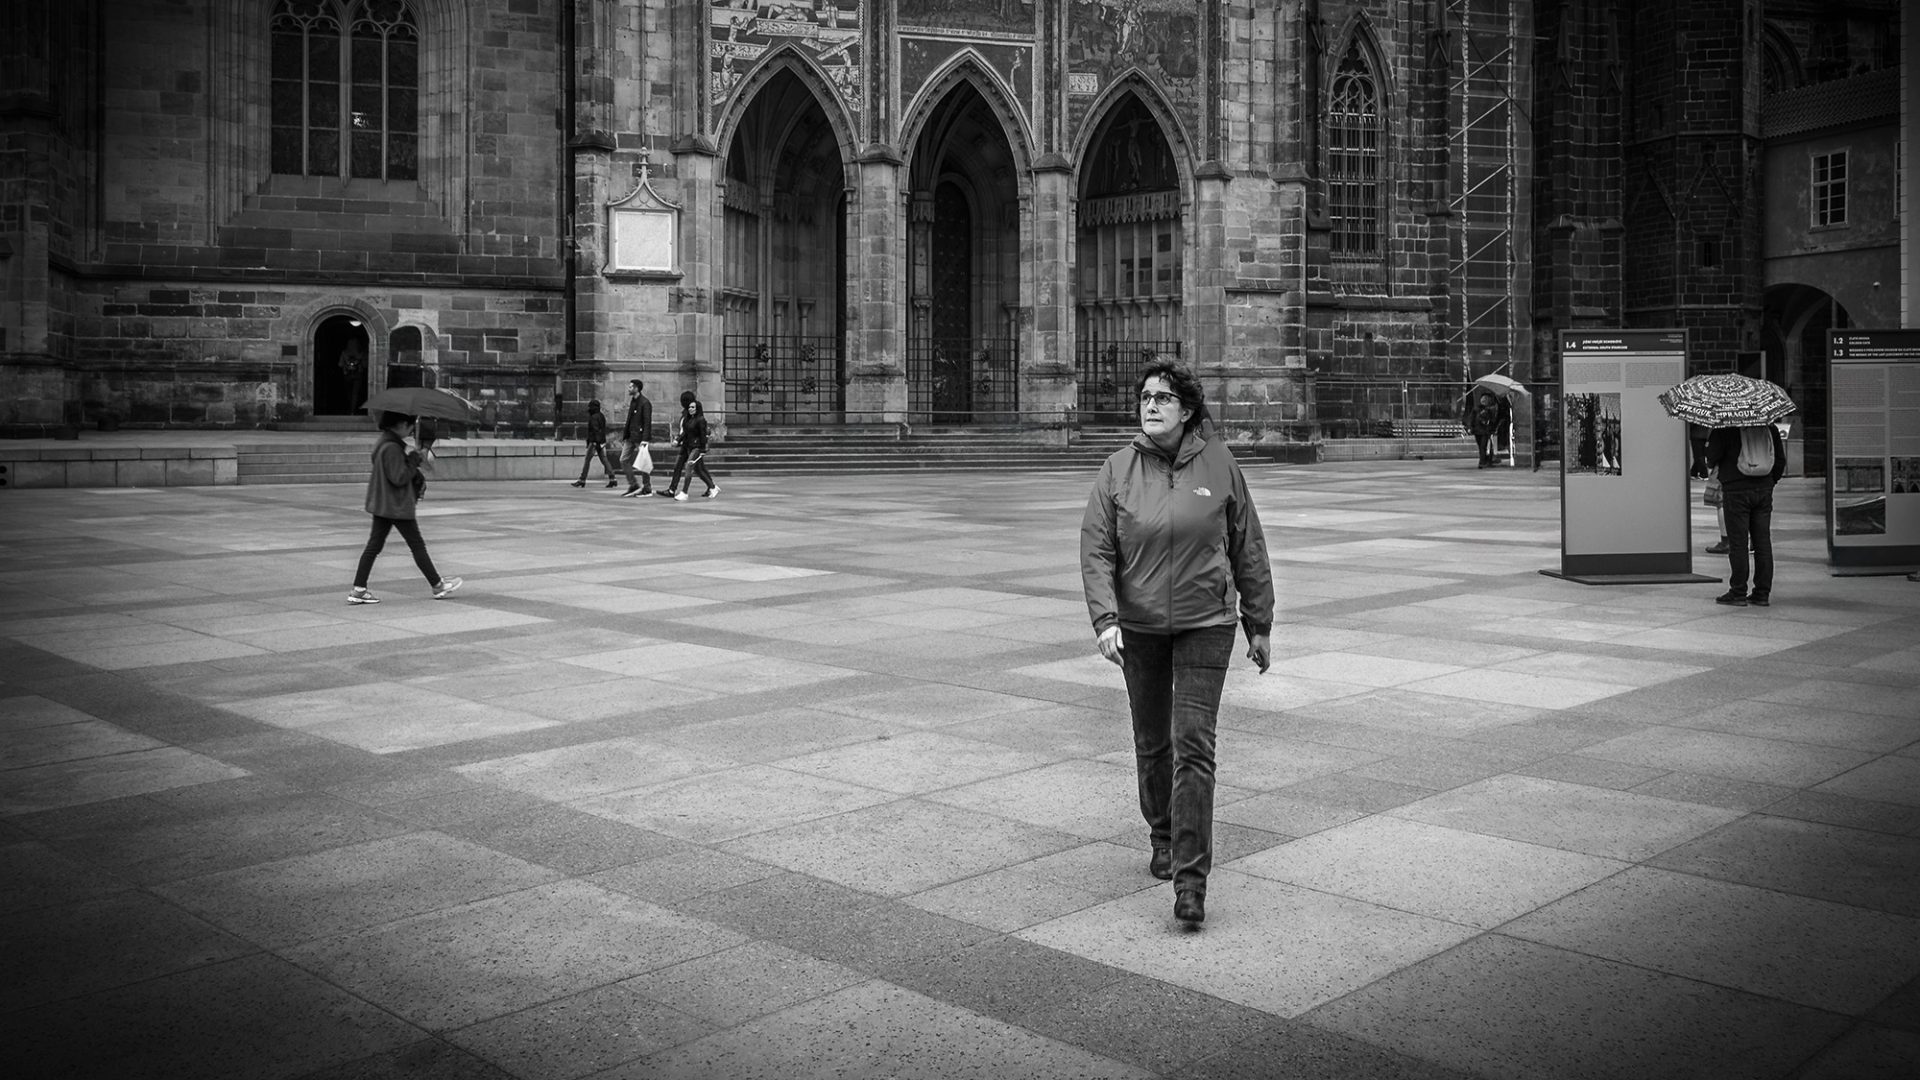
Tip # 2. Take the right gear
Nothing is more annoying than travelling with an overweight bag. On holiday, I want to travel as lightly as possible, so you also need to make intelligent choices in equipment.
While you don’t need expensive equipment to take great photos, having a camera that suits your needs is essential. Consider the type of photography you want to pursue, whether landscapes, portraits, or street photography, and pack the appropriate lenses and accessories. But what is the best gear for travel photography?
This depends on your specific needs, preferences, and budget. Here are some essential points to consider:
a) Camera:
Choose a camera that suits your skill level and requirements. Mirrorless cameras are popular for travel due to their compact size and excellent image quality. However, DSLRs are still viable if you prefer traditional handling and versatility.
You may decide to take all your travel photos with your smartphone. Nowadays, most smartphones have excellent cameras. Some even claim you can’t tell the difference between a photo taken with your smartphone and one with an SLR. I’m afraid I have to disagree because the photos from my camera have more depth and brighter colours, and also, when you want to make a giant print, smartphone photos have their limitations. But there is no doubt that you can also take beautiful photos with your smartphone. And the significant advantage of taking travel photos with your smartphone is that everyone has one in their pocket or bag. But invest in a smartphone with a good camera. Also, keep the lens of your smartphone clean.
Or do you prefer a real camera, like I do? And you want to use all the possibilities and control? Then, it makes sense to invest in a good camera.
Many people initially buy an SLR when they need a new, more ‘professional’ camera because of its good quality. You will also take good photos with a decent system camera (mirrorless). You can still change lenses, but you carry much less weight. Also, most system cameras can take photos in quick succession, especially compared to entry-level SLRs. I have always used a full-frame DSLR camera, but recently, I switched to the mirrorless Nikon Z7 II because it is lighter and more compact than my older Nikon D810.
Capturing genuine emotions and engaging scenarios is much more important than using the most expensive or powerful camera and, ultimately, more enjoyable for the viewer.
b) Lenses:
With a smartphone, you don’t need to bother about extra lenses; you must make confident choices with other camera types. As a travel photographer, I use the Nikon Z7 II full-frame camera. It is a compelling device that takes impeccable photos. Fortunately, there are many great lenses available for any camera.
Travelling with a wide-angle lens, a standard lens, and a tele lens is not always convenient because of the weight. I use what is, for me, a perfect travel lens: the NIKKOR Z, 24-200mmf4-6.3_vr. So I do not need to carry and switch lenses during my city trip. I do not need a faster lens since I concentrate primarily on landscapes, cityscapes, and seascapes.
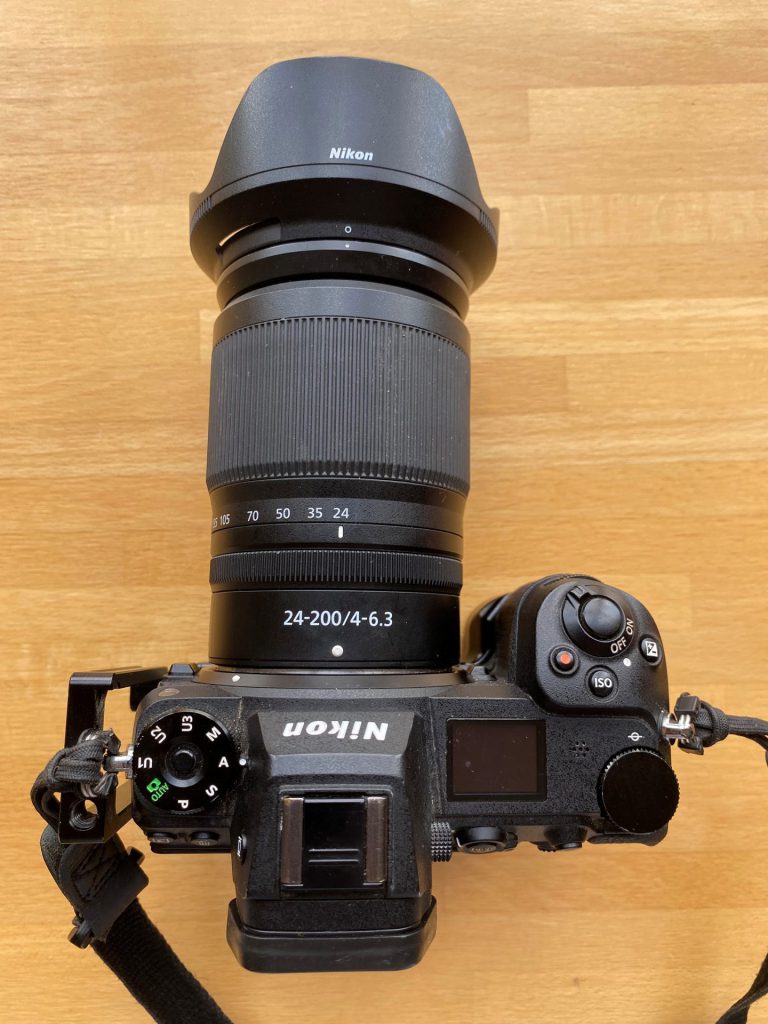
Nevertheless, I sometimes take an extra lens on my trips. But I travel as light as possible, and I check per trip whether I need another lens or not. More lenses will only make your camera bag heavier and less comfortable. Are you heading to a destination like South Africa? Then, you will want a zoom lens to photograph wildlife properly. These lenses have a wide zoom range, allowing you to capture your subjects’ long distances. They are handy for photographing birds or other animals without getting too close. In addition, you should consider a wide-angle lens for the broader vistas or landscapes.
In any case, always make sure your lens is clean. And take lens cleaning materials with you.
When I photograph grand architecture or majestic landscapes, more than an ordinary lens is usually needed to capture the whole thing, especially if there is no room to stand further back. That’s where wide-angle lenses come in.
As a rule of thumb, I suggest using a telephoto lens in crowded landscapes, zooming in to isolate a subject, and using more sky or foreground for negative space. Then again, use a wide-angle lens in wide, empty landscapes.
But as it usually goes in life, sometimes you must compromise between what is convenient and what could be interesting. If you don’t have the lens you want right away, you will also be encouraged to be creative with the circumstances, and you might come home with a sublime picture you had not initially thought of.
c) Tripod:
A lightweight and sturdy tripod can be handy for low-light situations, long exposures, or when you want to be in the shot. Look for a compact, lightweight option that is easy to carry during your travels. Wherever you go, a small and light travel tripod will always fit in your luggage. Usually, I use a Waterproof Carbon Fiber Tripod of SIRUI. That allows me to operate in all weather conditions, even in river beds or on the beach.
Few travellers realise how essential such a tripod is. Only with a tripod will photos be razor-sharp; you can take beautiful night shots or create significant effects with long shutter speeds. Combine your tripod with a way to take your photos remotely, such as a remote control or app, so you don’t have to stand by your camera to take that picture.
A gorilla pod is much more compact and lighter. It can also be used as a tripod, but you can hang the pod around poles and bridges, allowing you to use it in many situations. A bean bag is also a good solution. If you brought nothing, try putting your camera on your backpack, coat, jumper, etc., to keep it stable.
d) Camera bag:
Invest in a quality camera bag that protects your gear and is comfortable to carry. Look for a bag with compartments to organise your equipment and additional space for personal items like water, snacks, and a jacket.
e) Extra batteries and memory cards:
You must always carry spare batteries and memory cards to save power and storage space during your travels. Nothing is more annoying than ending up in a beautiful place while your SD card is full or your battery is dead. So always take enough SD cards and batteries with you. Moreover, you can only recharge your batteries in some places, for instance, if you go on a multi-day trek and only sleep in huts or tents. In addition, I always take an external hard disk with me so that I can put my photos on the hard disk right away, and my computer does not fill up quickly. It might sound a bit boring, but it is essential.
Another piece of advice: once you fill your memory card and remove it from the camera, protect it to overwrite or reformat it. It happened to me once when I accidentally took the wrong card out of my bag and reformatted a card with precious photos.
f)Filters:
Consider investing in a few filters, such as a circular polariser to reduce reflections and enhance colours and a neutral density (ND) filter for long exposure photography, particularly for waterfalls or capturing motion.
Again, here, it is a case of making compromises. When travelling with your family, lugging around a bunch of fragile and bulky filters may not be feasible.
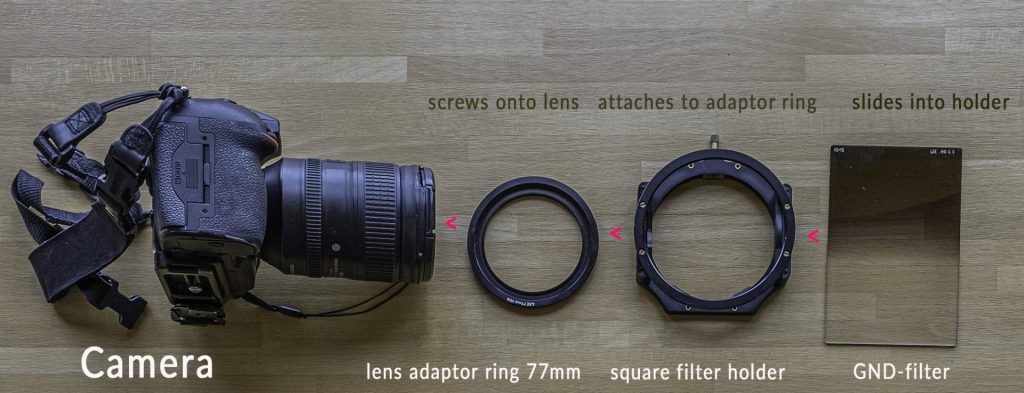
Recently, however, I found an excellent alternative in using magnetic circular filters from Kase, a very compact and light solution. (https://kasefilters.eu/filter-sets/magnetic-circular-filter-sets/) The Kase filter sets include ND, GND, and CPL filters, a magnetic adapter ring, a magnetic lens cap, and a filter bag. Depending on the lens filter set, there are different sizes and functions to choose from. Some consider this a drawback since you need different-size filters for different lenses. But you probably only take one lens since you want to travel light.
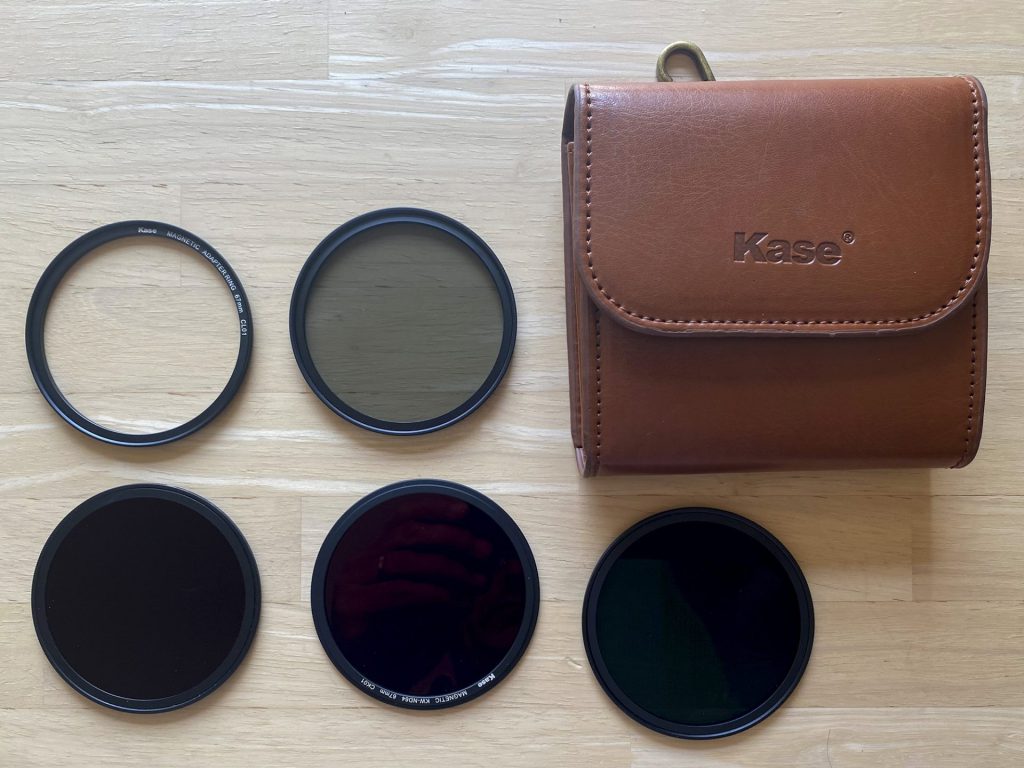
When I don’t have to travel that light, I will take my square Lee filters, including gradient ND filters (LEE 100 Filter System – (leefilters.com).
g) Cleaning kit:
Keep in your bag a cleaning kit with a microfiber cloth, a blower, and a sensor cleaning solution to keep your camera and lenses clean from dust, smudges, and fingerprints.
h)Remote shutter release:
A remote shutter release or an intervalometer can be helpful for long exposures, time-lapse photography, or self-portraits. They eliminate the camera shake caused by manually pressing the shutter button. Newer cameras can be mastered through smartphone apps.
i)Travel adapter and power bank:
A travel adapter is essential for charging camera batteries and other electronic devices when travelling to different countries. A portable power bank can also be handy for charging gear on the go.
Remember, the best gear is the one that suits your needs and allows you to capture the images you envision. Assess your photography style, consider the weight and size restrictions for travel, and choose gear that fits your budget while delivering the desired results.
Tip #3. Travel light
Do yourself a favour and travel light. Because you’ll change fewer lenses and fiddle less with your gear, you’ll probably take more pictures, too. Think about what equipment you want to take with you in advance. Some photographers, in their enthusiasm, think that ALL their gear needs to come with them when travelling, but a trunk-sized, heavy bag bulging on all sides strains your back. You drag probably some things, like specific lenses, for nothing because you end up not using them anyway. Think about which camera you bring and which associated lenses you use most. On planes, such large bags are often not allowed as cabin baggage. And if you take fragile equipment with you as check-in baggage, the question is whether it will arrive in one piece.
Of course, consider the important stuff like extra batteries, chargers, memory cards and possibly a world plug. All types of batteries must be carried in hand luggage, including your drones, should you take them.
Tip #4. Check your equipment before departure
Of course, you take cleaning gear for your lenses, camera, and sensor with you. But it is wise to check that your sensor has no dust before you leave. And don’t forget your lenses. Are they and any filters spotless? Is everything functioning correctly? It is recommended that you take some tests before you leave on holiday, not only to check that everything works properly but also to get used to it if you have just bought new gear.
Tip # 5. Know your camera
This may be an open door, but you should practise with your camera before you travel, mainly if you buy new gear. It is very annoying if you want to take a particular shot and have to search for minutes through your camera’s menu to find the proper setting. Know your camera before you leave and learn the correct settings on your camera inside and out in every situation. (Take the manual with you or search for an online version). We know that this can be boring and technology is off-putting at first. But if you want to take perfect travel photos, you need to know the most important settings of your camera – not all of them, but the most important ones!
There are probably YouTube tutorials or reviews available for your new camera. Only if you know your camera well can you get the most out of it during your trip. So, practice a lot, and you will see how quickly you will take your photography skills to the next level.
We promise you that with every function and every camera setting you learn, your photography will improve. So, from now on, get to know your camera, learn from your mistakes, and keep pushing yourself to capture unique and compelling images.
Of course, snapshots can also work. And here I say clearly “can” – because, at the latest, you must know how to act when a picture is not sharp. That is why I always recommend you look into the exposure triangle and the interplay of ISO, shutter speed and aperture. At first, it might look complicated, but once you master it, you can play around with it.
It is nonsense that you have to shoot in purely manual mode. I personally usually shoot with aperture priority. (With Nikon, you set the dial to “A.”) You can set the aperture according to the desired field depth; the camera calculates the shutter speed automatically.
Tip #6. You Plan your shots:
Once you arrive at your destination, plan your shots based on the research you’ve done. Consider the best times of day for lighting, different angles and compositions, and visualise the images you want to capture.
Consider the seasons. Some destinations are better to visit during certain times of the year, such as the autumn foliage season in Canada, the bluebell season in Belgium, or the cherry blossom season in Japan. And when you prefer snow landscapes, you have to wait for the winter.
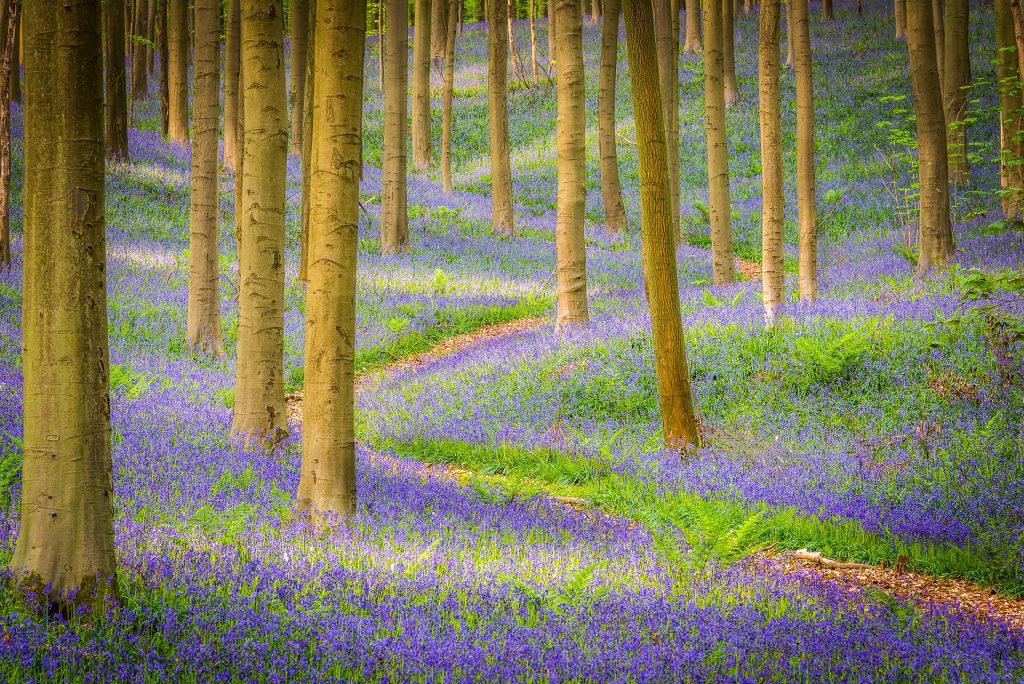
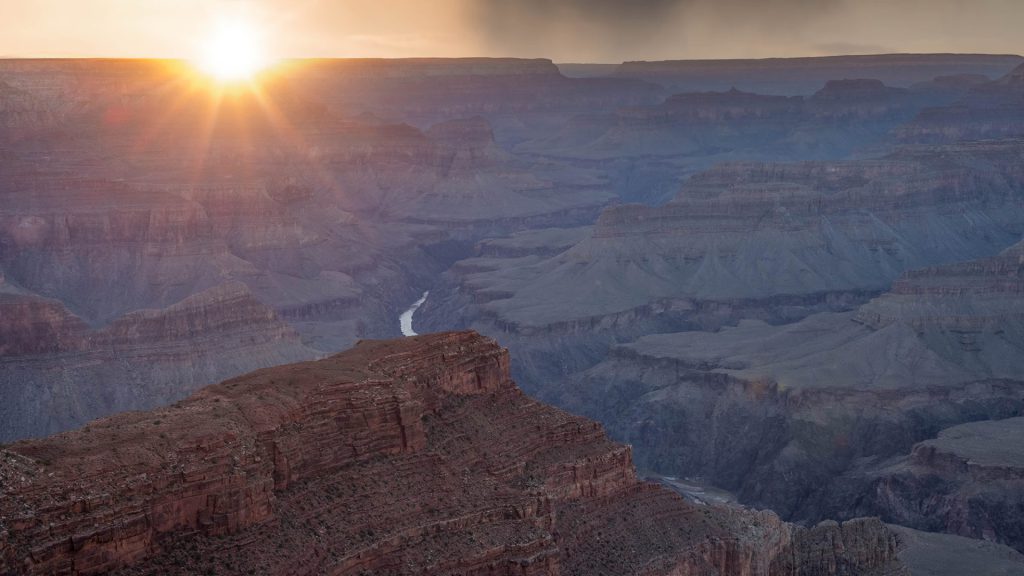
Planning a shot does not only apply to the seasons but also the time of the day. Taking into account sunset or sunrise makes a huge difference.
Tip #7. Capture the local culture:
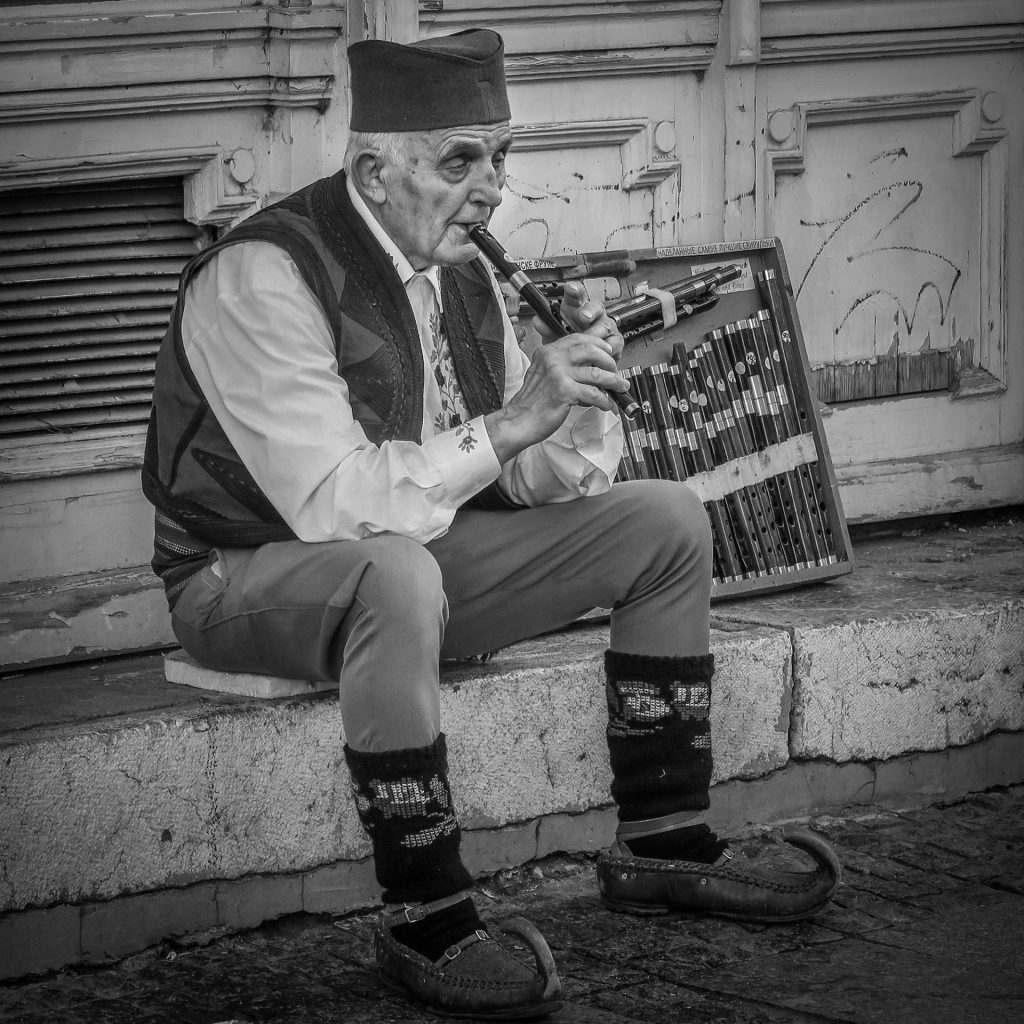
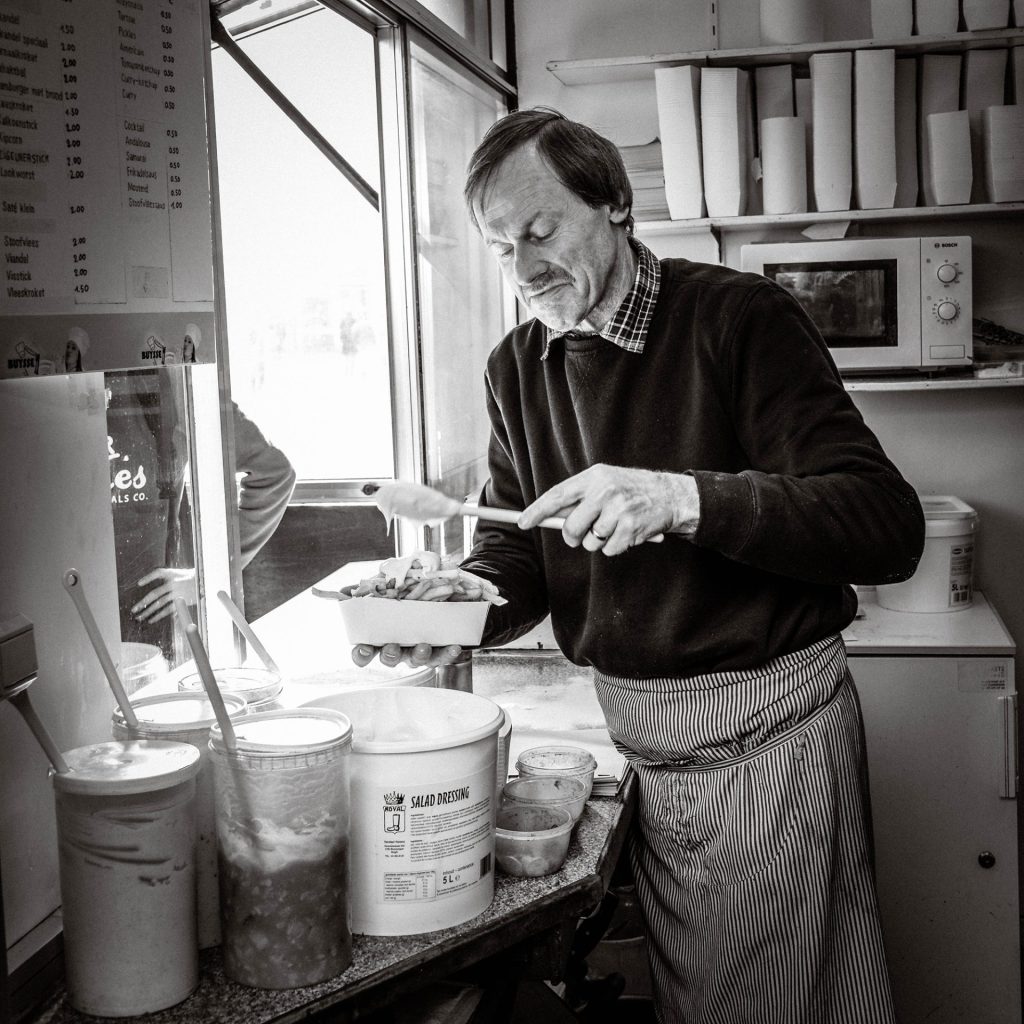
Travel photography is not just about capturing beautiful landscapes; it’s also about documenting the local culture and people. Interact with the locals, learn about their traditions, and try to capture the essence of the place through your photographs. Learning about the local culture and customs will help you avoid cultural faux pas and maximise your trip.
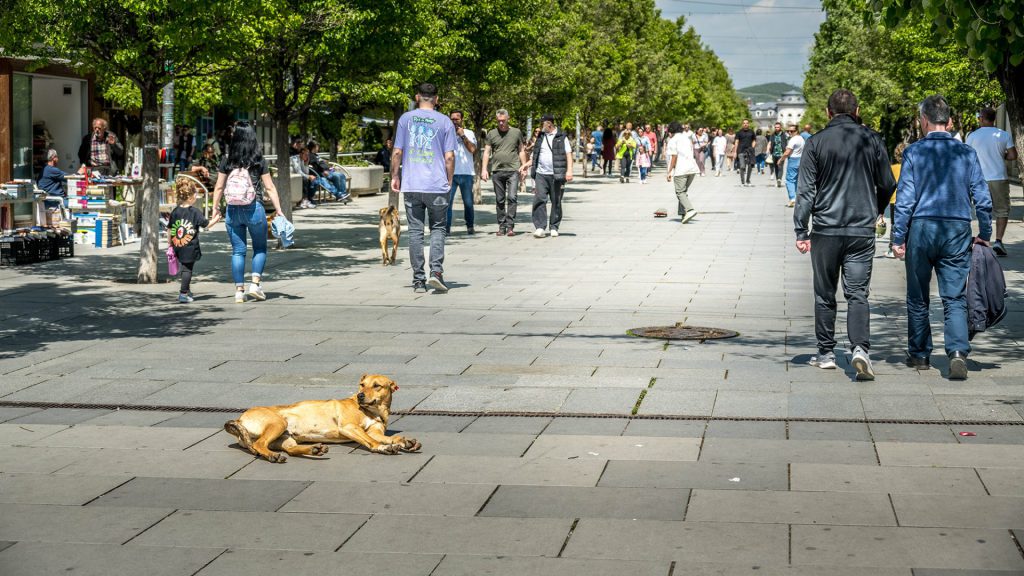
Don’t just take hidden photos from a long distance with your telephoto lens; talk to people directly, and you will be surprised that so many people will also volunteer to pose.
Travel photography provides a powerful medium for capturing the rich tapestry of cultural traditions, customs, and lifestyles worldwide. Some examples are festivals and celebrations, ceremonies and rituals, daily life scenes, traditional clothing, architecture and art, cuisine, cultural practices, religious practices, cultural landscapes, and indigenous communities.
Through travel photography, one can showcase the diversity of human cultures and celebrate the uniqueness of each community around the globe.
Tip # 8. Use natural light:
Lighting plays a crucial role in photography. Take advantage of natural light whenever possible, especially during the golden hour (the hour after sunrise and before sunset) when the light is soft and warm, creating a magical atmosphere.
Sometimes, you have to wait a while for the right shot. Think of busy tourist destinations or a beautiful building across the street with traffic racing past. Sometimes, things calm down, and you can shoot your perfect photo.
The reverse is also true. If you see the perfect light situation somewhere, don’t wait until later; grab your camera immediately. Within a minute, that ray of sunlight can be gone again, and the result can be completely different.
Tip # 9. Take pictures at the right time
Of course, you can take great photos throughout the day, but there are two times when your photos will be just that little bit more beautiful! That is just after sunrise and before sunset, which they also call the golden hour. The light is much softer then, so your photos will be much prettier.
You get the best light during golden hour, just after sunrise and before sunset. So, these are the ideal times to photograph, especially if you want to shoot landscapes or portraits. However, during the golden hour in the evening, i.e., just before sunset, you will likely find the streets very crowded. On the other hand, it is usually quiet during golden hour in the morning. I prefer early mornings, so the most beautiful places are still lovely and quiet. Do you still want to take photos in the middle of the day? Preferably, take pictures with the sun at your back. Shooting against the sun usually does not produce excellent images unless you want silhouettes.
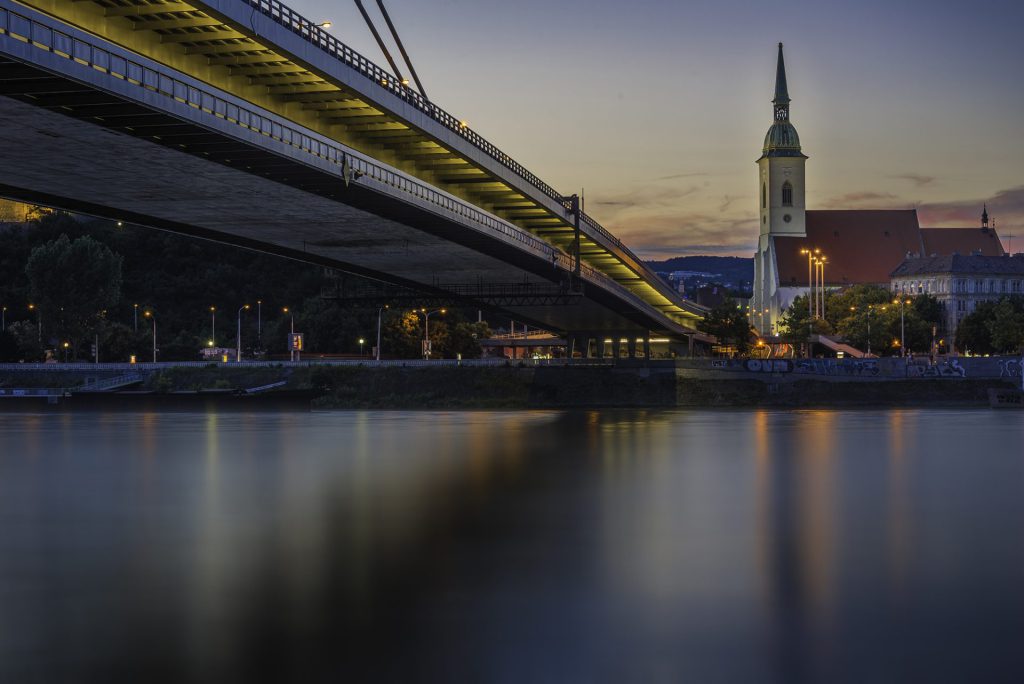
You can also use various apps to see when the sun rises and sets and when it is golden hour. For example, you can use the photographer ephemeris app or others.
As the last fallback position, you can always replace the sky in post-processing, for instance, with Luminar Neo. However, an excellent in-camera photo with the perfect lighting conditions remains the best solution.
Wait to stow your gear immediately if the sky turns cloudy and grey. This is the perfect time to photograph on the street both people and close-ups of buildings.
It remains interesting to photograph the city when it gets dark because the lights also turn on, and fountains or buildings are attractively illuminated. The lamps usually give off warm colours as well.
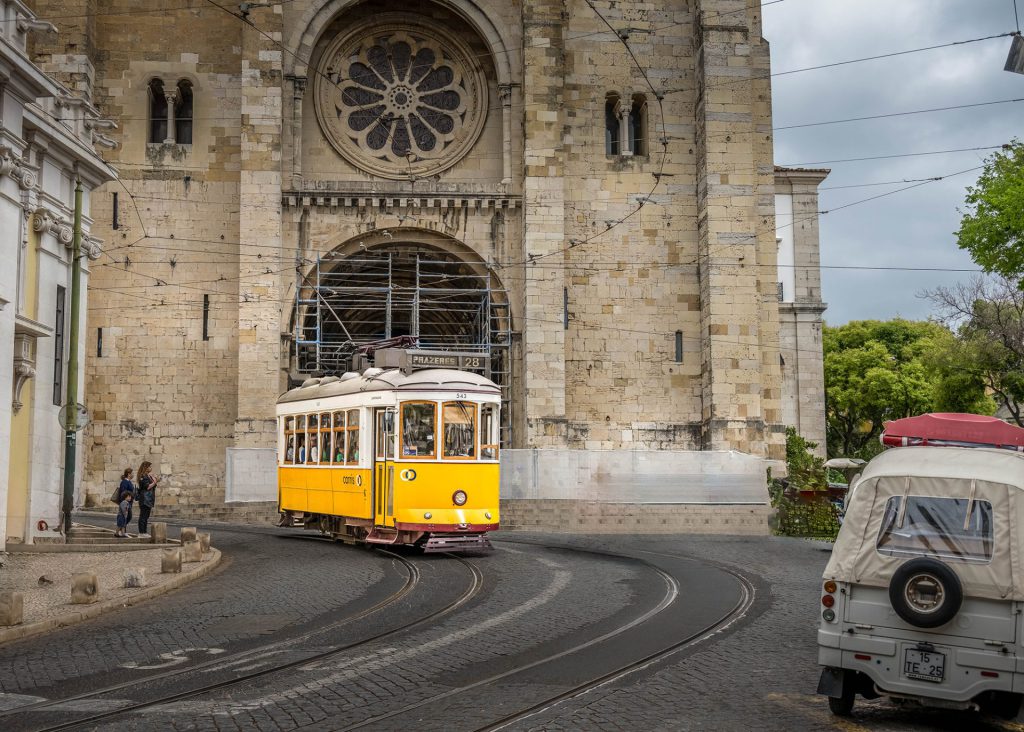
Time not only plays a role in the light, but it also determines what happens or not within a scene. Sometimes, you have to wait until, for example, a person steps into the scene at the right place. Or, as in the example below, until the tram is in the correct place in a bend in front of the cathedral.
Tip #10. Experiment with composition:
One of the most important aspects of a compelling photograph is a good composition that will take the viewer through the picture and direct their attention to the most critical aspects of the photo. Good composition is dynamic and encourages the viewer to spend time with the image. Try different compositions and angles to make your photos more visually appealing. With an excellent composition, we create order out of chaos to obtain a calm picture.
Many scenes and well-known hotspots have been photographed often in the same way. Try to create a composition that gives you an original photo. This could be keeping the camera low or capturing details. Just a little bit of thinking differently can create whole new images!
a. Make use of sharpness and depth.
Playing with sharpness and depth sometimes gives an excellent effect. For example, by focusing on a point and making the background blurry. Playing with depth of field is a fun way to liven up your travel photos. Placing a person, flowers, or another element in the foreground makes a photo-less static or frames your frame with an extra feature. This creates a playful and lively photo.
b. Make use of the rule of thirds.
The rule of thirds is a handy way to improve the composition of your photo. You can divide an image into nine planes. It wouldn’t be such an interesting photo if you put the subject in the middle. But if you put the subject on the left or right, it will immediately be a lot more interesting to look at! To apply this, you can turn on a grid on most cameras, so while shooting, you can already see exactly where to place the subject.
Make sure the picture’s main subject is placed at the intersection of the horizontal and vertical lines. This is because the human eye is naturally drawn to these intersections. To the eye, it, therefore, feels more natural if the photo’s main subject is right there. We, therefore, usually like this kind of composition better.
You can apply this rule not only to position your main subject but also to the horizon. If you place the horizon on one of the horizontal lines – i.e., at 1/3 of the bottom or top of the photo edge – you can emphasise the foreground or the sky. This creates depth in a photo. Do you want to emphasise the foreground? Then, fill 2/3 of your screen with the foreground and only 1/3 with the sky. OR would you like a beautiful sky in your photo as the primary focus? Then, fill 1/3 of your image with the foreground and 2/3 with the sky.
c. Make use of symmetry
In the previous paragraph, I told you not to put your subject in the middle of your photo. Symmetry, however, has a powerful effect on our perception. Our brains love symmetry; they’re drawn to it like moths to the flame. And that’s why we see it so much in architecture, for example. So, watch for symmetry in architecture and reflections in nature, and play with incorporating it into your photos.
d. Put something in the foreground or background
Placing a specific subject in the foreground or background is often lovely when photographing a landscape. Think of an animal or a person. This way, you create depth in the photo, making it much more enjoyable. If you photograph a person or other subject for scale, you often only see how impressive the landscape is.

e. Use leading lines
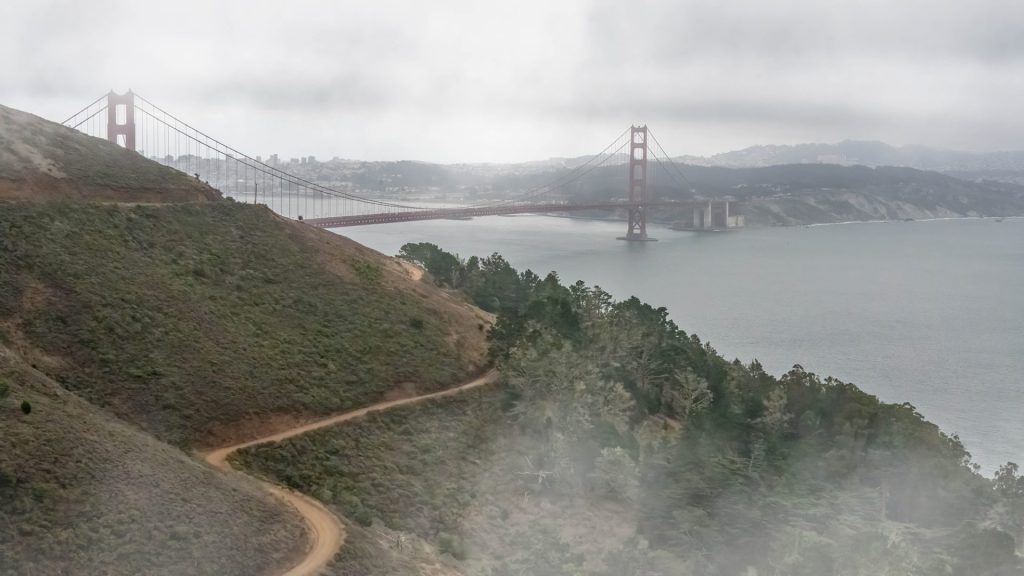
Lines and diagonals make your photo more exciting. If you have a line running towards your subject in your image, your eyes will be drawn to it. Moreover, lines add depth to your photo. For example, a guiding line could be a road, a railing, or a row of lampposts. Use your imagination.
f. Pay attention to your lines and horizon
Nothing is more annoying than looking at a crooked horizon. Keep an eye on other lines, such as the vertical lines of walls or buildings.
Tip # 11. Try different angles or a different perspective
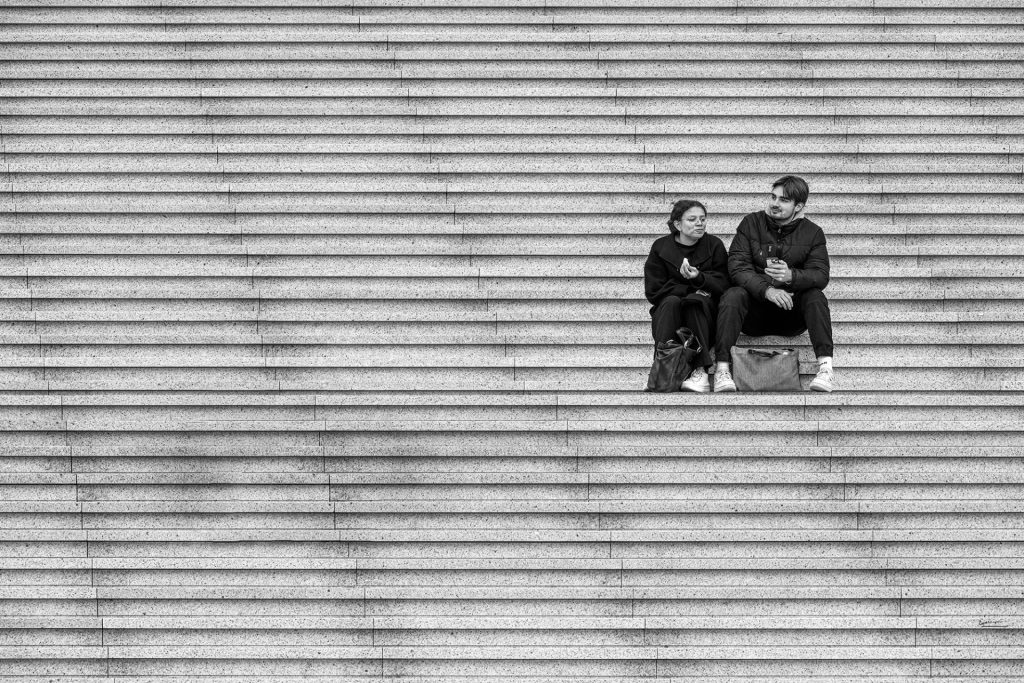
You might be tempted to photograph a subject straight from the front, but instead, try different perspectives.
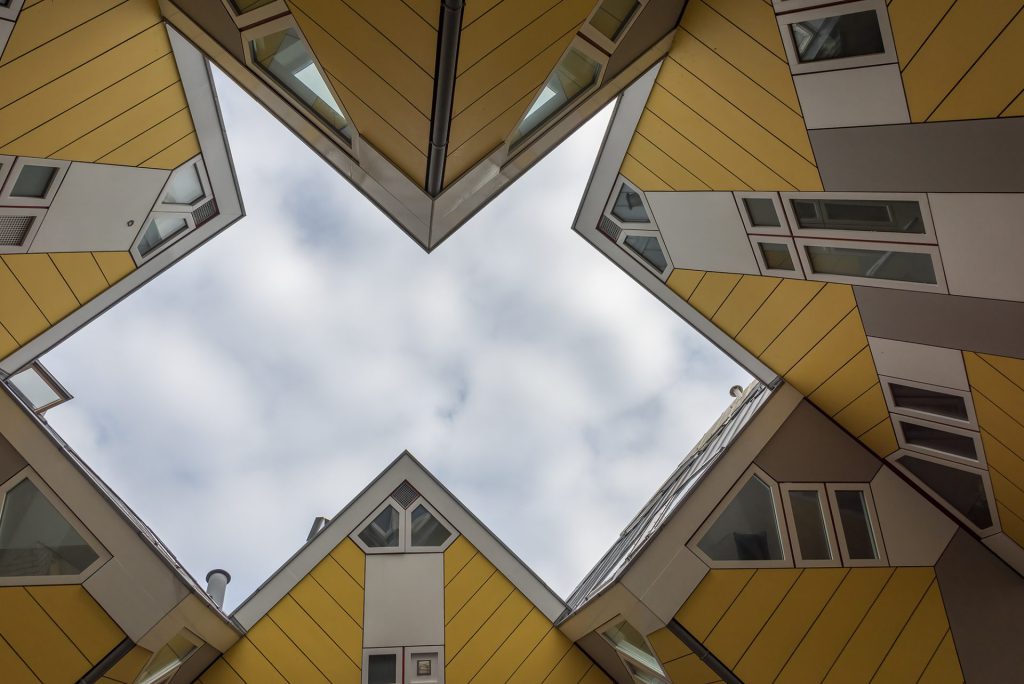
Sometimes, it takes some searching, but choosing a different perspective often results in exciting photos. Here are a few suggestions to improve the results of your subjects.
- Use a natural frame (e.g., leaves of a tree or a gate).
- Kneel on the ground and shoot low.
- Climb up to find a more admirable perspective from above.
- Move to the side to create a different effect and exclude that annoying traffic sign or dustbin.
- Find a puddle of water and use the reflection. This often makes for great shots!
- Too many people? Horrible scaffolding? Get close and photograph only a tiny section and details.
- Use foreground and background! Often, you only have to take a few steps to the side, and thanks to a great foreground, you immediately have a completely different photo.
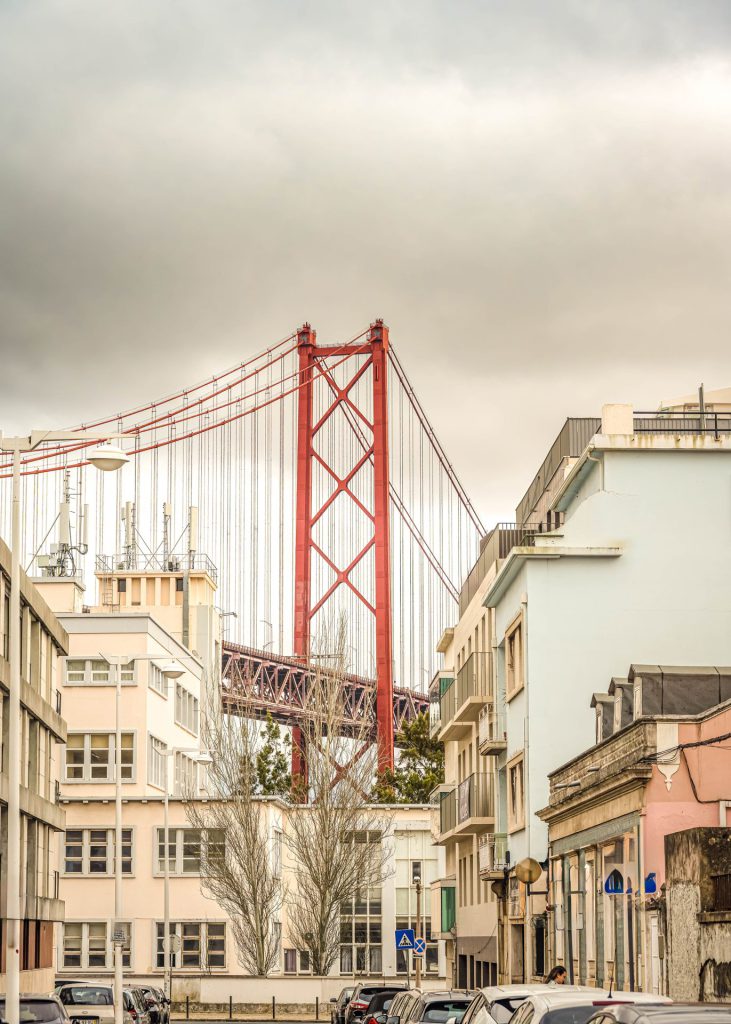
Tip # 12. Search for colour
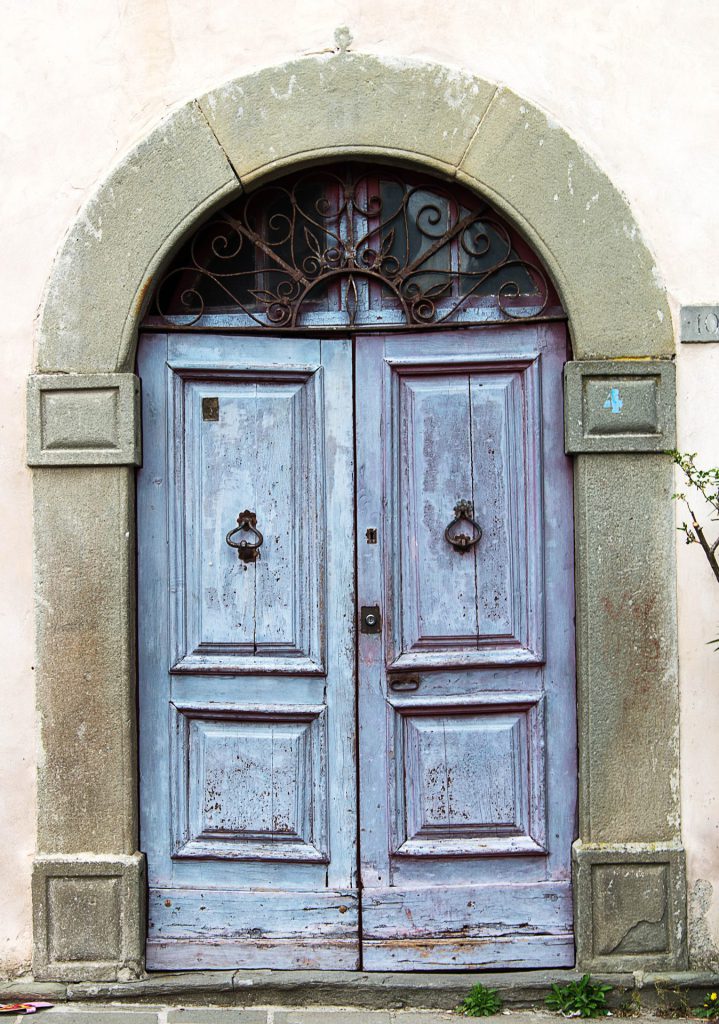
In cities, brightly coloured walls, doors, billboards, cars, etc., are common. A photo of a pastel-coloured wall with contrasting doors and windows can make an exciting picture.
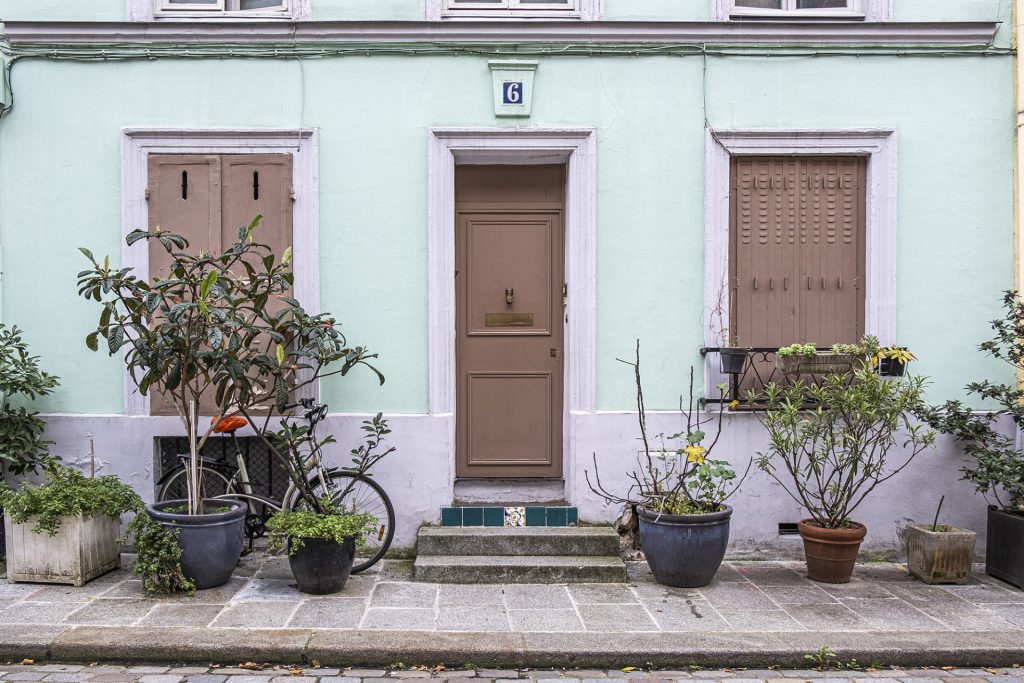
Colour in the City. (Paris, 2019, Guy)
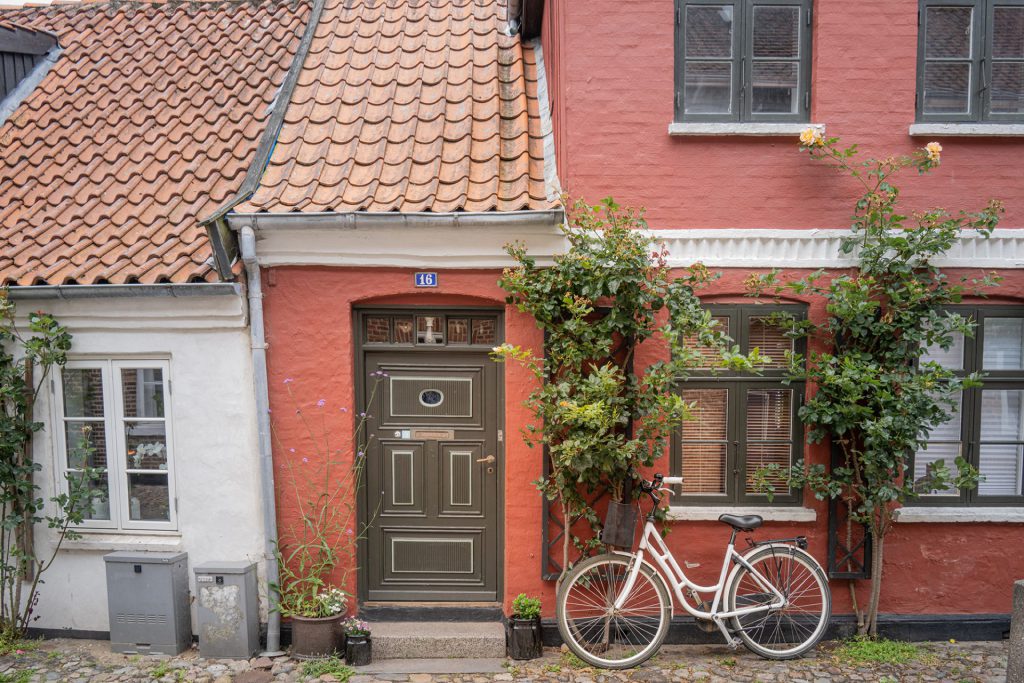
For example, during a trip through Denmark, I took a series of photos of tiny colourful houses with bicycles in front of equally colourful doors. Meanwhile, I have many pictures of attractive doors and gates in all sizes and colours.
Tip # 13. Look for patterns and structure in the chaos
Exciting patterns and structures occur everywhere, often in unexpected places. Think, for example, of the tangle of fishing nets.
The ease with which photography captures such patterns makes them popular subjects.
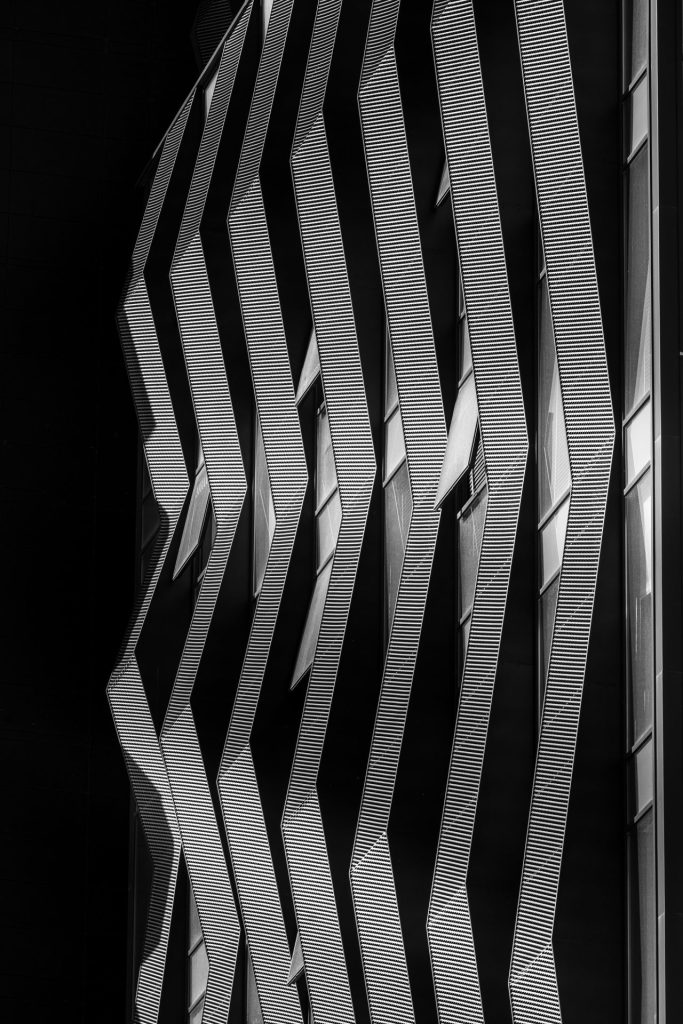
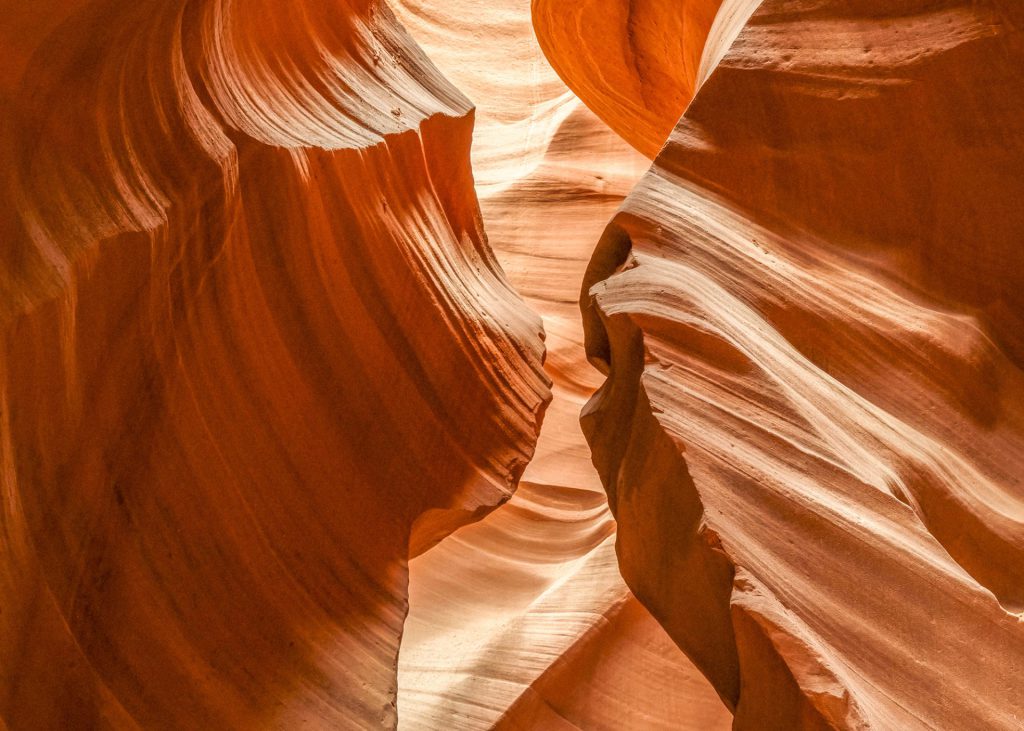
Weathered details of monuments can also be beautiful. The material outside the building (walls, windows, doors) can become a separate subject. Lighting is also essential here to capture more details and show the structure better. Light should come from one side to capture the relief and delicate texture.
Also, in nature, one can look for interesting textures and contrasts.
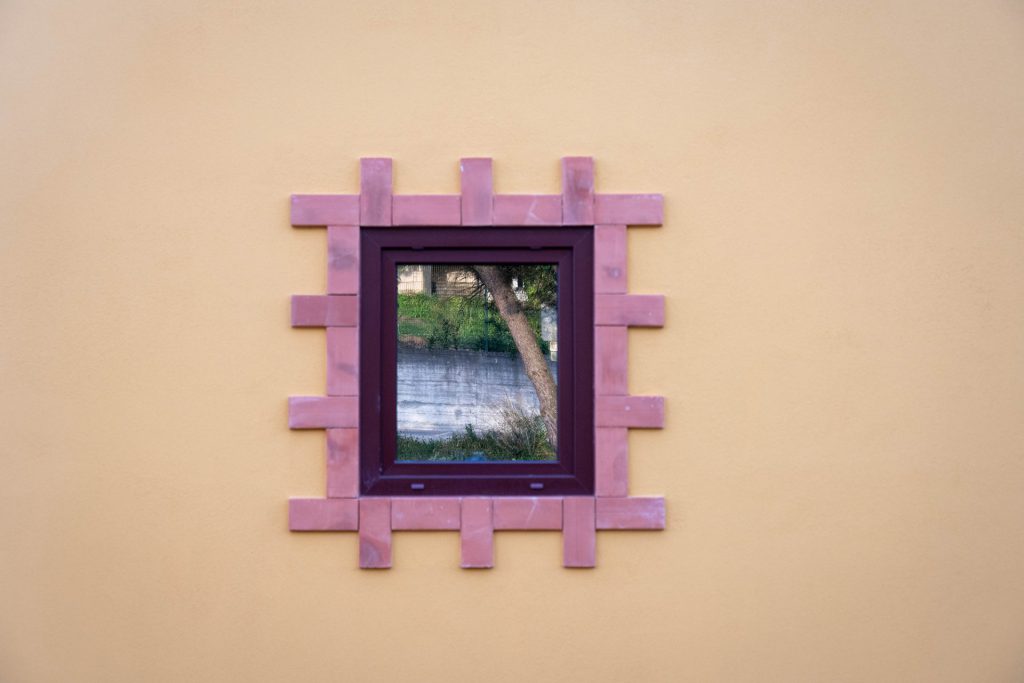
Tip # 14. Look for details in the city
When the neighbourhood you visit might be dull, start looking for striking details. Go closer or use your tele lens to single out exciting details.
Tip # 15. Capture movement in the city
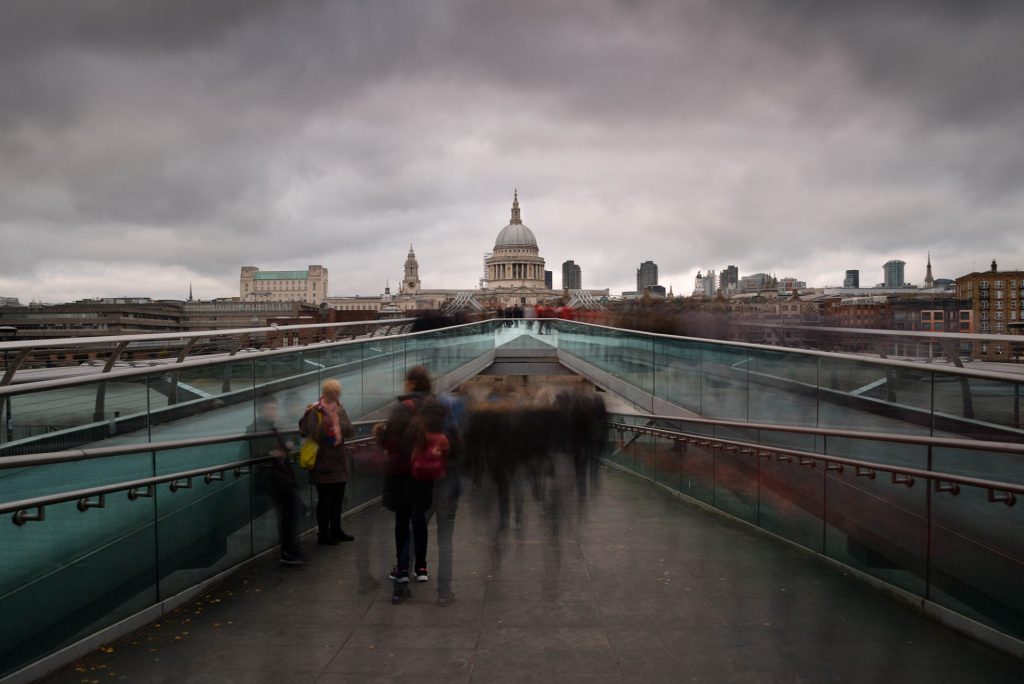
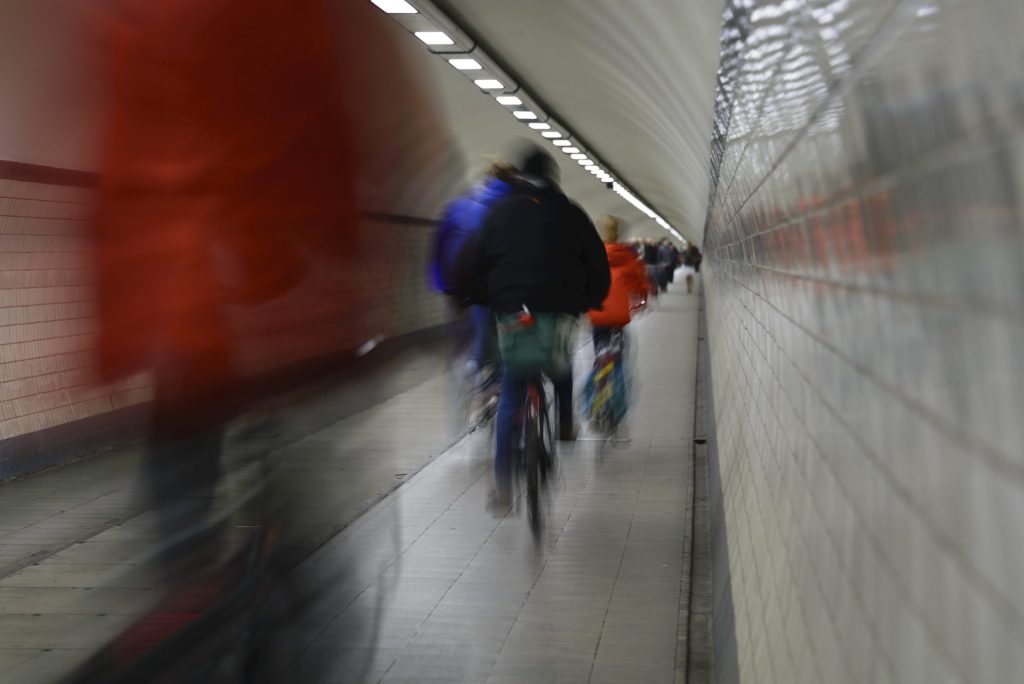
Cities are always bustling with moving people or cars. You could experiment with capturing light trails from passing cars or buses at night.
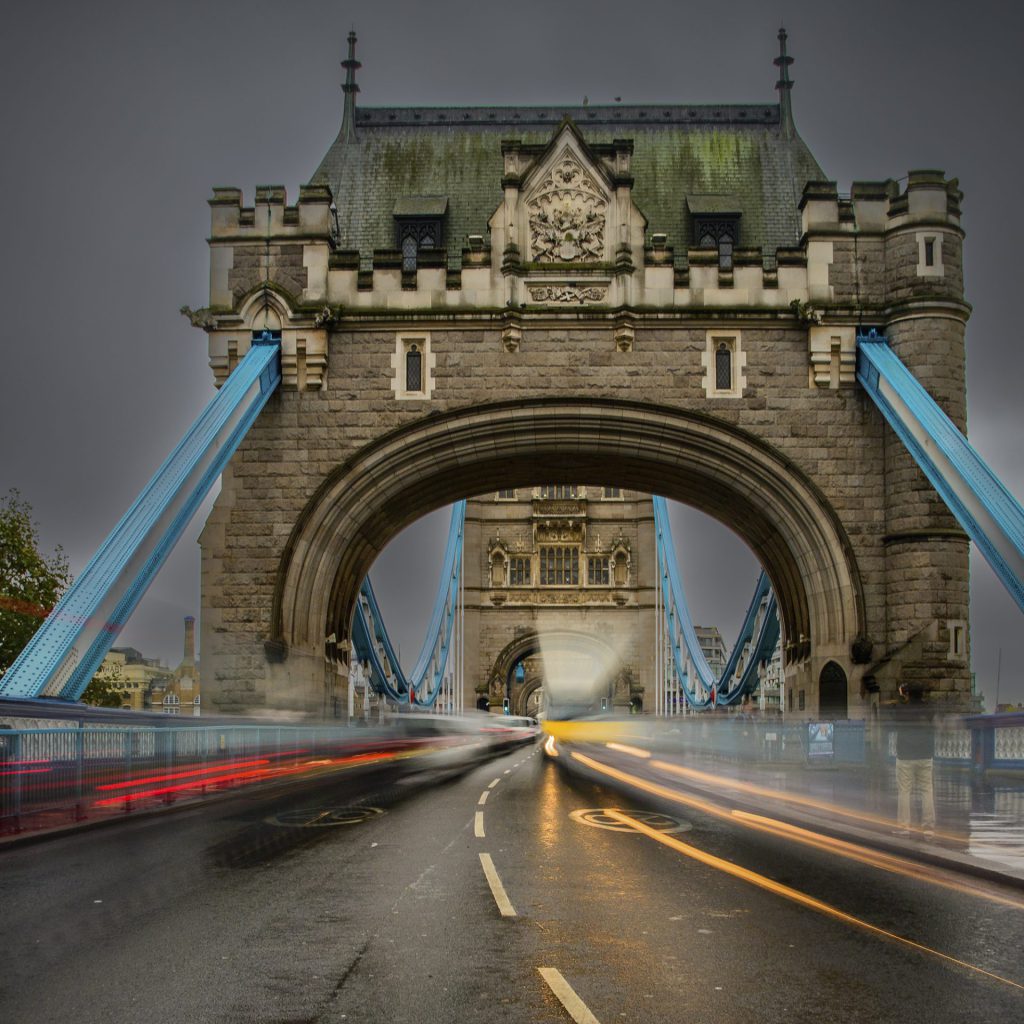
However, during the day, you can also achieve exciting effects with longer shutter speeds. Depending on the shutter speed and the speed of the moving people, they disappear entirely, or a ghostly haze remains.
Tip # 16. Pay attention to the background
When composing your shots, pay attention to the background. Avoid all distractions or clutter that might detract from the main focus point. Look for clean and uncluttered backgrounds that enhance the overall composition. The edges of your photos should also be as free as possible from distracting elements.
You cannot choose your background in all cases. In the accompanying example of a typical holiday snapshot, I want to show that in such cases, you can use depth of field smartly (or lack of sharpness) in your photo to let the background draw less attention, as here in the example, with the brightly coloured flags and bicycles. The second version of the photo is much more focused on the subject and less on the background.
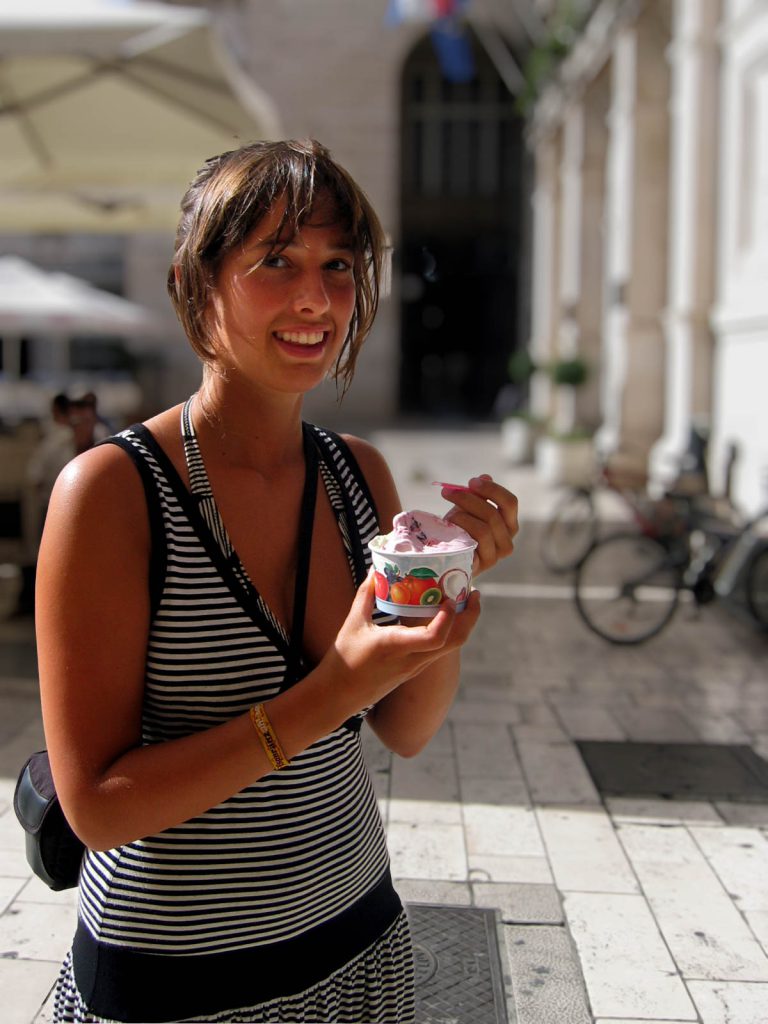
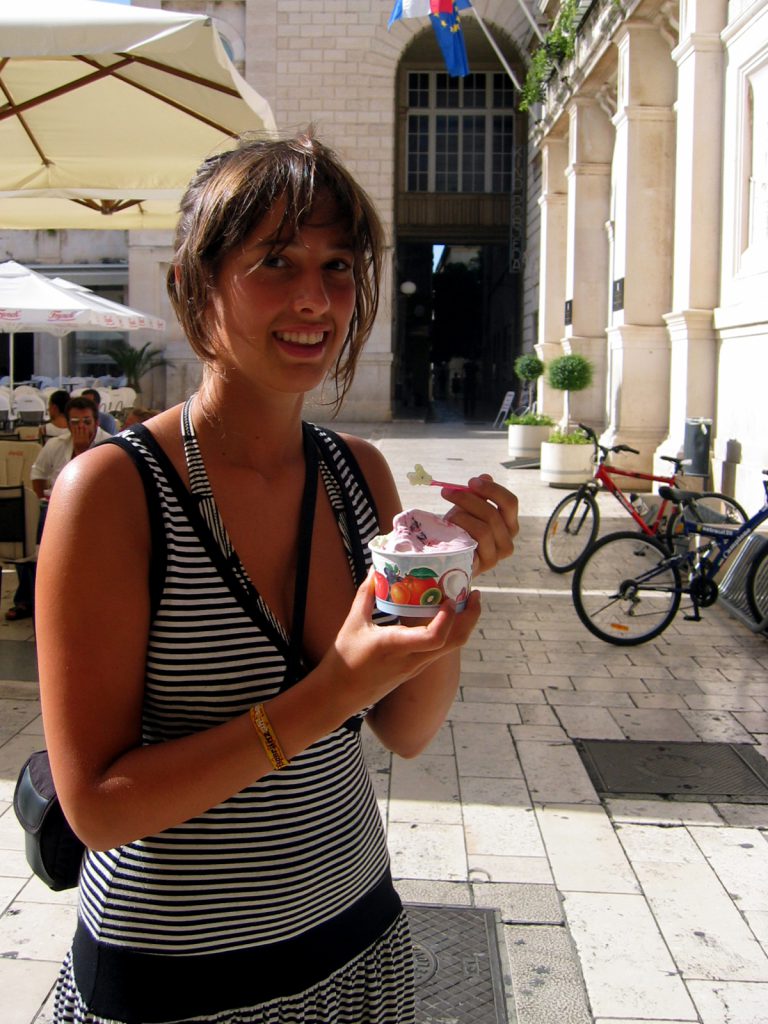
The original photo was taken with a compact camera, so I could not experiment with different lenses or apertures. Therefore, the effect was recreated in post-processing with the help of Luminar Neo and the Photo Bokeh sliders. In this example, I also added some extra light to the subject’s face.
Go to Luminar NEO for more information about this fantastic software.
Tip # 17. Tell a story
An excellent travel photograph tells a story or evokes emotions. Look for unique moments, exciting details, and scenes that convey a sense of place or experience. Try to capture the atmosphere and mood of the location.
In many cities, various architectural styles are juxtaposed, for example, historical buildings next to modern office buildings. Modern buildings often have glass facades that can provide exciting reflections.
Look for contrasts between elements’ shapes and sizes. Capture visual surprise by seeking powerful patterns, symmetry, attractive light, and various textures.
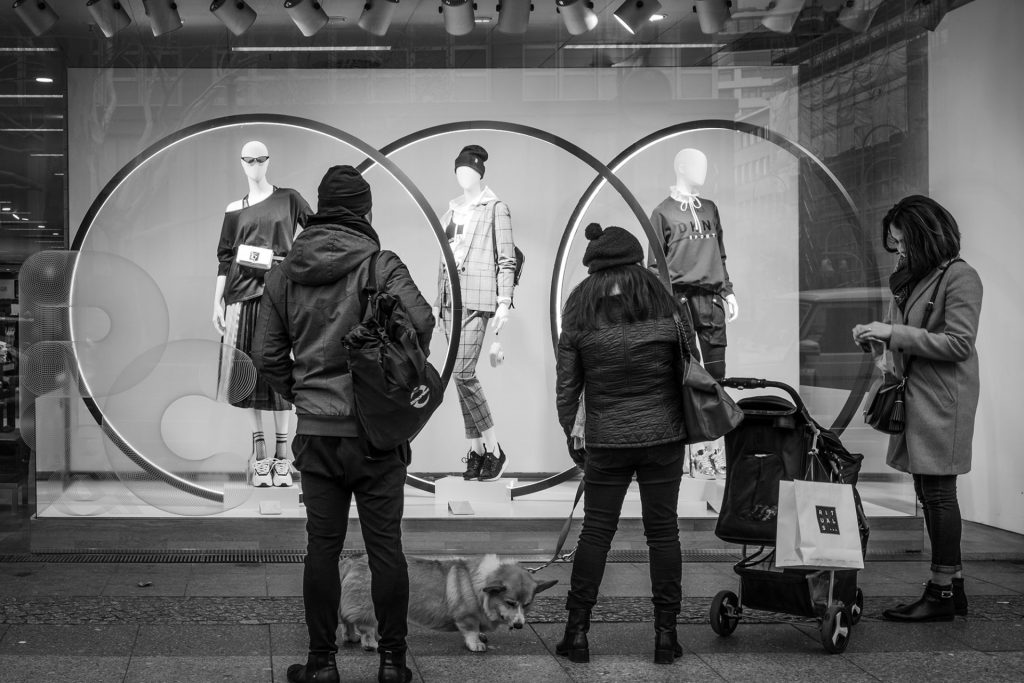
Street or city festivals, cultural events, demonstrations, etc., offer endless opportunities for vibrant, colourful shots. You can find colourful food in the stalls selling fruits and vegetables at local markets.
Cityscapes are full of elements that can be considered ugly, such as shutters, street furniture, and graffiti. A photograph of these need not be ugly, and the disarray and decay can still create a pleasing visual composition and story.
Tip # 18. Shoot in RAW
One of the best tips I can give you for travel photography or any photography is always to shoot your photos in RAW. This means you shoot raw data, whereas JPEG is already processed. Without going into all the technical details, think of it like this: RAW means that the camera records the raw version with all image information unprocessed. With JPEG, on the other hand, the camera already applies processing to your photo (e.g., white balance, colour saturation, etc.).
You can set it on most cameras whether you want to take pictures in RAW or JPEG format or even both simultaneously.
Advantage if you shoot in RAW format:
- You can get much more out of your photos in post-processing. Even completely underexposed or overexposed pictures often look good in the end. The RAW photo contains much more image information that makes this possible. You can still edit it to your taste. For instance, if the picture is under or overexposed, you can quickly correct it. You can also adjust the colours and contrast of the image. That is why I always shoot all my photos in RAW.
Disadvantages of shooting in RAW format:
- You have to edit your images. When unprocessed, the RAW file looks grey, desaturated, and colourless. You also need a suitable editing program to edit the photos.
- You need significantly more memory and faster (more expensive) SD cards.
In summary: If you only want to take snapshots from your holiday or post your results fast on social media and don’t like to edit, continue to take photos with JPEG. If you want to take great travel photos, give RAW a chance. It’s worth it!
Tip # 19. Edit your photos
Post-processing is an essential part of travel photography. Use editing software like Adobe Lightroom or other mobile apps to enhance your images. Adjust the exposure, contrast, colours, and crop if needed, but be careful not to overdo it.
You’ve taken many photos during your trip, but some must be corrected when you get home. Maybe there was a speck of dust in front of the lens, the horizon was crooked, or the colours didn’t quite pop.
Proper editing of a photo can make it a lot more impressive. For example, you can create specific objects that stand out more in a picture or enhance the photo’s colours. I edit all my photos in Lightroom and or Photoshop. For beginners, Lightroom is more user-friendly. If you don’t like Adobe’s subscription system, an excellent choice would be Luminar Neo. Luminar Neo can be used as a perfect stand-alone application that is filled with incredible and impressive features based on AI. You can transform your image into a compelling photo with only a few clicks. For example, you often are confronted with multiple powerlines in a cityscape. Luminar Neo can automatically recognise and delete powerlines in just one click. I have probably pushed Luminar Neo to the limits in the example below. Go to Luminar NEO for more information about this fantastic software.
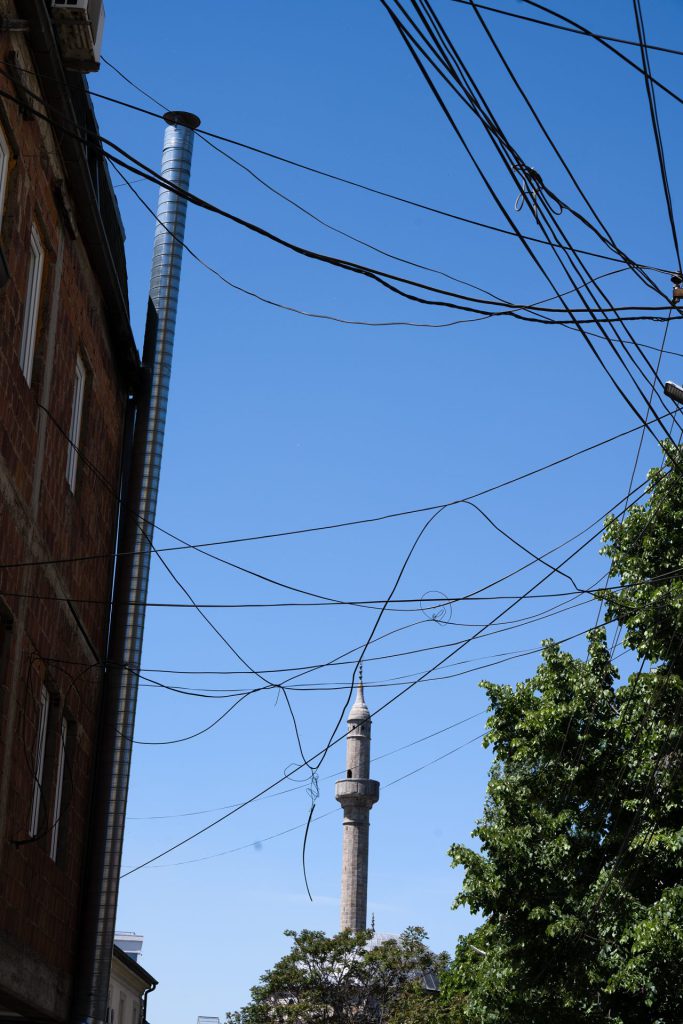
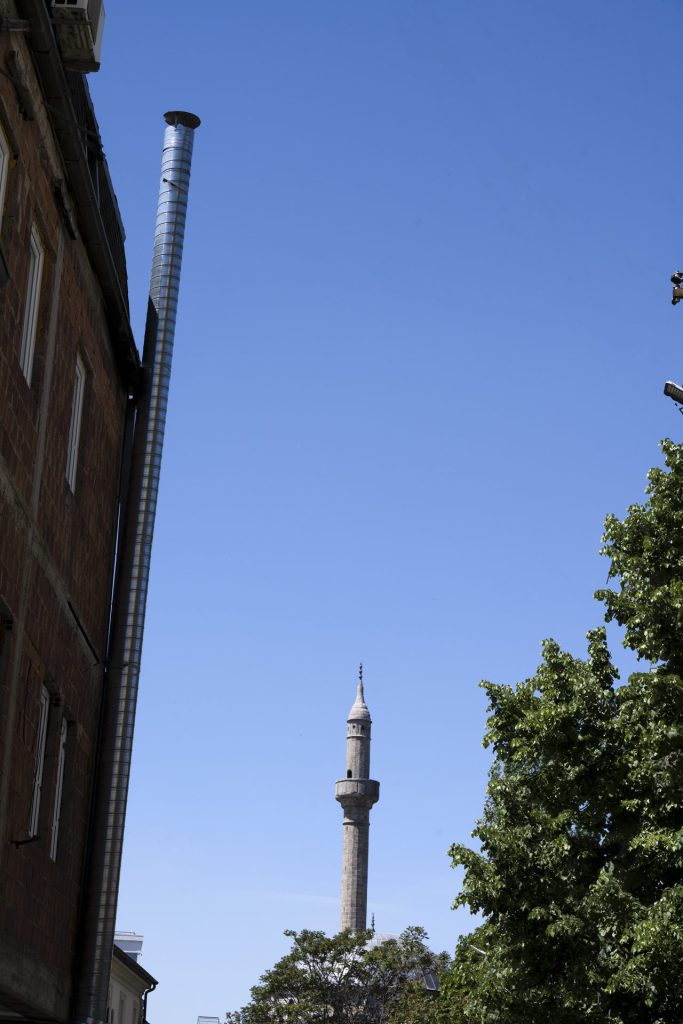
This is not the best photo, but it is perfect for illustration: Magical disappearing powerlines in just one click with Luminar Neo “Erase AI”. (Kosovo, Guy, 2022)
There are many options, but you can already see much improvement after some minor adjustments: exposure, contrast, and colour balance are small things you can quickly apply and make a photo much more beautiful if you set them correctly. A raw image is often even less colourful than reality, so adjusting here is okay. However, it would be best to stay moderate, as this will only make your photos less attractive. Cropping an image can also make a big difference, and remember to pay attention to a straight horizon.
Most travel photos are made and printed in colour, but why don’t you try converting some of them to black and white? Black-and-white images can also be compelling, and removing the colour can remove distracting bright colours.
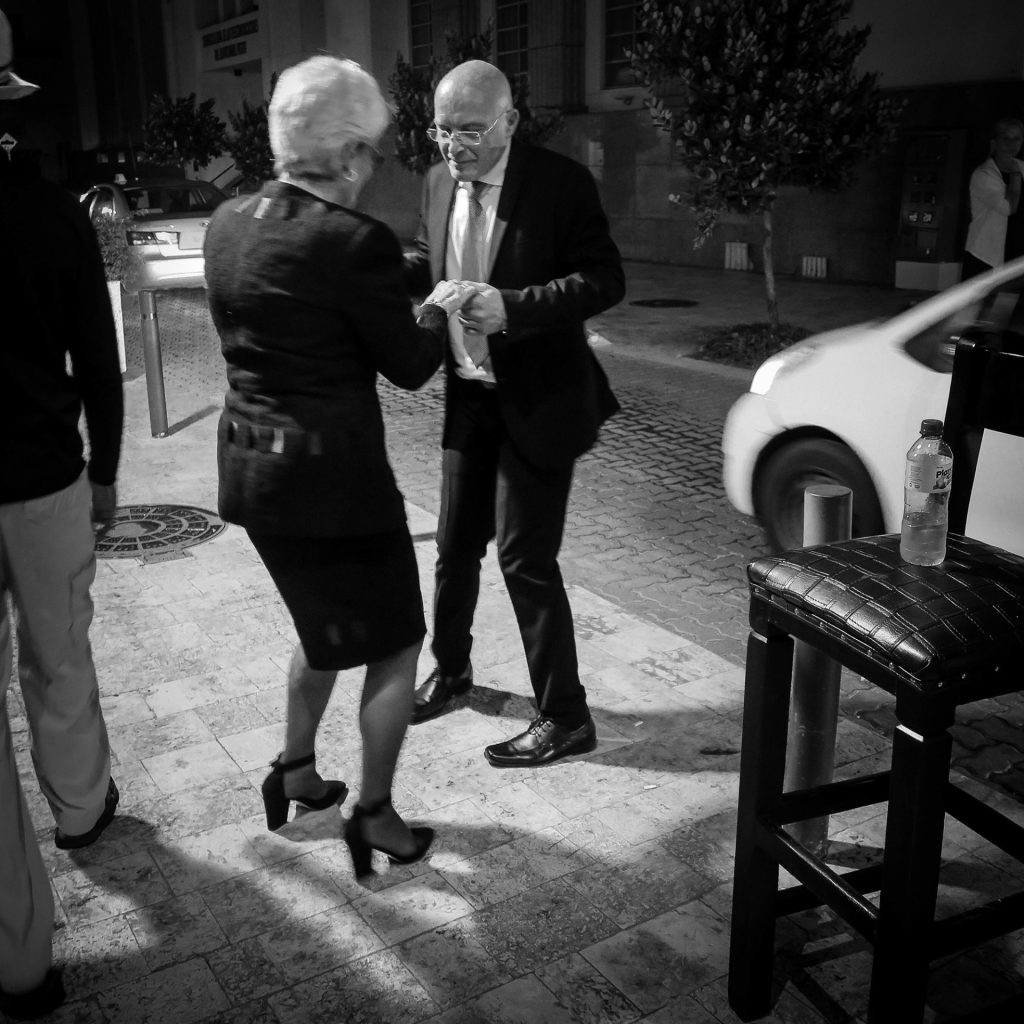
If we shoot architecture during daylight, we can also consider a black-and-white conversion because the huge contrast helps us process our images in black and white.
Tip # 20. Zoom with your feet
You can take lovely photos with your smartphone, but as soon as you zoom in with your smartphone camera, the image quality quickly deteriorates. That is why it is better to ‘zoom’ with your feet. Walk forward or backward a bit to get your subject well in focus. You can also choose to crop your photo afterwards.
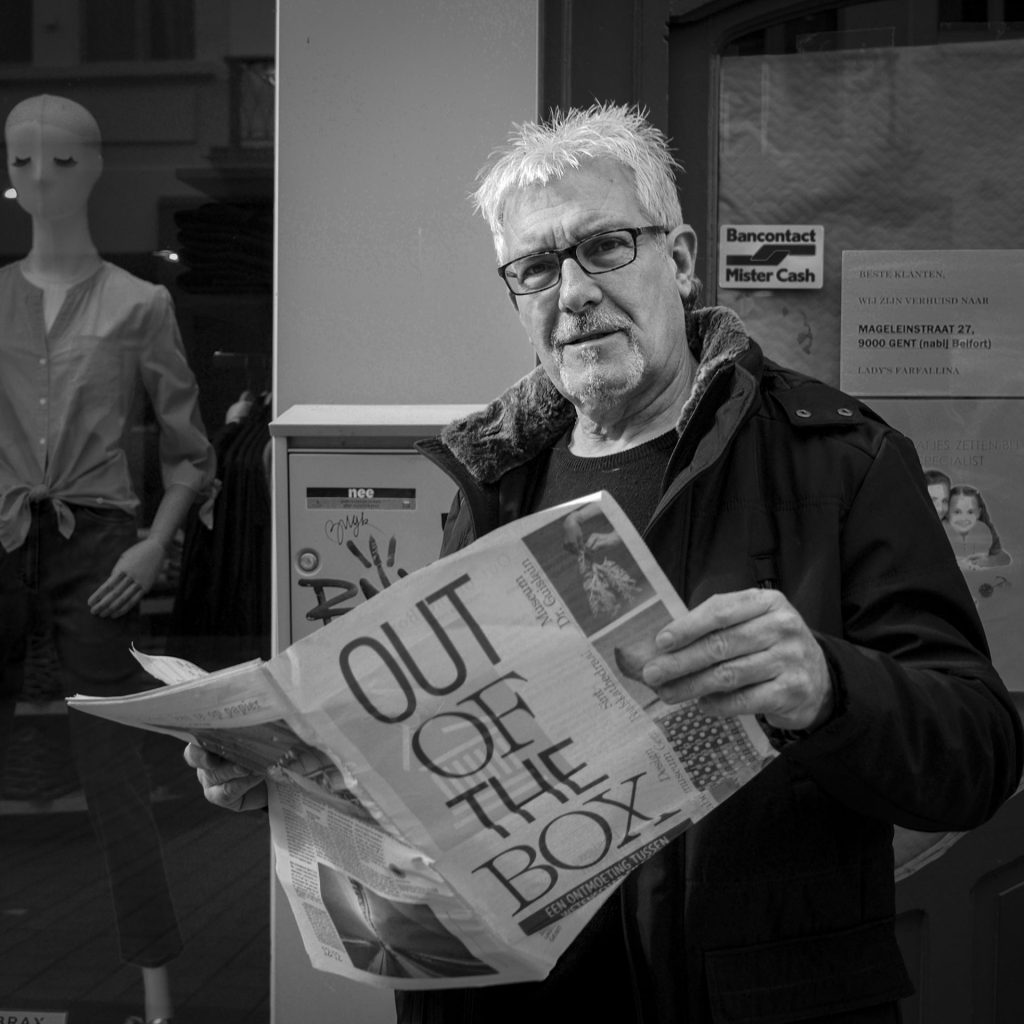
Especially when taking pictures of people, it seems appropriate to get as close to the person as possible. That usually means making contact, but many people also spontaneously smile.
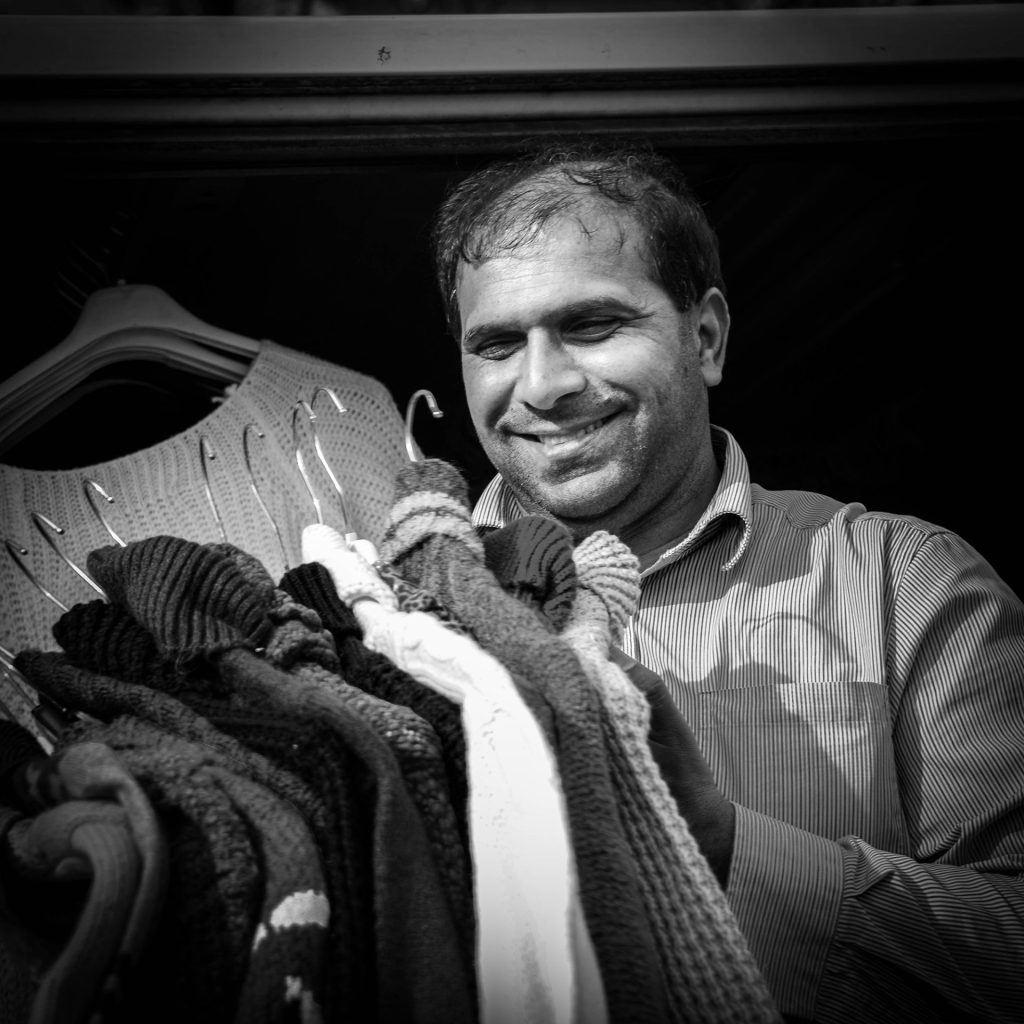
This clothes seller at the market in Ghent immediately put on his best smile when I asked if I could take his picture. In this photo, even if it is a small square cutout, you can immediately see the context of this man’s activity. (Guy, 2017).
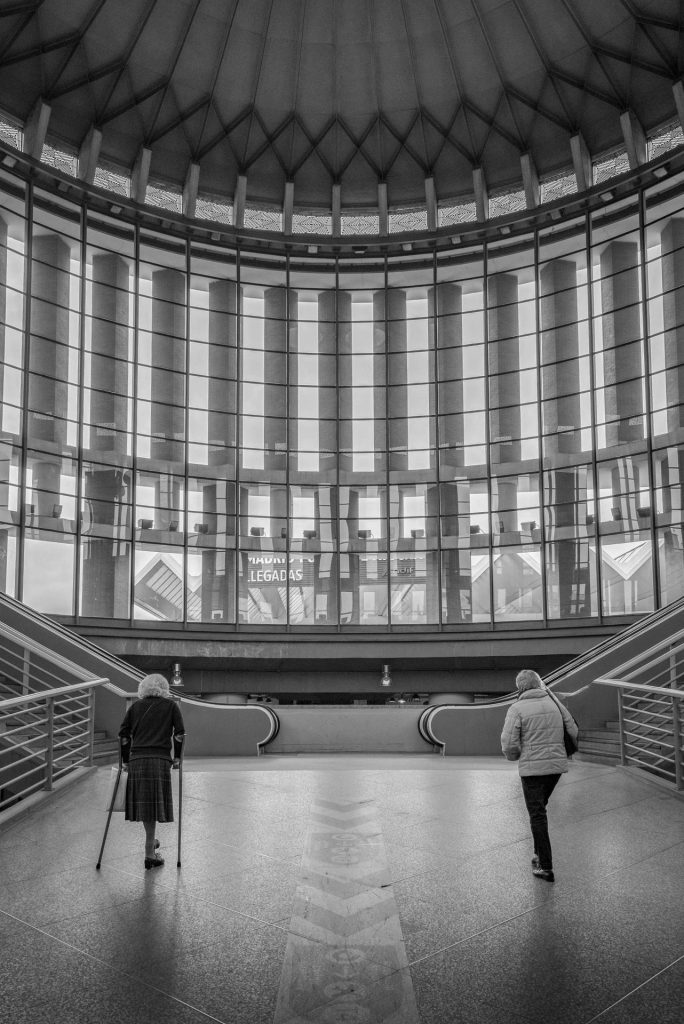
In this photo, I backed up a lot to get the height of the building. The two people in the image illustrate the size of the hall. (Madrid, Guy, 2015)
Tip # 21. Take some time for yourself and enjoy
It is excellent to travel with other people, but it can happen that your fellow travellers are walking fast while you just saw a perfect opportunity for a photo. Therefore, go out on your own occasionally and take your time to capture things. This way, you have many more opportunities to photograph something beautiful without paying attention to the others.
Taking time for your shot is also essential for long-exposure photography. Setting up your tripod, mounting the necessary filters and then waiting for the long exposure takes time and might be difficult when travelling in a group or with your family. And you don’t want another tourist in view.
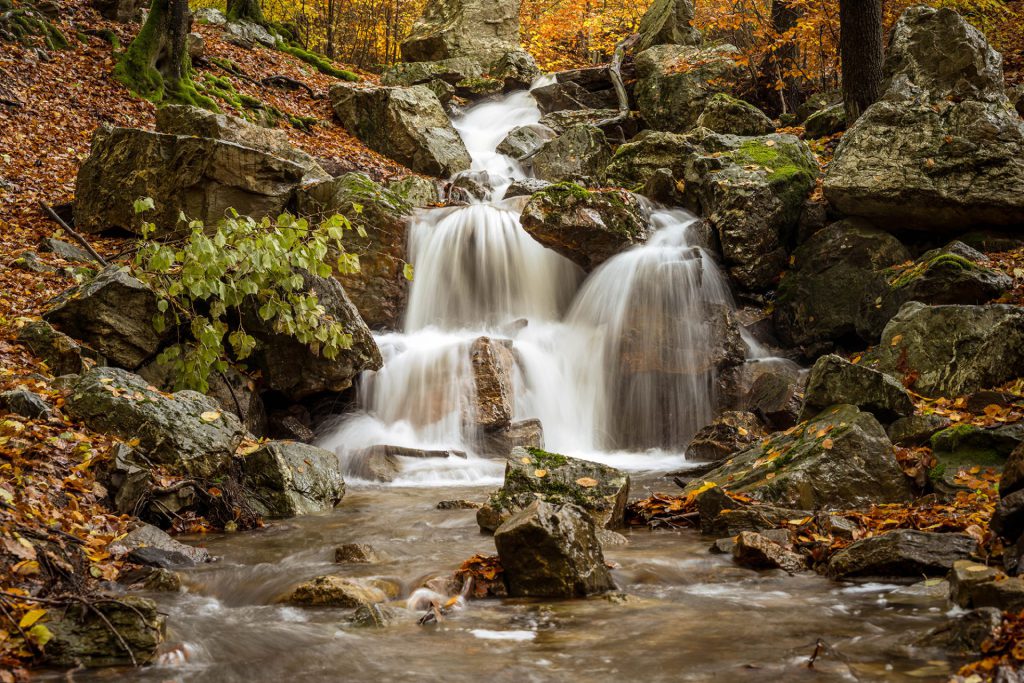
Long exposures take, by definition, more time. (Guy, 2013)
Tip # 22. Don’t look your entire journey through the camera; go and experience things, too
This is a bonus tip: put your camera away occasionally so you can be fully absorbed in the moment. Don’t look through the lens of your camera during the whole trip. Sometimes, we are too preoccupied with wanting to take a ‘good photo’. It is a shame because this makes us forget to enjoy all the beauty around us. Walking around and doing things without constantly looking through that lens is excellent. You’ll find you’re a lot more at the moment when you’re not busy photographing.
Sometimes, we are so preoccupied with what is in front of our lens that we forget to look backward to see where there might be something interesting to see as well.
Looking around and relaxing can also lead to very creative ideas for shooting photos. In an emergency, you can always take your smartphone out of your pocket. The quality of smartphone cameras has improved considerably in recent times.
Conclusions
Remember, the most important thing is to enjoy the process, have fun, and be creative while exploring and capturing the world’s beauty through your lens during your travels.
Good travel photography has little to do with equipment but with the person behind the camera. If you are creative enough, the kit makes little difference. A good photographer knows how to shoot at precisely the right moments, find creative angles, and create depth in a picture.
Please leave your comments or ask me more detailed questions here below. I am also interested in hearing about your experiences.
Leave a reply