In part 1 of my series of 3 of blogs on the use of filters in photography, I talked about different types and materials of filters. In part 2, I discussed the practical use of neutral density filters. This is the 3rd part of this series and we will focus on the use of gradual neutral filters.
GND-filters (graduated neutral density)
GND filters, or Graduated Neutral Density filters, consisting of a rectangular plate characterized by two separate areas: a fully transparent area and a dark area that is just like an ND filter as discussed in part 2. They come in different strengths. Depending on their strength, they block more or less light. In my opinion, you absolutely need a slide-in system (see also in blog part 1) for this type of filter for ultimate effects and flexibility.
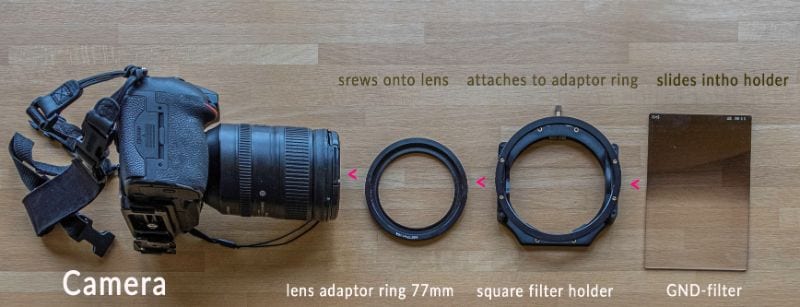
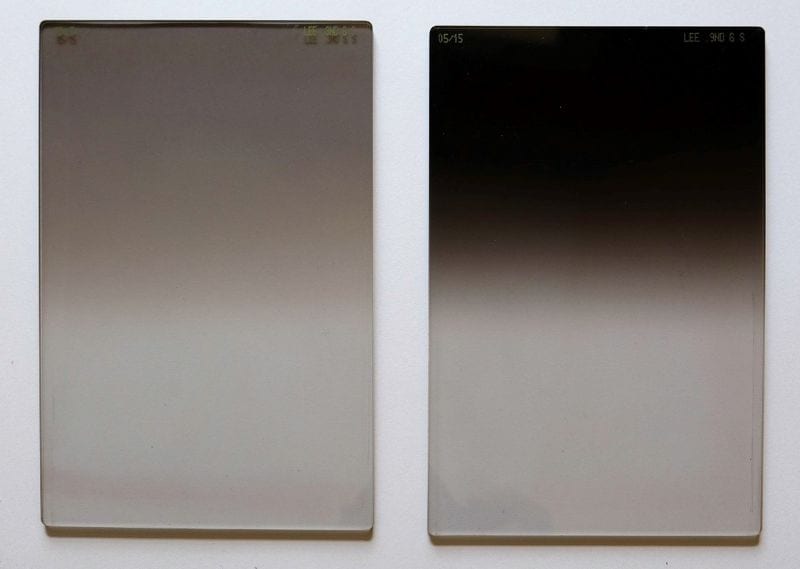
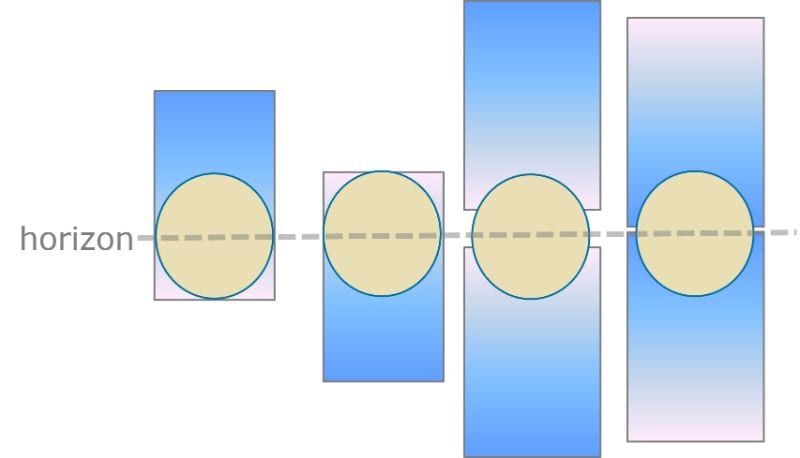
Thanks to the slide-in system, you can position the filter higher or lower depending on your composition or you can also tilt the filter with the holder If necessary.
Landscape photographers will usually use these filters when the dynamic range (difference between bright and dark areas) in the image field is far too large to capture on your image sensor. Our camera is limited and will always try to display an average value and then you end up with a foreground that is either too dark or a sky that is too light. In other words, when the difference between the dark areas and the light areas in your image is too big, GND filters come in handy. In practice, you will use these filters to cover the brightest area in the photo with the dark (ND) area of the filter. This will give you more detail in both the sky and the foreground.
The transition area on the filter, between light (transparent) and dark (ND), determines the type of GND filter you are working with. Several types are available on the market:
- Hard Edge filters are characterized by a clear boundary between the transparent and the ND area. They are therefore used when the separation between the bright and dark parts of the scene is very clear, such as the horizon in a seascape. It is important to position the filter at the correct height on the horizon, otherwise, it will quickly stand out. They filter the same amount above and in the middle and the sky will be evenly coloured. These types of filters are especially suitable for landscapes with a straight horizon.
- Soft Edge filters are characterized by a soft transition and are therefore used where the transition between light and dark areas is not so clear. A classic example is a shot in a mountainous area or when trees protrude above the horizon. These soft transition filters are also slightly easier to position. A mistake is less noticeable.
- Inverted filters are nothing more than filters with the ND effect that fades as you move more from the divider in the middle to the top or bottom edge of the filter. Basically, they were invented to better manage sunrises and sunsets, with the light being more intense on the horizon line
How should you use the GND filters in landscape photography?
The use of these filters in landscape photography might seem intimidating and complicated in theory, but it is rather simple in practice. I will try to guide you through the workflow step by step.
Spot metering with an external light meter is cumbersome and is, therefore, less used. Your camera has its built-in light meter, so you can use it conveniently.
As for every landscape, photo consider carefully your composition of the scene in front of you. I always recommend to use a tripod plus remote control, eventually, mirror up, vibration reduction switched of, focus (manual if you feel comfortable with that). Then take an image with the appropriate exposure for the bright area in the scene (such as the sky), do the same for a dark area, and finally calculate the difference between them in stops. Look at the EXIF information on your camera for this. This difference tells you the number of stops reduction needed to balance the exposure. Suppose the light metering indicates 1/250″ for the sky and 1/60″ for the dark rocks in the foreground. The difference between these measurements is 2 stops, so to balance the exposure, use a 0.6 (2 stops) GND. In the beginning, it is easier to bring a printed table with the different steps of stops with you, if you are not familiar with the concept. Stops can be expressed in F-stops or F-number which relates to the diameter of your diaphragm. They are written as a fraction: an aperture of f/2 is equivalent to ½ (one-half). Stops can also be expressed in shutter speed. Have look at the next table (Moving in the table one column, left or right, means 1 stop difference and this is a doubling or halving of the amount of light let in when taking a photo):

Once you have made your choice of filter, insert it into the first available slot closest to the lens. It goes without saying that you place the dark part of the GND filter in front of the bright part of the scene (in the previous example that is the sky).
The holder is definitely required if we want to use multiple filters together (combining different strengths). Sometimes you might have a bright reflection in the foreground and then you can use a second GND filter upside down. When using hard edge ND filters take care where the separation between the clear and the dark part is positioned, otherwise, it will ruin your shot.
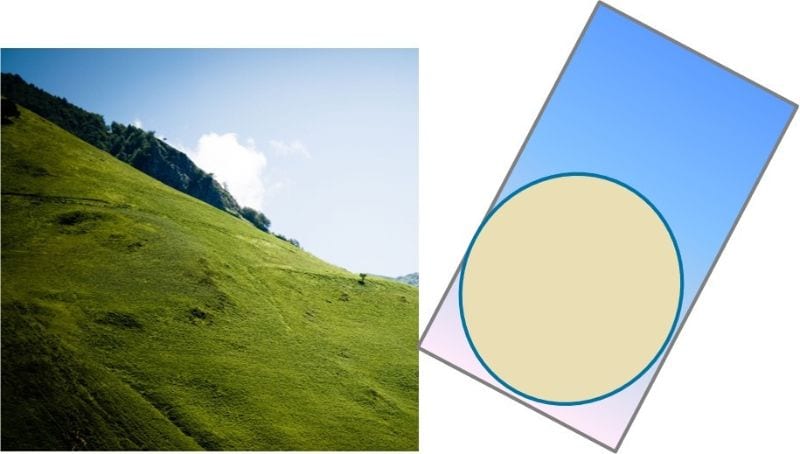
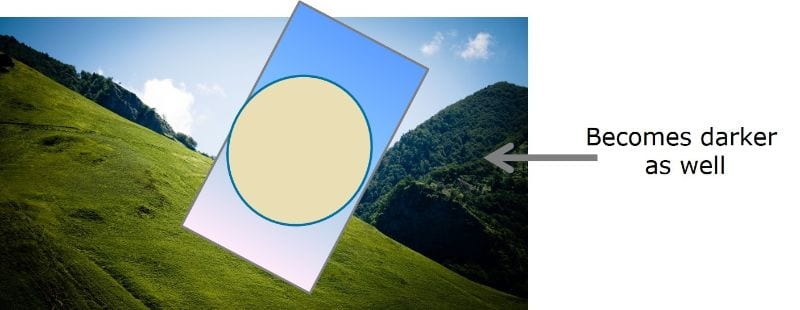
In a landscape with a slope, one can turn the ND filter to follow the horizon.
Unfortunately, if you have trees, towers or a mountain peaking above the horizon, these objects will become darker as well.
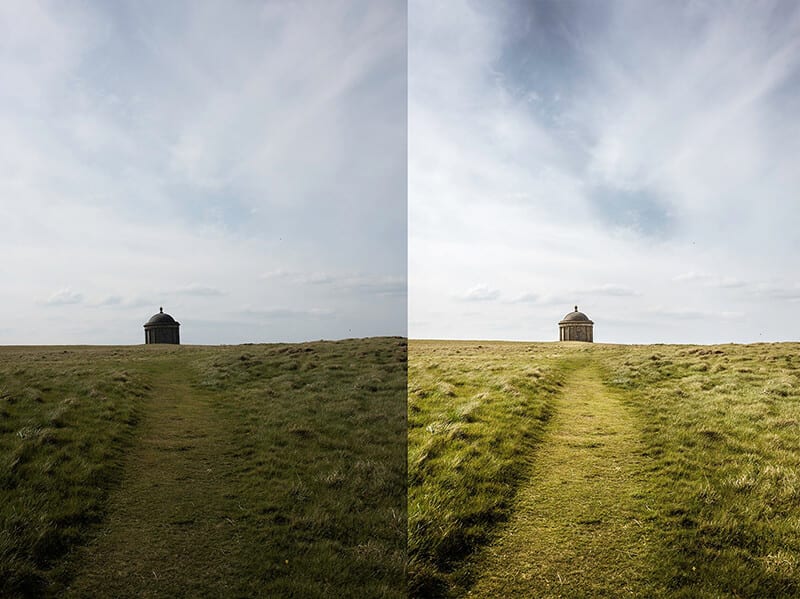
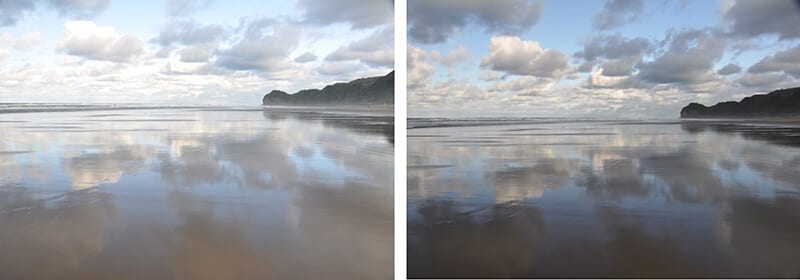
During a beautiful sunset, the difference in brightness between light and dark areas will be quite strong, so the 0.9 (3 stop) filter is probably the one you will use the most. If you enjoy taking pictures when the sky is cloudy, the 3-stop filter may be too strong and a 0.6 (2-stop) filter may be a better choice.
With the filter, the detail in the sky will probably be much better and as a bonus, the foreground will lighten up slightly.
Alternative solutions
You could also solve the problem of high dynamic range and also for protruding objects above the horizon with 2 shots of your landscapes, one with the correct exposure of the dark foreground and one with a correct exposure, of, for example, the sky, and then combine these with the use of masks in Photoshop. The use of your tripod is essential for this. The images must be identical and overlap perfectly. This is getting a bit more difficult with trees and windy weather. But that’s a completely different post processing technique called exposure blending. I will not talk about this specifically in this blog. I might come back to this in a later blog.
So, this concludes my 3-parts blog on the use of filters in landscape photography. For more inspiration visit my website www.thelandscapephotoguy.com and my other blogs.
Get outside, keep shooting and start experimenting and please, leave a comment here below.
Leave a reply