Landscapes are very accessible to all of us. They are all around us during our journeys. Besides, landscapes do not move or run away as people do. Landscapes seem the easy subject to capture on your camera. And yet, many people are not happy with their results when they get home. In this blog, I offer you some tips for the novice landscape photographer to improve your landscape shots.
1. Which camera to use?
You may have heard that the best camera is the one you have with you. Smartphones are not a bad choice for several reasons:
- The price (cheaper than a real camera)
- The quality
- The weight
- You may always have your smartphone with you and it’s easy to use
- Easy and fast sharing on social media
Personally, I only use my smartphone when I am scouting locations. With a real camera, you get many more possibilities, especially if you want larger prints. But a bigger camera does not necessarily give you “better” photos. If you only shoot in automatic mode, such a camera is even obsolete. But if you want more from your pictures than just a snapshot, then consider buying a real camera and I don’t necessarily mean the biggest full-frame camera or medium-format camera of many thousands of euros or dollars. Most brands have very decent and impressively good and reasonably priced entry-level models. If the photography bug gets to you, you can always upgrade later. Keep it modest, especially in the beginning when you are not sure yet whether you will like this new hobby!
My advice to every camera owner is to start immediately learning to use the settings of your camera properly. Do read your manual but also about photography, watch some YouTube videos or even better, take a course.
Photographic principles regarding shutter speed, aperture, ISO remain unchanged regardless of the size or price of your camera.
2. What will you photograph?
What will you photograph? Of course, there is no limit to that: people (portraits), landscapes, waterscapes, forest-scapes, cityscapes, architecture, street photography, events, performances, nature, plants, animals… possibilities enough.
There are endless categories of types of photography, but what is common to all of them, is that to make good photos one has think carefully about the subject.
What do you want the photo to be about? What draws your attention? What distracts you in the scene and should be left out? What do you want to make the focal point of the image? What message or story do you want to convey? What atmosphere do you feel in that place?
These insights usually determine what the most important element in your photo will be. This is something you will learn only by doing. The answer to some of these questions will determine how you want to compose the image of the landscape in front of you.
3. Composition
I have dedicated a specific blog to composition, have a look at it: Composition in landscape photography
What in, or out of the picture?
First of all, fill the frame with whatever you like, and make sure not to include anything disturbing elements. Find a clear focal point and do not make it too colourful. Look carefully at the background and the edges of your frame. Very bright or very colourful objects will automatically draw all attention even if you don’t want it. The art of photography is also the art of omission: leaving things out of the picture. Zooming in or out, taking a step to the left or right allows you to avoid tourists, rubbish bins or traffic signs. Have you seen those typical snapshots where lampposts or tree branches seem to grow out of the head of your subject?
Too many elements in an image, in my opinion, weaken a photo, and this will confuse the viewer. So, limit yourself to one main subject and ask yourself the questions I mentioned above. If some elements do not add value to your photo, leave them out, because “less is more”. This technique will lead you, to more powerful compositions.
I believe that you can never overdo it when simplifying. The best zoom lens is still ‘your legs’. They will help you avoiding a confusing composition. Walk around. Do not be lazy and try to find the right angle or frame. Turn your camera from landscape to portrait or vice versa.
When possible use ‘a frame in the frame’ and don’t forget to let the clouds play a role in the sky if present.
Create depth in your landscape photo
Pull the viewer’s eye into your image by paying attention to the foreground and background. If there is no clear foreground, look for light and shadow. Look for leading lines, they will lead the viewer’s eye to a point you want to lead the viewer to. These lines can be walls, roads or even shadow lines.
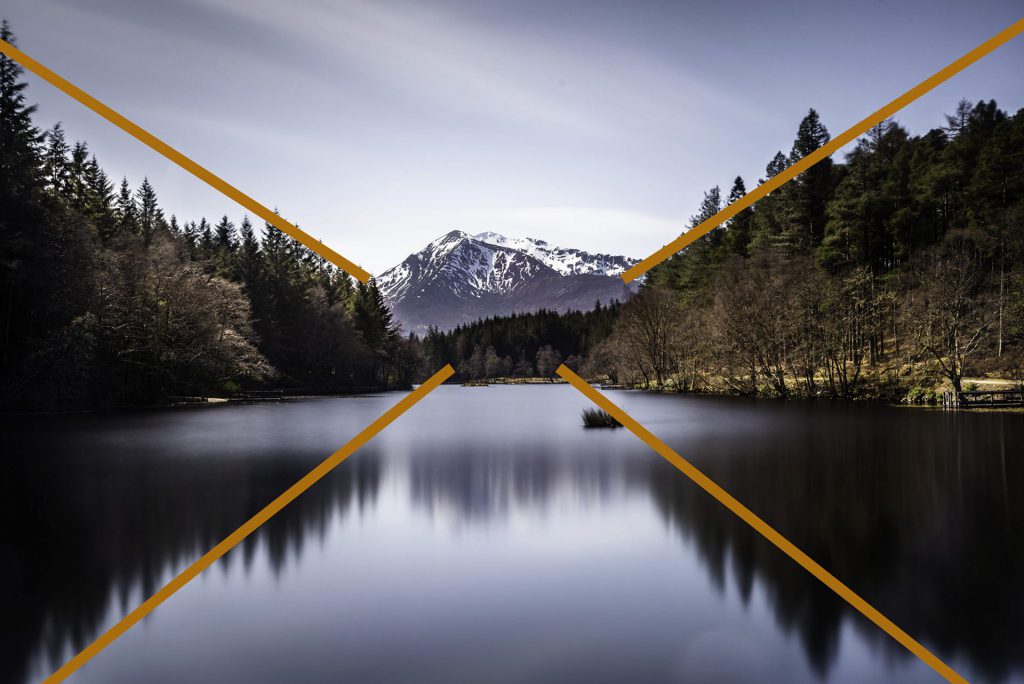
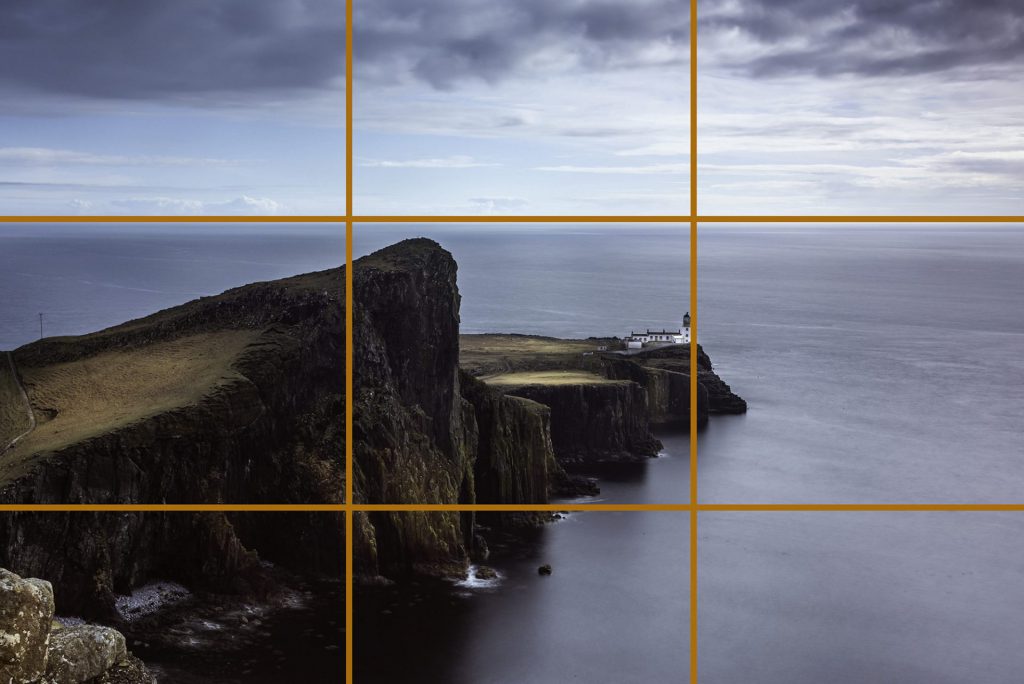
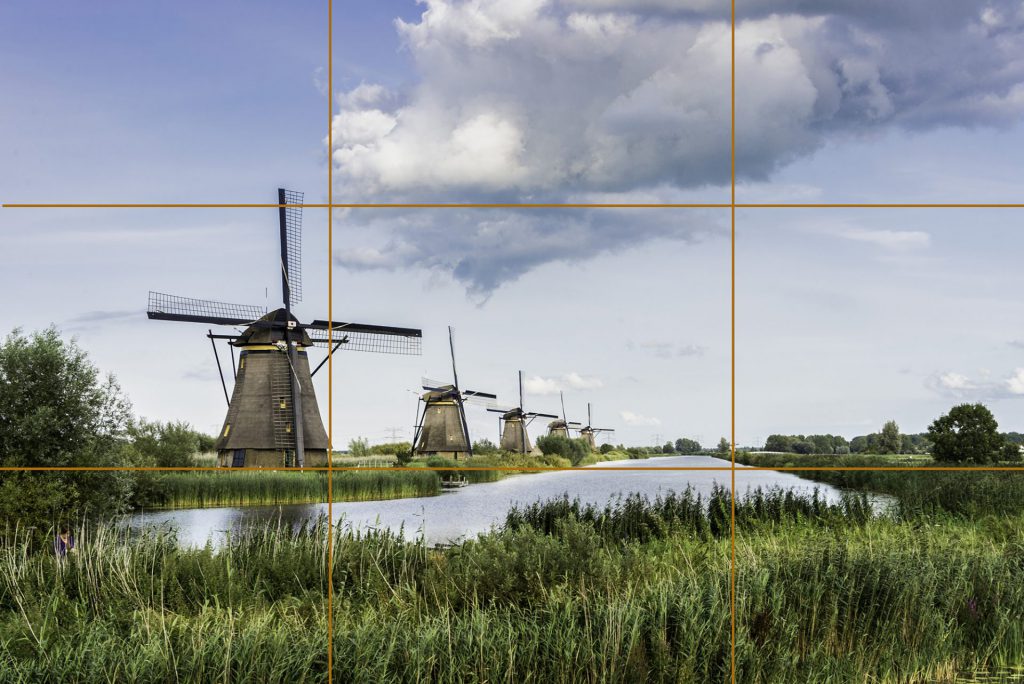
Do not systematically centre your subject, this is often rather boring. The rule of thirds is one that I have already described in my blog on composition and it remains a great rule, even though you may deviate from it on some occasions. If you take care of this from the beginning, it will become second nature.
Give the subject (person or animal) space to go somewhere or to look at something, don’t let them look out of frame. This will keep the eye of the viewer in the frame.
Perspective makes a huge difference
Try not to take every landscape photo from eye level, try once higher or lower. Where you stand, sit or even lie down, will have a significant impact on your image. By moving back and forth a little, you can find a position that will make the rule of thirds work. Or use water as a mirror to create symmetry in the image.
What You can do with the horizon in your landscape image is covered in more detail in my blog The horizon in landscapes? A short guide, but make sure it stays horizontal unless you desire some extreme artistic effect. To give a brief summary: If you have a beautiful sky, put the horizon line in the bottom third of the photo to give the sky more attention. If the foreground is more interesting, put the horizon at the top at 2/3. The important thing is to emphasise the best part of the picture.
4. Light is everything
A discussion between photographers about light can sometimes flare-up. But do not forget that the origin of the term “photography” means writing with light.
Light, especially natural light, is constantly changing. Starting photographers sometimes think they have to wait until noon when the sun is at its highest. But actually, that is the worst possible time to take photographs, even though it can be a very pleasant time to be outside. In the middle of the day, there is usually harsh light and hard shadows. If you insist on taking a portrait of someone at that time, go into the shade. Your subjects will not squint their eyes against the strong sun and the shadows on their face will be much softer, making a much more pleasing portrait.
Your landscape photo will also be better with the light hitting the landscape when the sun is lower. You will notice the undulations of the landscape. Therefore, the best moments with the best light for the landscape photographer will be at sunrise or sunset. Wake up early, or stay up late and do your best in between to come home with the best results.
Pay attention to the position of the sun (shadow and light). Apps on your smartphone like “The Photographers Ephemeris (TPM)” or “Photopills” will help you in your preparation because you will know where the sun will be at a certain moment.
The top moment during a day for the most interesting light effects is called ‘the blue or golden hour’. Read more about this in my blog “What about the weather and landscape photography?“.
If you notice specific and nice light effects in a certain landscape, do not hesitate and take your shot as soon as possible, because 5 minutes later, the opportunity might be gone.
5. Camera settings for landscape photography
As I said at the beginning of this blog, it is best to learn to control the settings on your camera very early, so that you do not have to start wondering about them when you are out in the field.
As a landscape photographer, I usually use “aperture priority”. “Manual” is good too, but it is more complex, you can make more mistakes and it takes more time if you are not used to do so. Because you also want to determine the depth of field with your aperture, aperture priority seems a logical choice to me.
This does not necessarily mean that you should leave everything to the camera. Use the ‘histogram’ at the back of your camera and “expose to the right” (move the histogram to the right). But make sure you don’t have burnt out highlights. You can use your ‘exposure compensation dial’ to move the histogram if necessary (look it up in your manual of the camera).
Do you choose automatic focus or manual? Whichever feels most comfortable is fine. Usually, of course, you focus on a clear focal point. If that is more difficult, a good rule of thumb is to use about one-third of the distance in your image as the focal point. Supportive apps can calculate for you where your “depth of field” (the sharp area) will lie, or on what distance to focus to get the preferred result.
Using a tripod allows you to use the lowest ISO settings (sensitivity of the sensor) for landscape photos and get sharper images with less noise. A wide-angle lens is not a bad idea for landscapes, but a zoom lens can work wonders zooming in on parts of the image to exclude certain disturbing elements.
The camera or the equipment is not everything, the eye of the master is much more important. Don’t blame the equipment for poor composition.
6. Practice, warm up and adjust
Usually, to create great landscape images, you have to warm up by making mediocre images first. Sometimes I need to make some images to understand where I want to go with the shot even though I have a certain previsualisation in my head. Once you get outside, start warming up immediately by shooting for a few minutes without worrying too much about the results. But do not get stuck in that phase. Adjust your framing, move left or right, up or down, check your settings, adjust the diaphragm or the ISO etc. As you get the hang of it, it will go faster and faster. The most important thing is that you reflect on what you want to create and adjust consciously your settings.
7. Special effects for landscape photography
Once you become more proficient at taking photos, you may also become interested in pursuing special effects such as slow shutter speeds (long exposures). For this, I refer you to my three-part blog on the use of filters.
- Handy tips about using filters for landscape photography (1/3)
- Handy tips about using filters for landscape photography (2/3)
- Handy tips about using filters for landscape photography (2/3)
To create bokeh (blur or haze and light spots) and a blurred background to your landscape shot, I refer you to my specific blog.
8. Preparation before you go
Get ready in advance: make sure the batteries are charged and that you have enough memory cards. Be organised: organise your camera bag logically.
Protect your equipment: the weather can change from sunny to rainy in an instant. Pack a simple rubbish bag to cover your camera if necessary. Many camera’s have no problem with light rain but too much water can damage both the camera body and lens. If there is not too much wind an umbrella might help as well. If you don’t have a helping hand around try an umbrella holder or a clamp. Make sure that you have at least a few micro fiber cloths available when photographing in rain or wet conditions.
Clean your equipment: make sure the lens and camera sensor are clean from dust and smudges. Do not forget to clean the legs of your tripod after a hike through the mud in the countryside or the sand and the salt at the coast.
9. Inspiration before you take off
My advice is to become a travelling photographer instead of a photographing traveller. Prepare yourself when you travel to a certain area. Nowadays, you can find enough inspiration on social media such as Facebook, Instagram, Pinterest or photo books etc. Do not just copy what you see there, but it can give some ideas to visit specific areas.
You don’t have to skip tourist sites, as they are usually worth a visit even if they are photographed a million times. Try to find an original point of view. That’s not always easy for iconic sites. Go earlier than the mass of tourists, or much later, the light will be different too. Try using a very wide lens or a zoom lens, add an interesting subject in the foreground etc. In the worst case, turn around and photograph all the other photographers taking snapshots. Maybe you will see a spectacular sunset behind you? Or on the way to a popular location, you might come across some unexpected gems.
10. Post-processing
Post-processing is not cheating, but always take care not to exaggerate. If your viewers say “that is well photoshopped”, then you have probably gone too far already. Landscape icon Ansel Adams could also spend hours in the darkroom getting the best out of his images but without it being noticed as such.
To get the best out of your images, I cannot repeat enough to shoot in RAW-format. The backdrop is that the files will be larger. Your camera will already apply compression to JPG-files, which immediately results in some loss of detail. RAW files straight from the camera, usually have little contrast and sharpness, but rest assured that all information is present to get the best out of them in Lightroom, Photoshop or other post-processing programs. You will have full control. It is therefore normal that your images require some degree of post-processing which does not mean photo manipulation, of course.
The use of Photoshop might frighten you because it can be a complex piece of software. To a novice, I would suggest to get started with Lightroom. This is a very logic first step and it is far more user friendly. And if you want to go a step further in the development of your post-processing skills, you can always add Photoshop at a later point. If you want to take it easy because you are not very proficient with post-processing you might look at the use of pre-sets, which can transform your landscape photo with one click of a button. But if you want to have everything in control in detail, from beginning to end, you will also have to study the techniques of post-processing. So, my advice would be taking a course or search for specific solutions on YouTube. Be warned that photo editing can become as addictive as photography itself
11. Afterwards
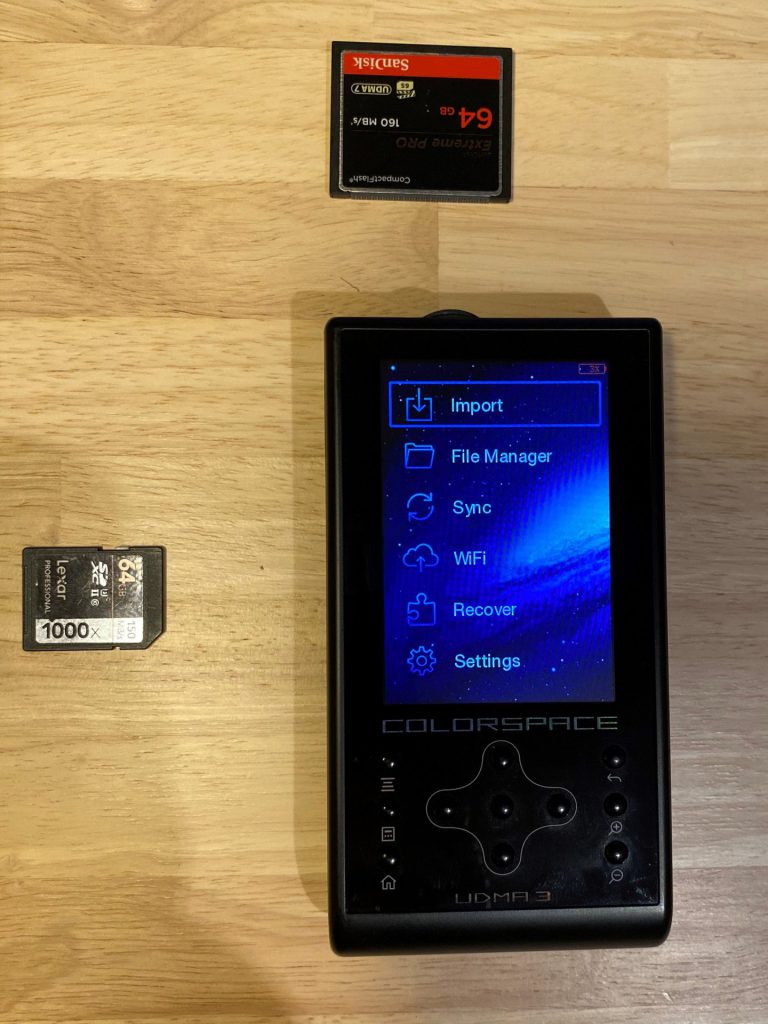
Back up your memory cards as soon as possible. Do not leave your files sitting on your memory card too long. You would not be the first to erase older files that you did not transfer yet by accident. After transferring the files from your memory card, it is a good idea to reformat the card, this will keep them in better shape and ready for use. It would be a pity if you run out of space when on a hike. When I am on the road for several days, I make every evening a backup on a loose memory card backup device that combines a battery-powered hard drive with a memory card reader in a portable package. I don’t need a computer for that.
On your computer create a logic system of naming your folders. This will help you later to retrieve them. I use a combination of the year and the place, but there are plenty of options as long it stays logic for you.
Further, I hope it is needless to mention to make sure that your files on your desktop or laptop are regularly backed up. It wouldn’t be the first time a computer crash made everything disappear.
Feedback
As always, I welcome you to leave a comment or question here below…
Leave a reply