
Introduction
Seascape photography is a genre of photography that focuses on capturing the beauty and essence of the sea or ocean and its surroundings. It involves photographing various elements such as the coastline, beaches, waves, rocks, cliffs, marine life, lighthouses and other features associated with the sea. The aim is to capture the unique characteristics of the sea or the ocean and create visually stunning images that evoke a sense of tranquillity, drama, and awe.
You probably want to go to the beach during the hot summer days. Many go to the coast to sunbathe, swim or take a beach walk with their dog. But the coast is also an eminently suitable place for taking beautiful photos, and this is in all seasons, not only in summer.
Seascapes are not static landscapes, you will have to deal with multiple factors, and it’s crucial that you’re aware of them all. Nevertheless, through careful composition, timing, and technical considerations, photographers can create stunning images that transport viewers to the captivating world of the ocean.
I will develop some critical aspects of seascape photography in this blog: composition techniques, lighting, long exposures, timing, filters and accessories, gear, post-processing, and much more.
That being said, let’s take a closer look at how you can capture better seascapes. I will develop these aspects in the 34 tips and tricks I carefully selected for you.
Have also a look at my earlier blog, waterscape-and-seascape-photography.
Seascape photography tips:
Tip # 1. Consider your composition carefully but play with the rules
Tip # 2. Find an attractive focal point or subject
Tip # 3. Shoot from a higher vantage point
Tip # 5. Apply the rule of thirds
Tip # 6. Framing and Perspective
Tip # 7. Straighten your horizon
Tip # 9. Select an interesting foreground
Tip # 10. Put somebody in your frame
Tip # 11. Use different shutter speeds
Tip # 13. Filters and Accessories
Tip # 14. Incorporate reflections in your seascape photo
Tip # 15. Emphasising patterns and textures
Tip # 16. Maximise Depth of Field
Tip # 19. Timing and keeping an eye on the weather
Tip # 22. Use a sturdy tripod for seascape photograph
Tip # 23. What is the best camera for seascape photography?
Tip # 24. Chose the appropriate lens
Tip # 27. Using Photoshop in post-processing
Tip # 28. The use of Luminar Neo in post-processing
Tip # 29. Create a sense of serenity
Tip # 30. Turn your seascape into black and white
Tip # 31. Go for a minimal fine art approach
Tip # 32. Capture Multiple Images and Blend Them
Tip # 33. Be creative and think out of the box
Tip # 34. Bring lens cleaning tools (wipes or microfiber cloths) and some camera protection
Tip # 1. Consider your composition carefully but play with the rules:
Composition plays a crucial role in seascape photography as it helps to create visually appealing and impactful images that evoke emotion and capture the essence of the sea. Photographers carefully frame their shots, considering foreground, midground, and background elements. In addition, they use natural features such as rocks, piers, or jetties as leading lines or points of interest, guiding the viewer’s eye into the scene.
Therefore, mastering composition techniques can significantly enhance the impact of your seascape photographs. Try to combine several rules into one picture, for example, the rule of thirds, leading lines, frame in a frame, etc.
In the following tips, you will find why composition is essential in seascape photography.
Composition allows you to create a sense of balance in your image. You can distribute visual weight evenly and create harmony by carefully arranging the elements within the frame. A well-balanced seascape photograph is pleasing and draws the viewer’s attention to the main subject or focal point.
Seascape images often feature multiple elements, such as the sky, water, rocks, and other structures. Composition allows you to balance these elements within the frame, ensuring that no single element overpowers the others. You can create a visually pleasing and harmonious composition by considering each element’s size, shape, and placement.
Tip # 2. Find an attractive focal point or subject
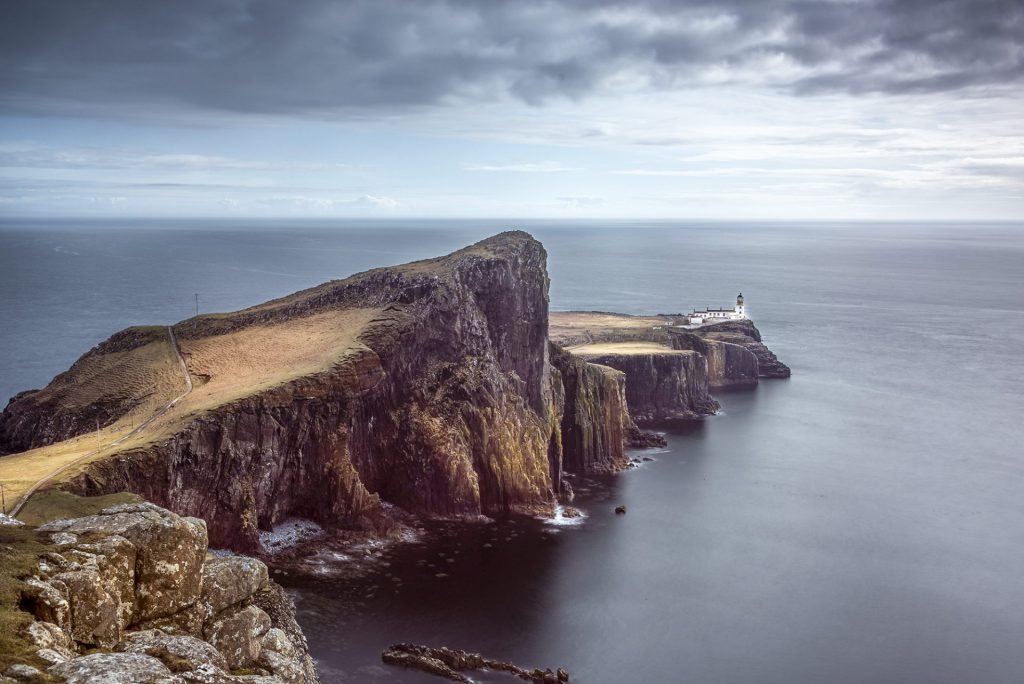
The vastness of a beach is, of course, a subject in itself, but these images can quickly become tedious. So, find an interesting object to which the viewer’s eye is drawn. Of course, there are always such resting points on a beach; footsteps in the sand, washed-up shells, breaking waves, patterns in the sand, a lighthouse, etc. But you can also use the interplay of lines of receding or rising water to add depth to your image. By varying your point of view, you can emphasise this more or less.
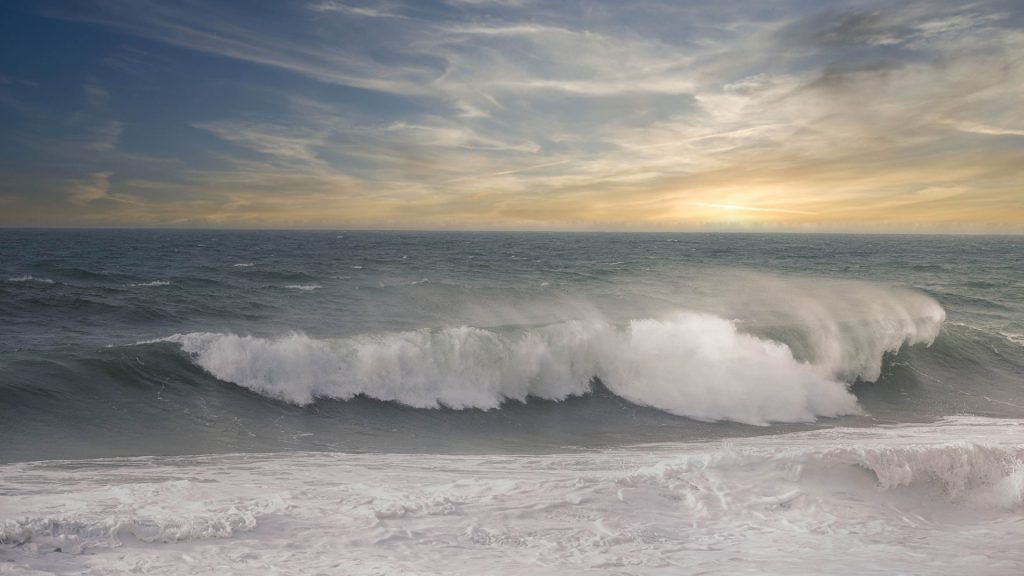
Another great opportunity is to capture the waves as the main subject. This will be easier with a longer lens to zoom in.
There are two ways to photograph the waves: standing on the beach or swimming next to them. Unfortunately, the latter requires specialised equipment, and I have never tried it. One can freeze the wave with your telephoto lens, using a shutter speed of 1/250 or faster. This value may be different depending on the angle the waves are going. You can’t go wrong with 1/800 – 1/1000 for any angle. The best advice is to experiment with this.
There is more technique where you take a more prolonged exposure, like 1/10 of a second. In this case, the wave looks like an explosion or a burst. And it also adds drama and menace to the photo.
Tip # 3. Shoot from a higher vantage point
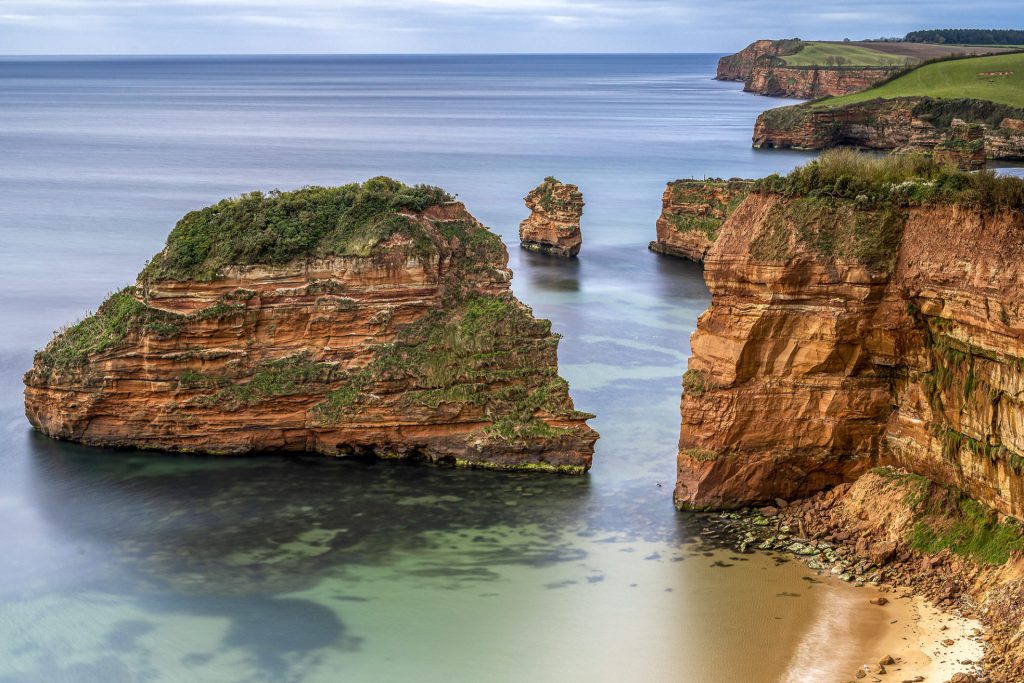
Shooting from a higher vantage point like cliffs, dunes, or dykes offers a different perspective.
The 30+ second exposures smooth and blur the water surface and make it even. Combined with the sharp leading lines provided by cliff edges, it creates a surreal look and feel. Such photos have a taste of eternity in them.
When the light is brighter, it might be better to go down to sea level because the water patterns from the higher point can make the photo busy. However, it is different when you have massive crashing waves beneath your position. Also, during the day, a higher position provides much better colours. And the patterns are no longer distracting.
Daytime ocean colour is one of the best photographic opportunities you can get. Because of the higher elevation, the water surface does not reflect that much, so you get better colours.
Tip # 4. Use Leading Lines in seascape photography
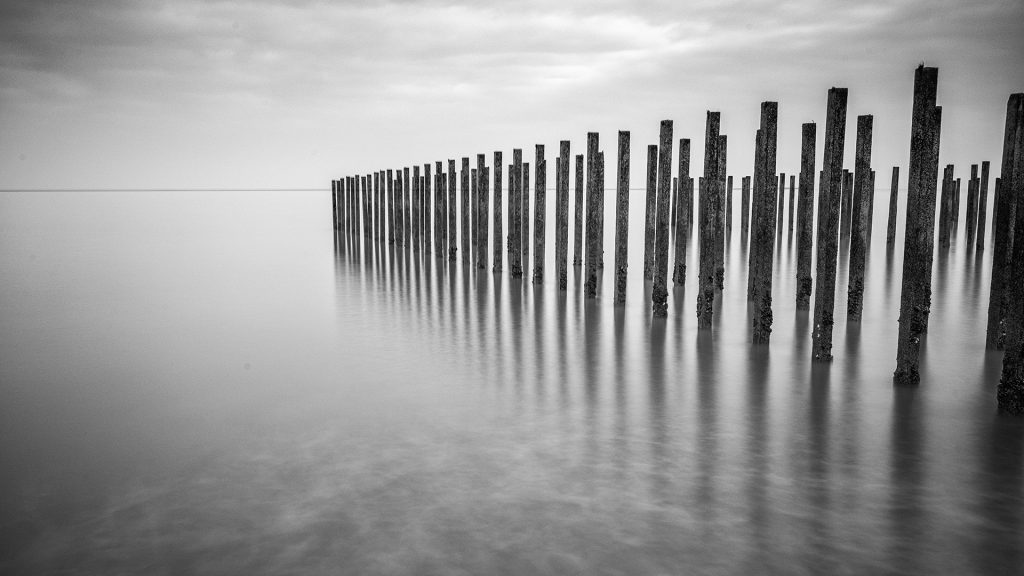
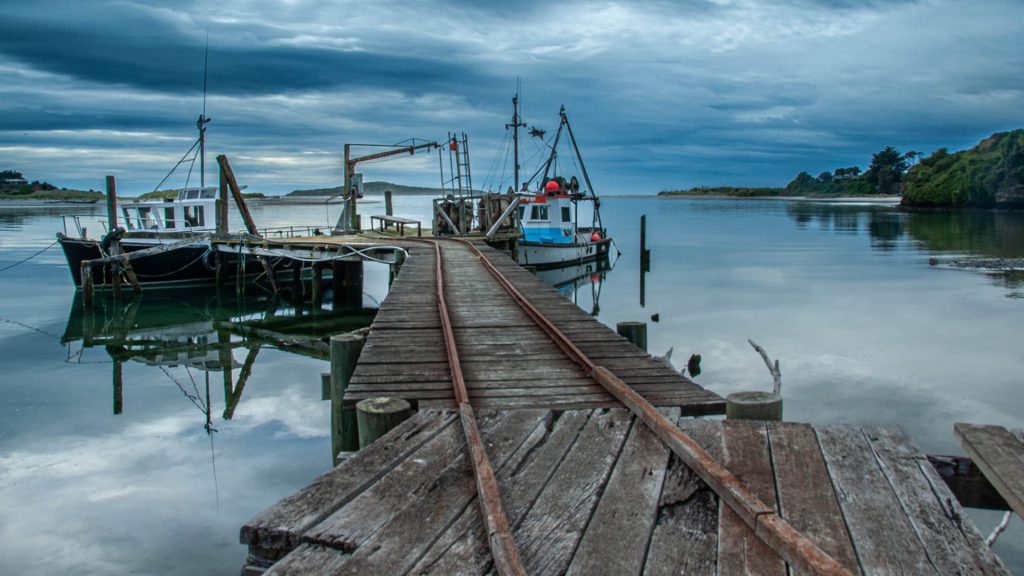
The use of leading lines is a powerful compositional technique in seascape photography. The natural lines created by the shoreline, waves, or other elements can guide the viewer’s eye into the frame, creating a sense of depth and adding visual interest. In addition, leading lines can help establish a clear optical path and draw attention to the main subject or point of focus.
Tip # 5. Apply the rule of thirds
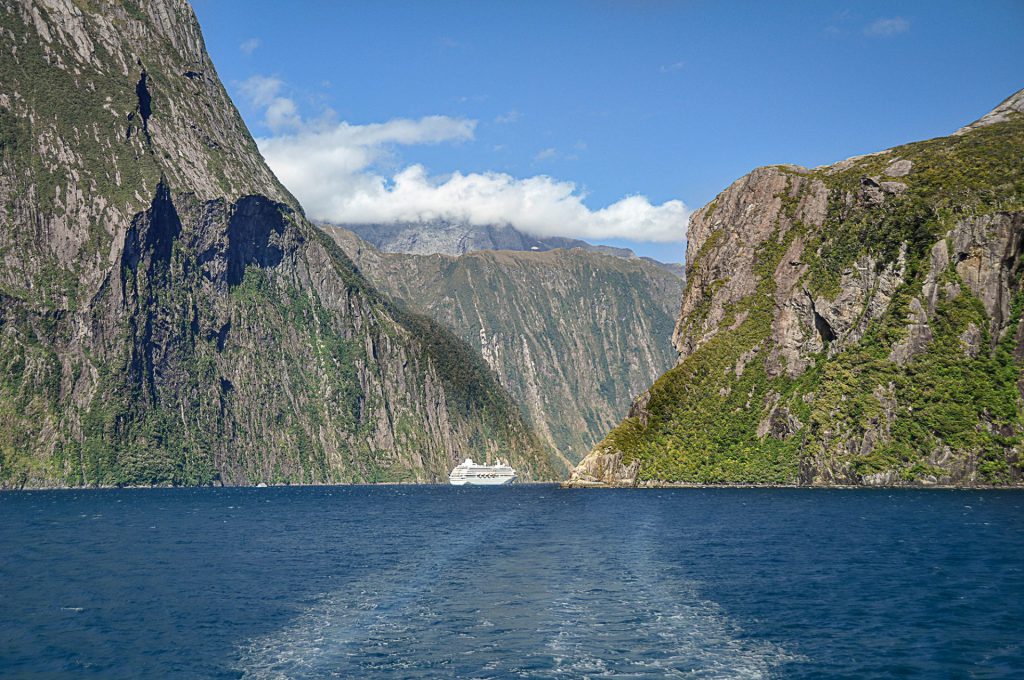
The rule of thirds is a fundamental compositional guideline that divides the frame into a 3×3 grid. You can create a more balanced and visually appealing composition by placing critical elements along the gridlines or at the intersection points. This technique adds dynamism and helps avoid placing the main subject in the centre, making the image more engaging.
Have also a look at my blog composition-in-landscape-photography
Tip # 6. Framing and Perspective in Seascape photography
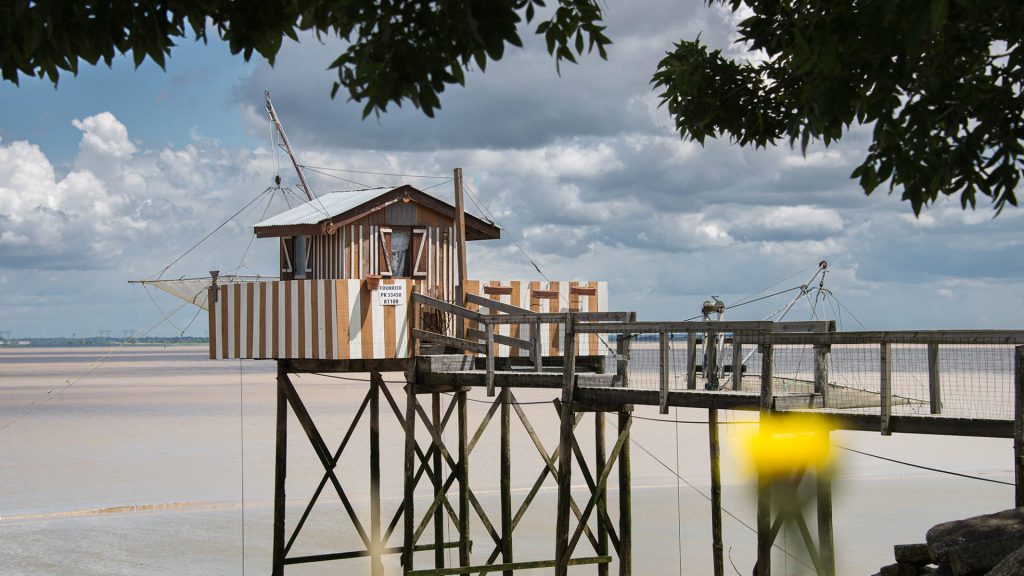
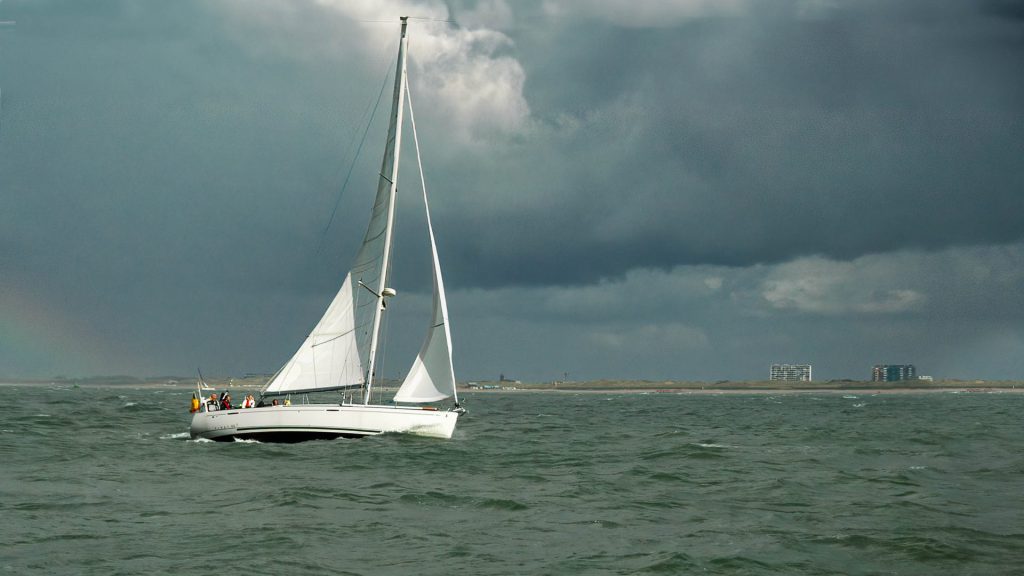
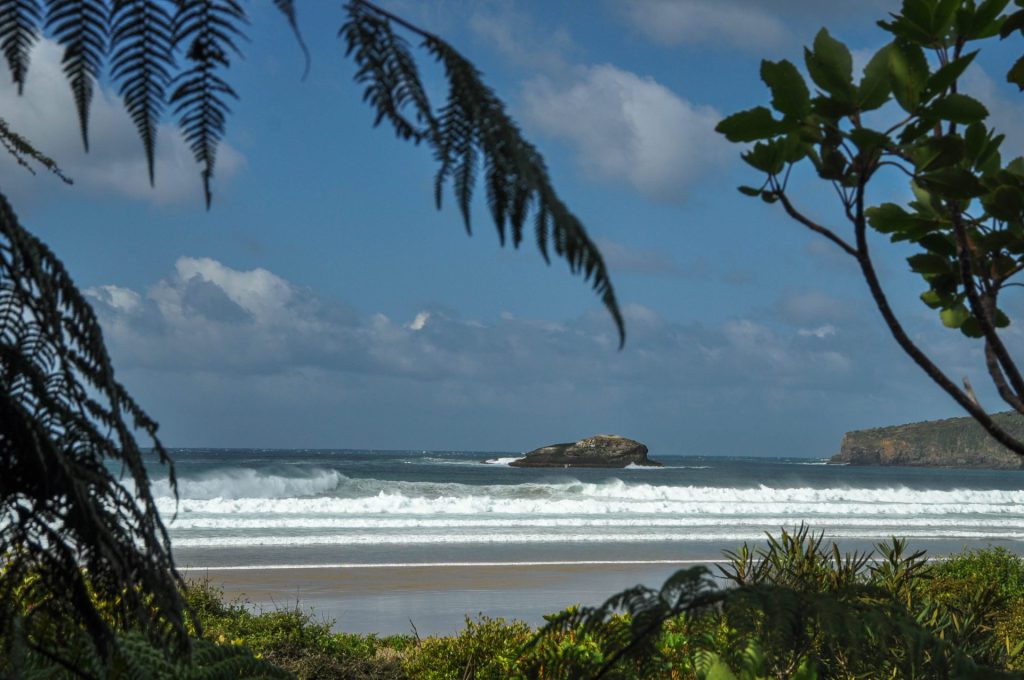
Seascape photography often offers opportunities to use natural elements as frames or points of interest. For example, you can use rock formations, arches, or overhanging branches to frame the scene and draw attention to the subject. In addition, consider exploring different perspectives, such as shooting from a low angle or including foreground elements, to add depth and create a more immersive experience for the viewer.
Tip # 7. Straighten your horizon
With any seascape you shoot, it is important to get your horizon straight. U can use your viewfinder on the screen to get a perfect level horizon or a spirit level on your camera or tripod. If you get home and have a photo that isn’t level, you didn’t get the composition completely perfect in the field. Lightroom or Photoshop have powerful tools to help you fix up your images. (Crop and straighten tool).
Tip # 8. Use Negative Space
Negative space refers to the empty or unoccupied areas in an image. In seascape photography, negative space can effectively emphasise the main subject or convey a sense of vastness and tranquillity. By carefully composing your shot and leaving areas of empty space, you can create a minimalist and contemplative atmosphere.
- Emphasizing the subject: Negative space can be used strategically to draw attention to the main subject in the photograph. By surrounding the subject with empty space, it stands out more prominently and becomes the image’s focal point. In addition, the absence of distracting elements allows the viewer’s gaze to be directed towards the subject, creating a sense of visual emphasis and importance.
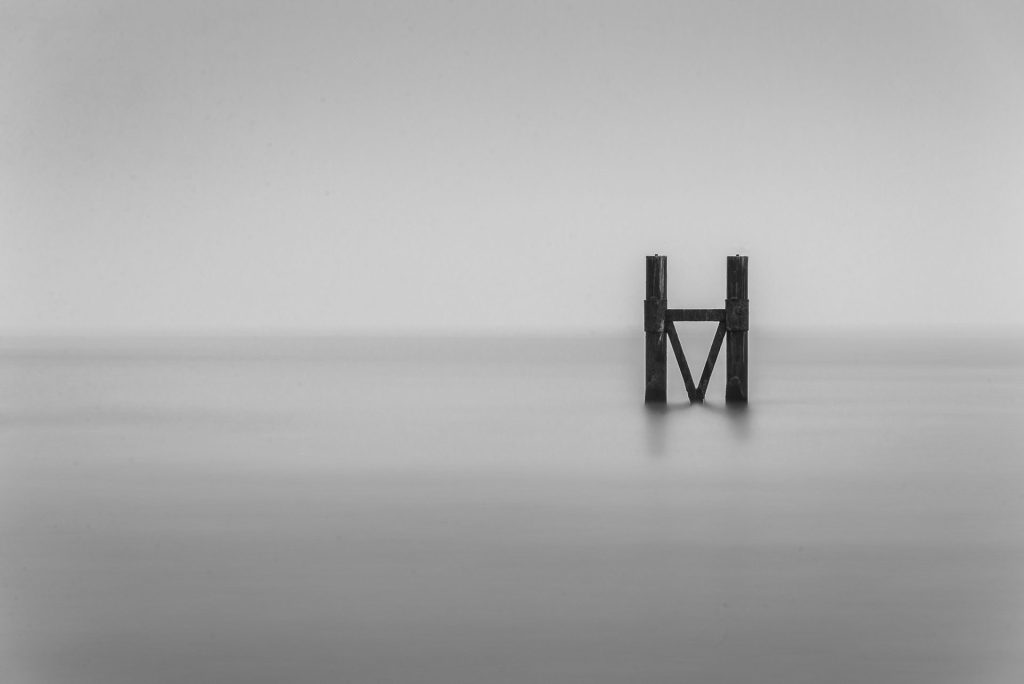
2. Creating a sense of serenity: Seascape photography often aims to evoke a sense of calmness, tranquillity, and vastness. By incorporating negative space in the composition, you can convey this feeling of openness and spaciousness. The vast expanse of empty sky or water can create a serene and peaceful atmosphere, allowing the viewer to experience the tranquillity of the sea. See also tip ##
3. Providing breathing room: Negative space can give the viewer’s eyes a “breathing room” within the image. It provides a visual break from the main subject and other elements in the frame, allowing the viewer to rest and appreciate the overall composition. This can result in a more relaxed and enjoyable viewing experience, as the negative space balances the visual elements and prevents the image from feeling crowded or overwhelming.
4. Enhancing minimalism: Negative space is often associated with minimalism, a style that focuses on simplicity and the use of essential elements. You can create a minimalist composition in seascape photography by incorporating negative space. The clean and uncluttered aesthetic allows the viewer to appreciate the beauty of the sea and its surroundings in a minimalistic and orderly manner. See also tip 33
5. Invoking imagination and storytelling: Negative space in seascape photography leaves room for the viewer’s imagination to wander and interpret the image. It can spark curiosity and prompt viewers to imagine what lies beyond the captured frame. This storytelling aspect of negative space can engage viewers on a deeper level as they create their own narratives and emotional connections with the image.
6. Balancing the composition: Negative space plays a crucial role in balancing the composition of a seascape photograph. It helps distribute visual weight within the frame, creating harmony and a sense of equilibrium. You can achieve a visually pleasing and well-balanced composition by carefully considering the placement and amount of negative space.
Overall, negative space in seascape photography is a powerful tool for emphasising the main subject, evoking emotions, creating a sense of calmness, and providing balance within the composition. In addition, it enhances the image’s visual impact and allows the viewer to connect with the scene in a unique and contemplative way.
Tip # 9. Select an interesting foreground
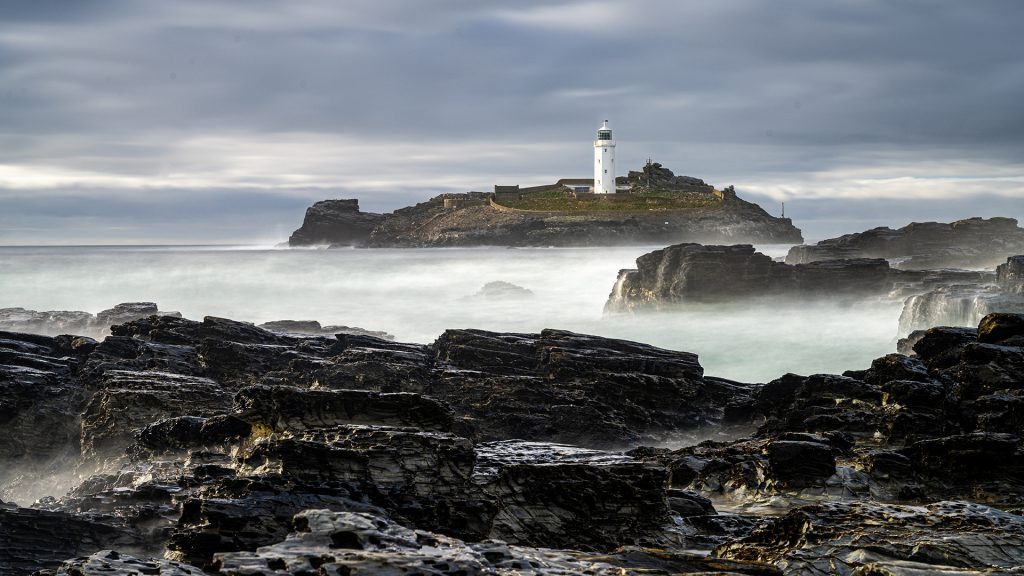
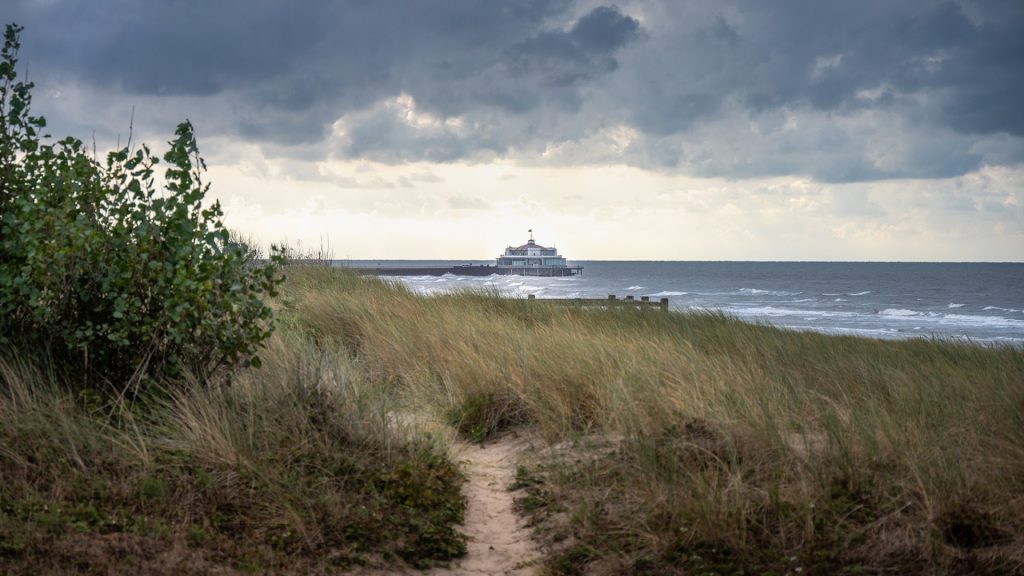
Seascape photography is very diverse when it comes to foreground selection. Like the regular landscape, you can pick the rocks, the plants, the cliffs, puddles, or any solid objects.
But in addition to that, you can also try the action in the water. Depending on the environment, it is possible to create multiple appealing subjects.
Tip # 10. Put somebody in your frame
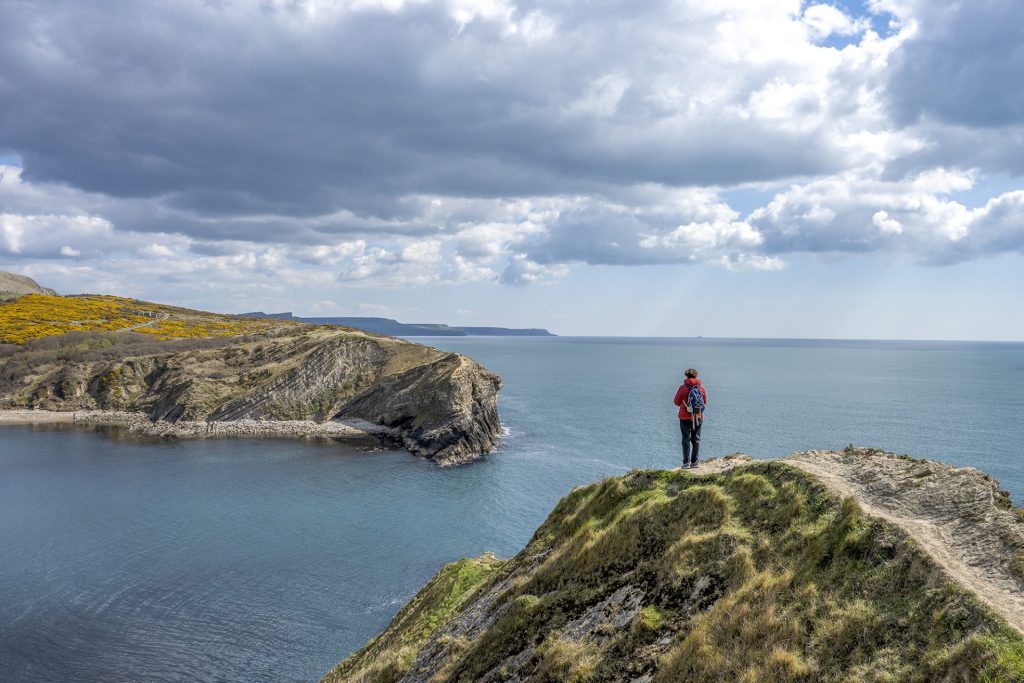
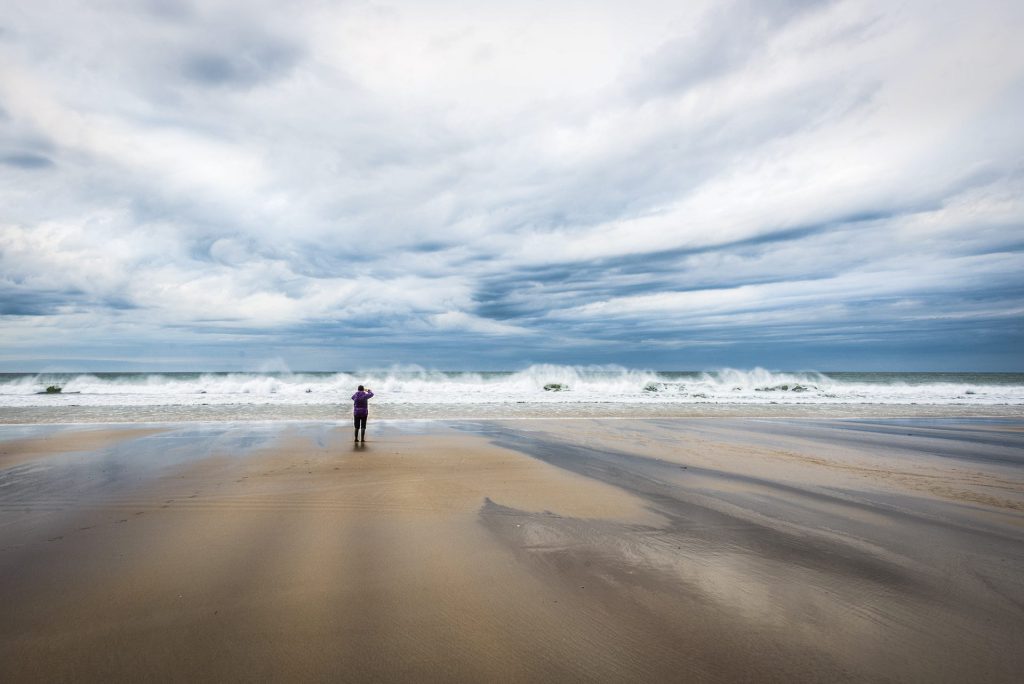
You can include people in seascape photography to add a sense of scale, narrative, or human connection to the scene. Here are some ways to incorporate people into your seascape photographs:
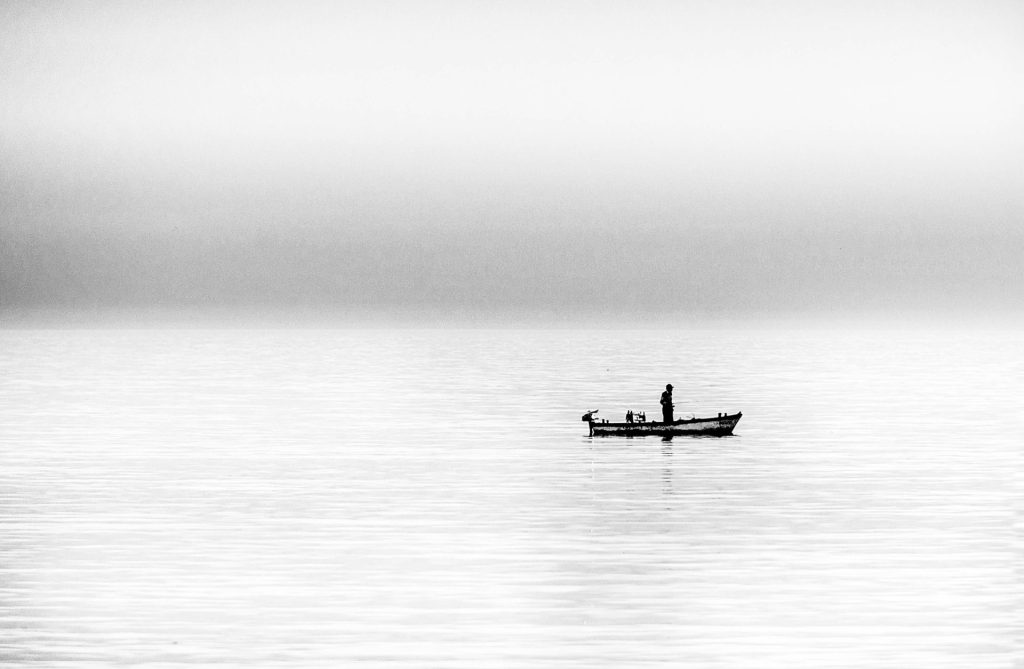
- Silhouettes: Capture the silhouettes of people against the backdrop of the sea, especially during sunrise or sunset when the light is low. Silhouettes can create a strong visual impact and add a sense of mystery and anonymity to the image.
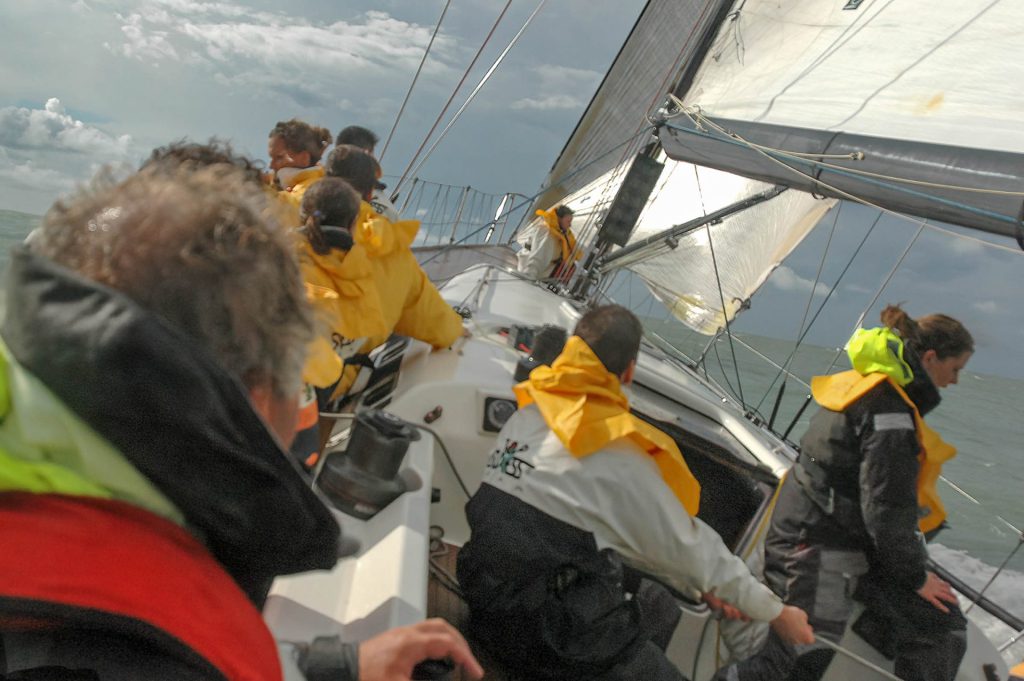
- Action and movement: Photograph people engaging in activities related to the sea, such as surfing, swimming, sailing, or fishing. Capturing their movements can add dynamism and energy to the photograph, making it more engaging for the viewer.
- Candid moments: Look for candid moments where people naturally interact with the sea or the surrounding environment. This could include someone walking along the shoreline, a group of friends playing in the waves, or someone enjoying a quiet moment by the water. Candid shots can convey a sense of authenticity and capture the emotions and experiences of the individuals involved.
- Portraits: Incorporate portrait photography into your seascape shots by having a person as the main subject, with the sea as a complementary backdrop. This approach can create a more intimate connection between the viewer and the subject, highlighting their emotions and expressions.
When including people in your seascape photography, it’s essential to consider the composition and how they interact with the overall scene. Please pay attention to their placement in the frame, ensuring they don’t distract from the main elements of the seascape while still contributing to the narrative or visual impact.
Tip # 11. Use different shutter speeds
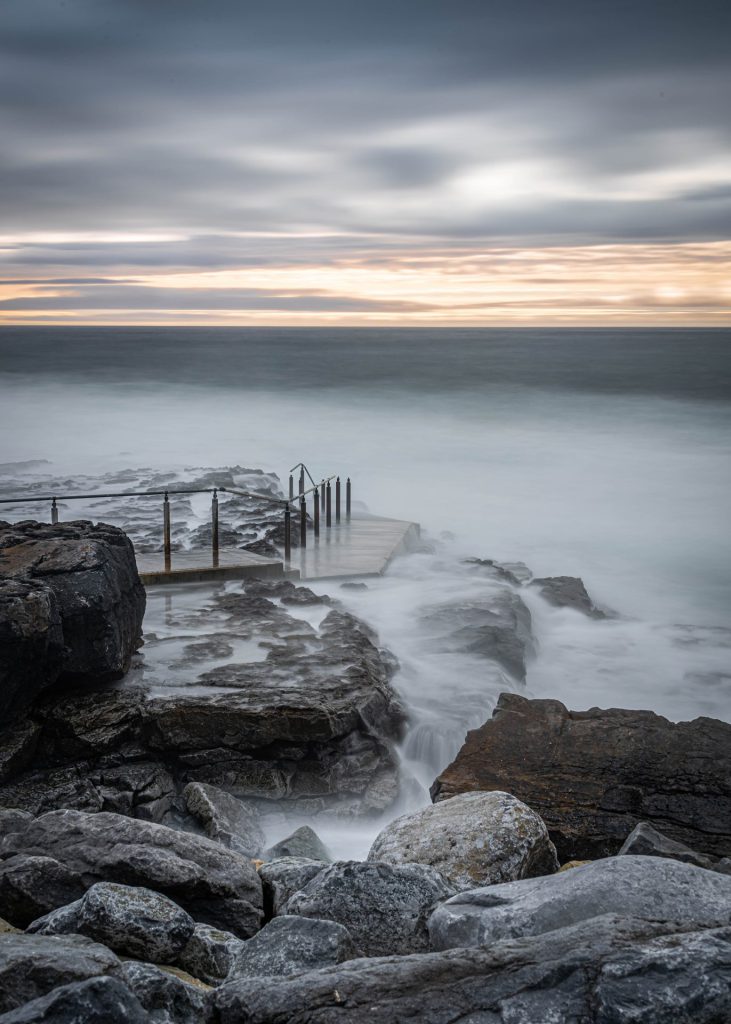
With shutter speed manipulations, one can create the following:
- Streaks of flowing water. Use 1/4 – 5 seconds for the receding wave. With a strong current, the shot can work out with the shorter shutter speed of 1/4 – 1/2 sec. If the flow is enormous and powerful, 2-5 seconds will also work. But I prefer shorter exposures because they keep more of the texture. In general, I wouldn’t go above 2 seconds.
- Little waterfalls. When the wave rolls over some rock, it creates multiple beautiful waterfalls. Again, the best shutter speed is 1 second and higher.
- Sand reflections. It would be best to have a flat and even sandy beach for this one. If the water recedes slowly, it leaves some fantastic reflections behind. This effect works well for the sunrise or sunset (the bleu hour or golden hour.)
- Restless sea. The sea boils and topples near the rocks and rock platforms, crashing against them and rolling back. These areas provide a fantastic opportunity to show the character and power of the sea. Use shorter exposures here, 1/8 – 1/2 at max.
- The waves. I have already mentioned these, but they comprise a significant part of seascape photography. Use 1/10 – 1/3 to fix the waves without freezing them. They’ll keep their shape without a busy look. The waves look best with backlighting when the sun shines through them. Even when the sun is higher in the sky and not in the frame.
- Colours. The colour of the water depends on the depth and the colour of the sky and can show some spectacular effects. It works well for the foreground too.
Tip # 12. Long Exposure in Seascape photography
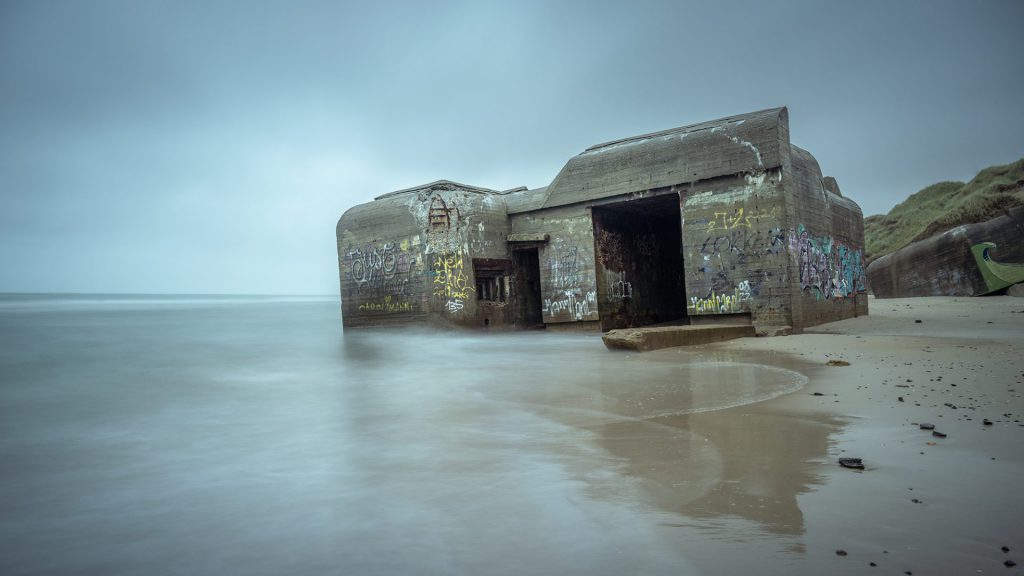
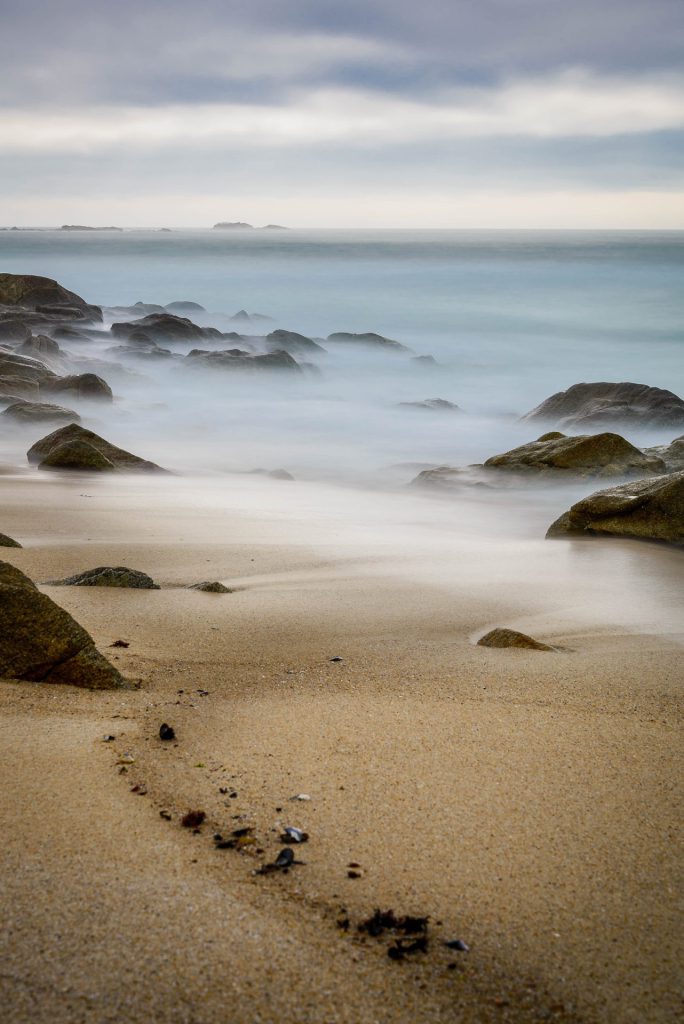
Long-exposure photography is a widespread technique in seascape photography. Photographers can create a sense of motion in the water using a slow shutter speed, typically several seconds or more. This technique smoothens the waves and captures their ethereal, misty appearance, adding a dreamy and surreal quality to the image.
Creating optimal long-exposure seascape photos requires careful planning, proper equipment, and technique. Here are some steps to help you achieve the best results:
- Choose the right time and weather: Long-exposure photography often benefits from soft, diffused light, typically found during the golden hour (shortly after sunrise or before sunset) or in overcast conditions. Pay attention to the weather forecast and look for days with clouds or atmospheric conditions that add interest to the sky. Additionally, consider the movement of the water and the tide schedule to capture the desired effect.
- Use a tripod: A sturdy tripod is essential for long-exposure photography. It keeps the camera steady during the extended exposure time, preventing any blurring caused by the camera shake. Choose a tripod that is stable and can withstand wind and uneven terrain. Ensure that the tripod legs are fully extended and secure to maintain stability.
- Attach a Neutral Density (ND) filter: see also tip #13. ND filters are crucial for long-exposure photography as they block light from entering the lens, allowing you to achieve longer exposure times. Start with a 6-stop or 10-stop ND filter and adjust based on the lighting conditions and desired effect. Then, attach the filter to your lens before setting up your composition.
- Set a low ISO: Set your camera to its lowest ISO setting to maintain image quality and reduce noise. A low ISO ensures that the image remains clean and retains detail, especially in the shadow areas.
- Choose a small aperture: Select a small aperture (high f-number), such as f/11 or higher, to maximise depth of field and ensure sharpness throughout the image. A smaller aperture also helps to reduce the amount of light entering the camera, allowing for longer exposure times.
- Use manual focus: Switch your camera to manual focus mode and focus on the most crucial element in the scene. Using live view and magnification can help achieve precise focus. Once you have reached focus, remember to turn off autofocus to avoid any accidental changes in focus during the exposure. Sometimes, when you use strong filters, it isn’t easy to focus with the filter on the lens. On those occasions, focus first without the filter and then put the filter bask on the lens
- Calculate Exposure Time: With the ND filter attached, your camera’s light meter may not provide an accurate exposure reading. You can use a long exposure calculator app or the “bulb” mode on your camera to determine the proper exposure time. Start with a longer exposure time (e.g., 30 seconds) and adjust based on the histogram and the desired effect. Then, review the image after the initial exposure to evaluate the exposure and make any necessary adjustments.
- Compose the scene: Consider the elements in your seascape scene and compose your image accordingly. Look for leading lines, exciting foreground elements, or natural patterns that will enhance the overall composition. Consider the flow of the water and how it will appear in the long exposure.
- Capture multiple exposures: It’s often beneficial to capture multiple exposures of the same scene to ensure you have options to choose from during post-processing. Vary the exposure times slightly and experiment with different compositions to capture the most compelling image.
- Review and adjust: Review your images on the camera’s LCD screen to ensure the exposure and composition are as desired. Then, make any necessary adjustments and reshoot if needed.
- Post-Processing: Post-processing can enhance the final result once you have captured your long-exposure seascape photos. Adjust the white balance, contrast, and saturation as needed to bring out the best in your image. Pay attention to details such as the highlights and shadows to achieve the desired mood and balance.
A 10-second-long exposure provides some basic textures created by the foam movement and is less even. It shows unusual patterns, which are different from every photo.
Shorter exposures starting from 2 seconds and all the way to half a second are perfect for seascape photographers. These shutter speeds create the most dramatic and dynamic effects in the water while still smoothing it and removing the busy and shattered look.
Anything faster than 1/15 creates a shattered splashy look, which you can use to shoot incoming waves. But to completely freeze the wave, you’ll need 1/250 or faster.
Remember that long-exposure seascape photography requires patience, experimentation, and practice. Take the time to plan your shots, be open to adjusting your settings, and embrace the creative possibilities that long exposures offer.
Tip # 13. Filters and Accessories:
Seascape photographers frequently use filters and accessories to enhance their images. Graduated neutral density filters help balance the exposure between the bright sky and darker foreground while polarising filters reduce glare and improve colour saturation. Tripods are essential for stability, especially during long exposures.
Filters are valuable tools in seascape photography that can enhance the quality and impact of your images. Here are some common types of filters used in seascape photography and their purposes:
- Graduated Neutral Density (GND) Filters: GND filters are essential for balancing exposure in scenes with a significant difference in brightness between the sky and the foreground. These filters have a gradient, transitioning from dark (usually neutral grey) to clear. By positioning the dark portion of the filter over the brighter sky and the clear part over the darker foreground, GND filters help reduce the dynamic range and retain detail in both areas, resulting in a well-exposed image.
- Polarizing Filters: Polarizing filters reduce reflections and enhance colour saturation. They selectively block or allow light waves to align in a specific direction. When photographing seascapes, polarising filters can reduce glare and reflections from the water’s surface, rocks, or wet sand, revealing the natural colours and textures beneath. They can also deepen the blues of the sky and water, resulting in more vibrant and saturated images.
- Neutral Density (ND) Filters: ND filters are designed to reduce the amount of light entering the camera without affecting the colour or tone of the scene. They come in different strengths (measured in stops), from mild to extremely dense, and are particularly useful for achieving long exposure effects in seascape photography. You can extend the shutter speed using an ND filter, resulting in smooth, ethereal effects on the water, such as blurring waves or creating a mist-like appearance.
- UV Filters: UV filters primarily serve as a protective layer for the camera lens, safeguarding it from scratches, dust, and other potential damage. They also help reduce the effects of UV rays on image quality and can be left on the lens at all times. While UV filters have minimal impact on seascapes, they are commonly used in various photography genres, including seascapes, for their protective properties.
When using filters, it’s essential to choose high-quality options that maintain the optical integrity of your lens and minimise any potential image degradation. Additionally, filters can add additional layers of glass in front of the lens, so proper cleaning and maintenance are necessary to avoid smudges, fingerprints, or dust that could affect image quality.
Filters give photographers greater control over exposure, colour, and light in seascape photography. Photographers can use the appropriate filters for specific situations to capture stunning seascapes with balanced exposures, reduced reflections, enhanced colours, and creative long-exposure effects.
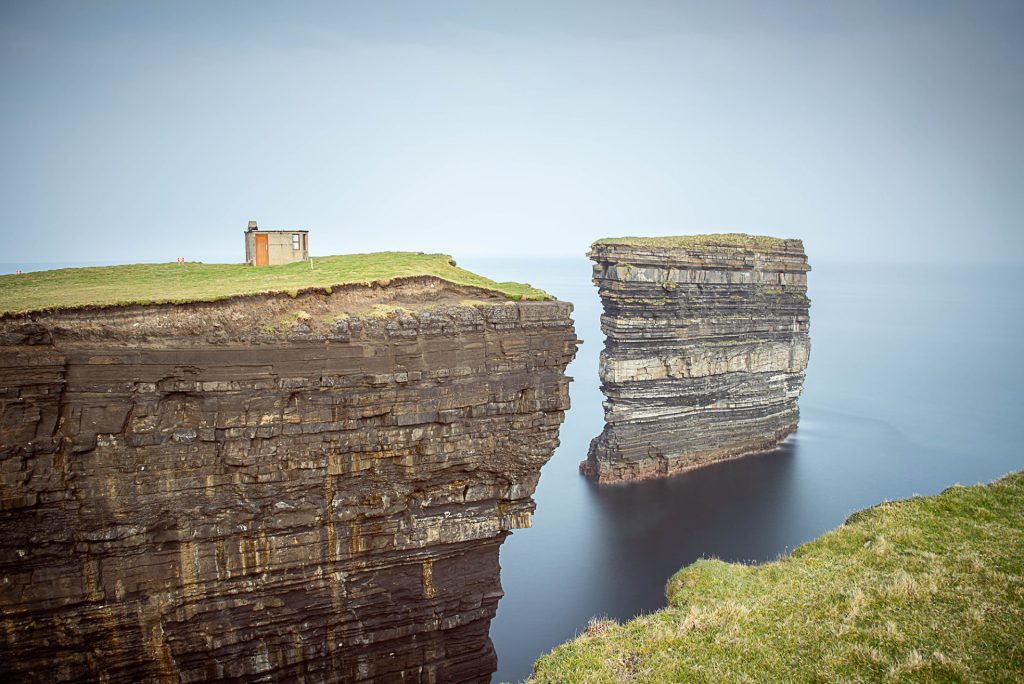
For more information on the use of filters, go to my 3-part blog tips-for-filters-in-landscape-photography-part1 part2, part3
Tip # 14. Incorporate reflections in your seascape photo
Reflections will add new opportunities to make a shot. Unfortunately, where to get reflections for seaside photography is not always obvious.

Reflection of the sunset in a beach puddle (Guy, 2023)
Here are some easy-to-use ideas on where to look for reflective surfaces in seascape photography:
- Rockpool during low tide. When the waves cannot hit the pool or do so rarely, it has enough time to become still and reflect all of the skies.
- Puddles on the rocks and rock platforms. Such pools need much time to dry. Go to the rocky area after rain or after a storm. You’ll find plenty of possibilities to capture the reflections.
- Sand beach. During the low tide, you can go to the beach and capture reflections on the sand. After the wave slowly recedes, it takes more time for the thin layer of water to dissolve. You can use those couple of seconds to build your composition.
- Wet rocks produce fantastic orange glares during sunrise or sunset. Adjust your camera to find the angle with the best shiny effect.
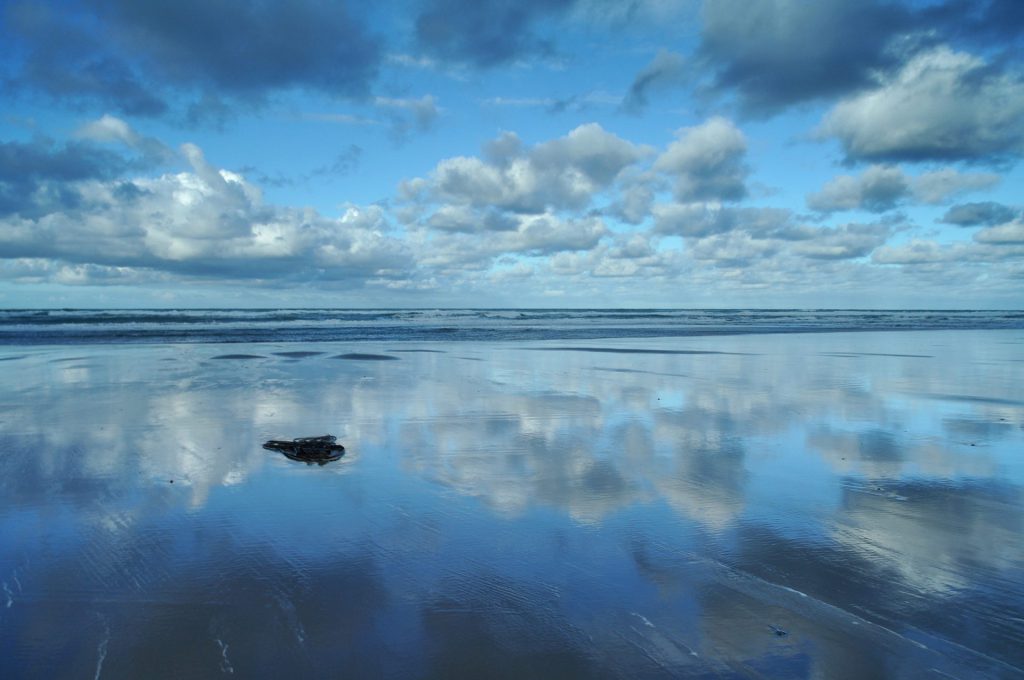
When experimenting with reflections, one can easily ignore the rule of thirds and put your object pr the horizon in the middle of the photo to emphasise the symmetry.
Tip # 15. Emphasising patterns and textures
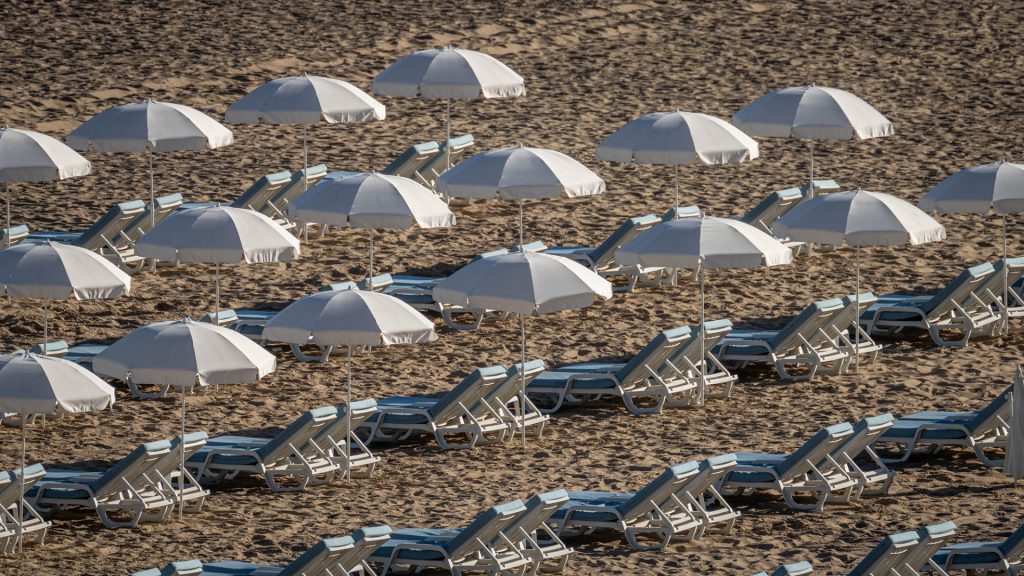
Seascape photography often presents fascinating patterns, textures, and details in the water, sand, or rock formations. Composition allows you to highlight these elements and make them central to your image. You can capture intricate details and create visually captivating compositions by getting close to the subject or using a telephoto lens.
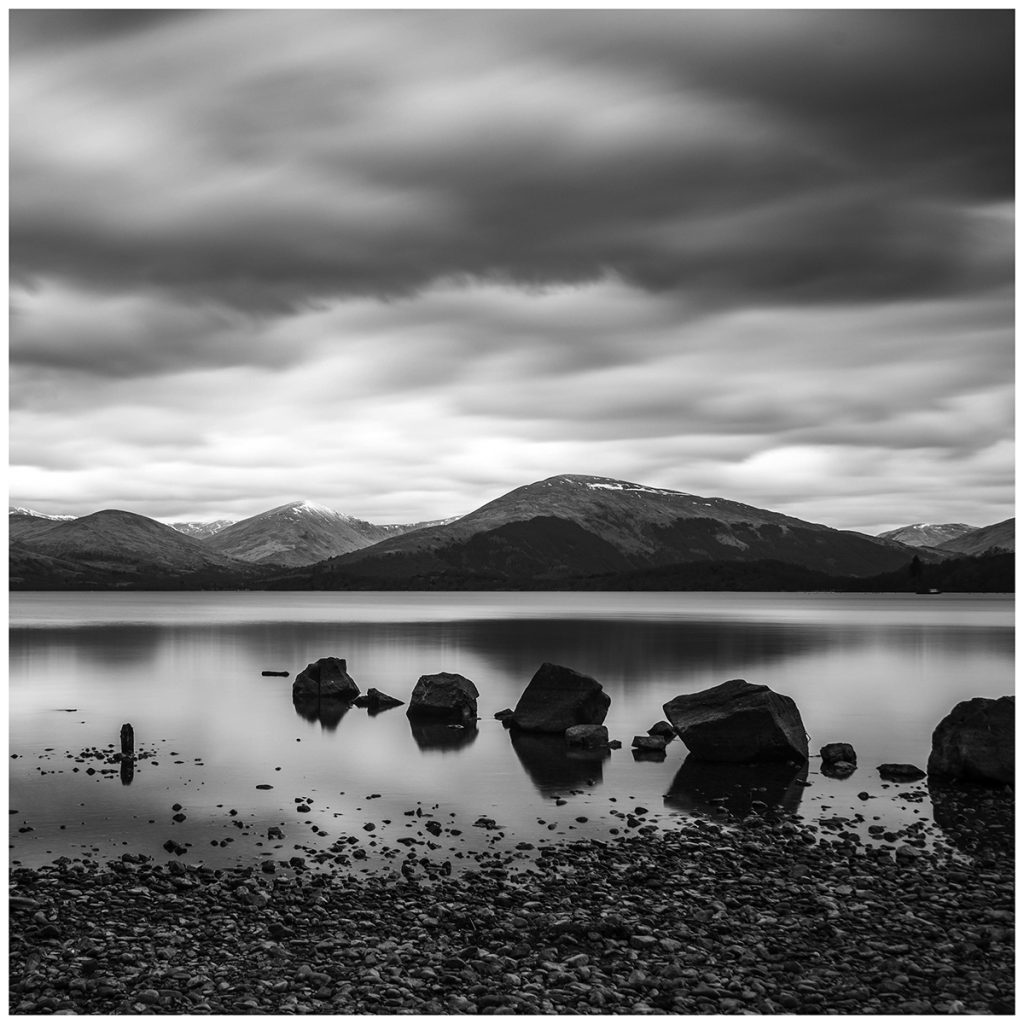
Tip # 16. Maximise Depth of Field
When we talk about camera settings, depth of field is one of the most important technical parameters of the photo. For a landscape or seascape, it should cover the whole area of the picture.
Depth of field correlates with the f-number and the focal length. So, to have a photo in focus everywhere, you need at least f/8. On the other hand, lenses often have the best performance at f/11 – f/13—some of them at f/16, which is the smallest aperture you can use. Smaller apertures (bigger f-numbers) will produce blurred images due to the diffraction.
Many internet resources say you should calculate the hyperfocal range and focus there. Several apps are available for the calculation, but in my experience, that’s overkill. So instead, focus anywhere around 1/3 into the frame, and that’ll do.
Tip # 17. Lighting
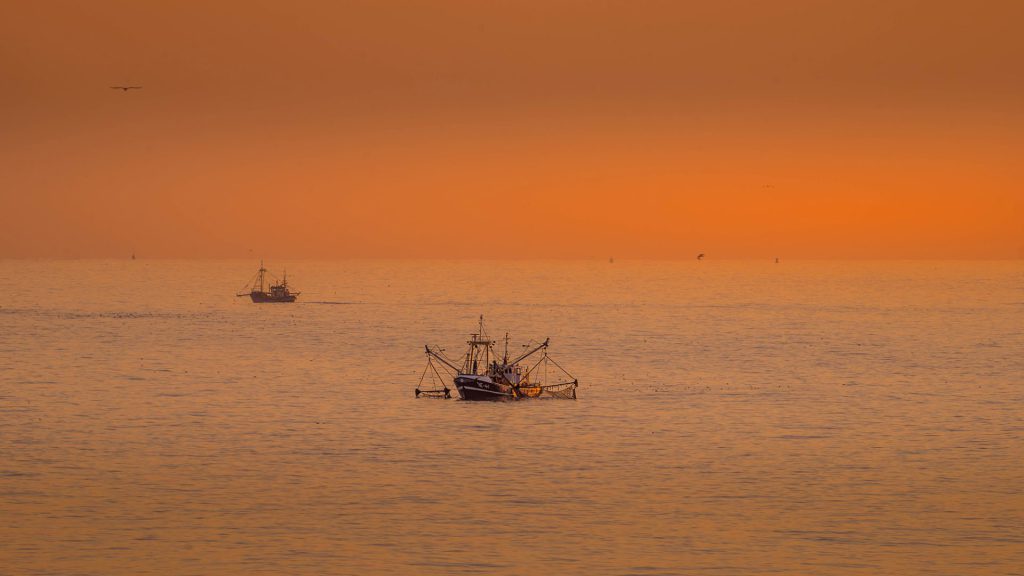
Lighting is essential in any form of photography and greatly influences the mood and atmosphere of a seascape image. Photographers often aim to capture the soft, warm light of golden hour (shortly after sunrise or before sunset) or the dramatic lighting during stormy weather. The interplay of light and shadow adds depth and dimension to the scene.
Tip # 18. Use leading lines
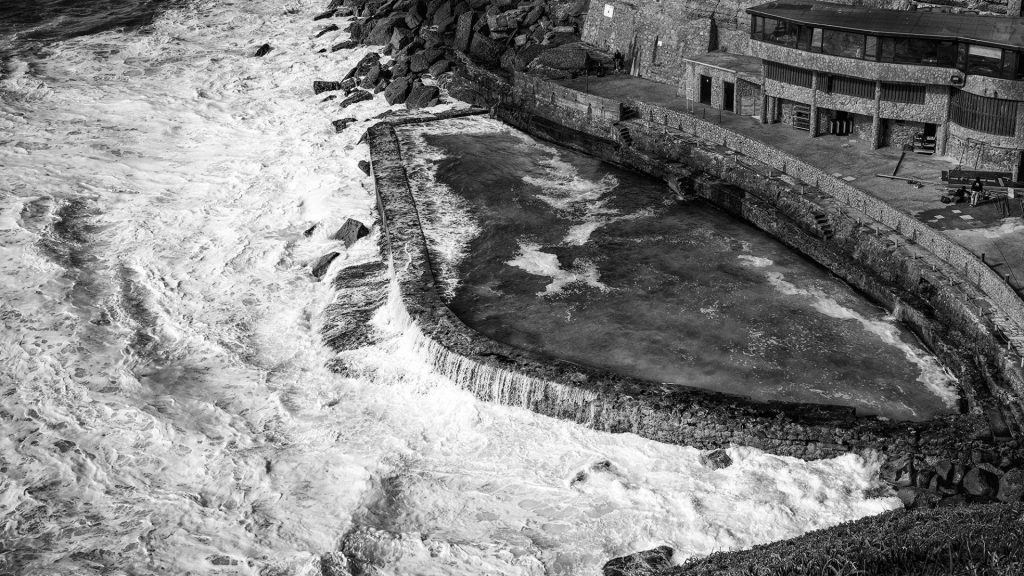
Using leading lines effectively in seascape photography can add depth, guide the viewer’s eye, and create a sense of movement within the image. Here’s how you can make the most of leading lines in your seascape compositions:
- Identify Natural Leading Lines: Look for natural elements in the seascape that can serve as leading lines. These can include the shoreline, waves, rock formations, piers, jetties, or even patterns in the sand. Take your time to explore the location and find elements that naturally guide the viewer’s gaze towards the main subject or point of interest.
- Position the leading lines: When identifying them, carefully position them within your frame to create a visual path or flow. Consider the rule of thirds and place the lines off-centre, adding a sense of balance and visual interest to the composition. Experiment with different angles and viewpoints to find the most compelling positioning of the leading lines.
- Use diagonal or curved lines: Diagonal lines or curves can add a dynamic and engaging element to your seascape compositions. Diagonal lines create a sense of movement and energy, while curved lines can convey a sense of grace and elegance. Look for opportunities to incorporate these lines in your compositions, whether it’s the shape of a wave, a winding shoreline, or the arc of a rock formation.
- Leading lines as foreground elements: Leading lines can also serve as foreground elements that draw the viewer’s eye into the frame. For example, a receding wave can create a line that starts in the foreground and leads towards the horizon. By incorporating such elements in the foreground, you can add depth and dimension to your seascape images.
- Experiment with different compositions: Be bold and experiment with various compositions and viewpoints to make the most of the leading lines. Try shooting from different heights or angles, crouching down low or getting up high, to see how the leading lines change and affect the overall composition. Be open to creative possibilities and explore different perspectives to capture unique and captivating images.
- Balance Leading Lines with Other Elements: While leading lines are important, balancing them with other elements in your seascape composition is crucial. Consider the placement of the main subject or focal point about the leading lines. Ensure that the subject doesn’t get overwhelmed or overshadowed by the lines but rather complements and enhances the overall composition.
- Post-Processing Refinements: After capturing your seascape images, you can further enhance the leading lines during post-processing. Adjustments to contrast, saturation, and clarity can help emphasise the lines and make them more prominent within the image. However, be mindful not to over-process or make the lines appear unnatural. Instead, aim for a natural and balanced enhancement that complements the overall aesthetics of the photograph.
Remember, leading lines are powerful compositional elements but should serve a purpose in your image. For example, they should guide the viewer’s eye towards the main subject or create a visual journey within the frame.
Tip # 19. Timing and keeping an eye on the weather
Timing is crucial when photographing seascapes. Photographers often wait for the perfect moment when the tide, waves, and weather conditions align to create the desired effect. For example, high tides and stormy weather can result in powerful waves crashing against rocks, while low tides can expose interesting textures and formations on the beach.
The standard approach is to shoot around sunrise and sunset. This is, of course, correct, with some exceptions. The sea gets the best colour when the sun is high in the sky. This is especially true when you shoot from heights like cliffs or dunes. Depending on the seabed and water depth, you could get some deep blue or blazing cyan.
Another option to shoot during the day is to photograph the beach. Harsh, intense, filling light removes all ugly shadows from the beach, making it even in colour and lighting. This type of photo is characteristic of paradise beaches, so don’t disregard it.
Before my shoots on the beach, I always check the weather forecast, considering the sun, the tides and the cloud cover. For a raging sea, you need to go out with strong winds. This can give stunning images, especially in combination with the drifting sand. An oncoming rainstorm can create threatening, steel-blue skies over the sea. A local cloud cover, lit from below by the setting sun, often makes for spectacular skies. It is a continuous play of water, light, sand and dynamics.
On our west coast, the sun does not rise over the sea but behind the eastern row of dunes. That means the tide line is in shadow at first light. However, that first light can illuminate the clouds very nicely. So, ensure you arrive in advance in the morning if you are looking for beautifully coloured skies.
At sunset, it can be interesting to stay a bit longer. This is because contrasts are less, colour tones become softer, and the often longer shutter speeds also create more colour saturation.
See also my blog weather-and-landscape-photography.
Tip # 20. Know the Tides
Another aspect closely related to timing is, of course, considering the tides. So don’t start photographing before you know the current and coming tide. There are several reasons for this. First, to stay safe and second, to use creative possibilities.
Many photographers push their limits to get a great image. This can sometimes involve a certain amount of risk. We don’t do this because we’re adrenaline junkies but because we know there’s potential for a great image. Still, we don’t do this without knowing the consequences and dangers. Knowing if the tide is coming in or going out means you can better navigate the cost safely.
Photographing seascapes without knowing the tide is like summiting a mountain without any preparation. The risk of getting in trouble is significant. In some areas, the tides can come quickly and surprise you while you are concentrated and close to the action. Taking the tides into account will protect yourself and your valuable gear.
Remember to stay safe and be mindful of the changing tides while shooting. Tides can vary depending on the location and can be affected by factors such as lunar cycles and weather conditions. Therefore, it’s essential to double-check tide information before each shoot, as it may fluctuate slightly from the predicted times.
The beach is shaped day by day by the influence of seawater. A tide mark forms when the water is at its highest during high tide. This is a clear line of rubbish, weeds, shells and other things washed up. A short beach full of footsteps and debris on the tide line. I don’t like this much in my photo and prefer ebb or low tide.
The tidal zone is between the tide mark and the low-tide line. It is a particular stretch and often forms part of my compositions. Twice a day, this stretch of beach becomes land, and twice a day, it is flooded. In this tidal zone, the action of the water often creates beautiful, photogenic structures and small pools that reflect the sky beautifully. I wouldn’t say I like photographing at high tide.
The second reason it’s essential to know the tide is purely creative. It’s part of planning your photograph.
If you find a beautiful beach, then it’s probably during low tide that it becomes truly magical. You will see all the incredible textures and patterns hidden in the sand at low tide. Unfortunately, during high tide, these are underwater, and the beach isn’t probably nearly as photogenic.
If you want to photograph your beautiful beach before sunrise and at low tide, you should do some planning and wait for the right moment. It would feel like a waste if you arrived to realise that it is high tide.
The tides can significantly affect your seascape images’ composition and visual impact. Here’s why:
- Access to Different Features: The tide level determines which features and elements will be visible or submerged. Certain rocks, tide pools, or coastal formations may be covered by water at high tide, limiting your compositional options. On the other hand, at low tide, more of the shoreline and exciting textures, such as exposed rocks or sand patterns, may be revealed, providing opportunities for unique compositions.
- Movement and Flow: Tides influence the movement and flow of the water, which can significantly impact the dynamic elements in your seascape photographs. Photographing during incoming or outgoing tides can create interesting patterns and textures in the water as it interacts with the shoreline. Waves crashing against rocks or receding water can add drama and energy to your images.
To effectively plan your seascape photography around tides, consider the following:
- Research Tide Charts: Check local tide charts or consult reliable sources to determine the high and low tide times before heading out. Many online resources and smartphone apps provide accurate tide information based on location. I use “My Tides” and “tides planner”.
- Scout the locations in advance: Visit your chosen location ahead of time, ideally during both high and low tide, to understand how the tides affect the landscape. Take note of interesting features that may be hidden or revealed at different tide levels. This will help you plan your compositions accordingly.
- Timing: Decide whether to capture the scene during high, low, or somewhere in between to achieve the desired look and feel. Consider how the water’s movement and the sun’s position interact with the landscape to create visually engaging images.
- Composition: Use the knowledge of the tides to inform your compositions. For example, you may want to focus on exposed foreground elements, such as rocks or tide pools during low tide. During high tide, you may emphasise the power of waves crashing against cliffs or capturing reflections in the receding water.
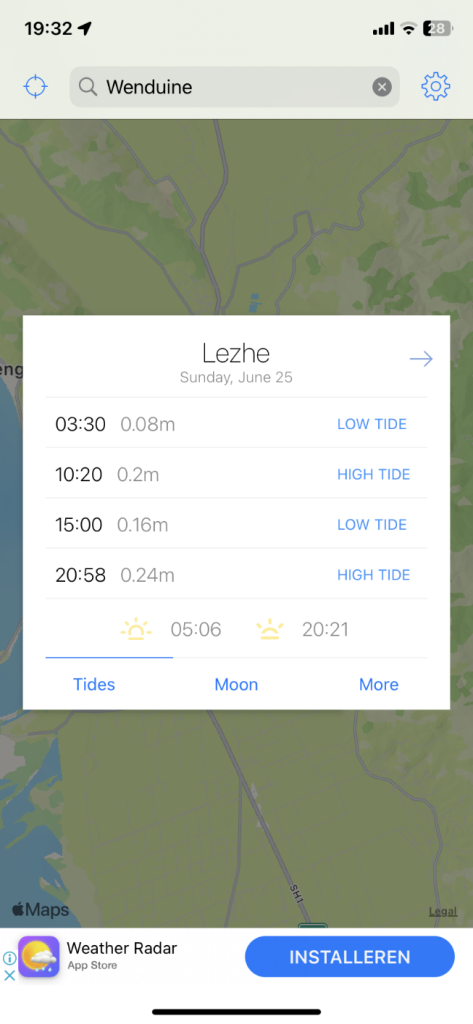
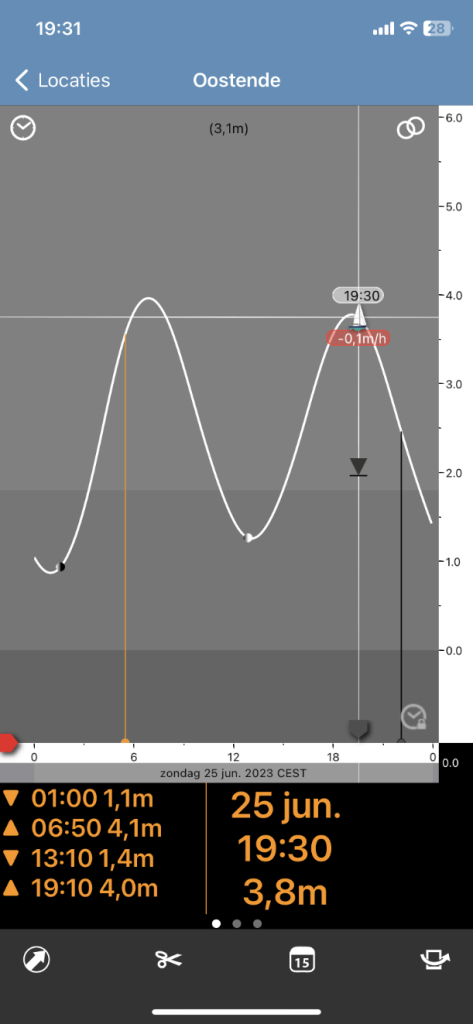
Screenshot of the Apps My Tides (left) and Tides Planner (right) showing low and high tides
Tip # 21. Check the weather
Use a reliable App to check up on the weather and, even better, more than one. One of the most exciting parts of this kind of photography is its unpredictability. You can even have four seasons in a day in some parts of the world. Arm yourself with as much as possible knowledge of the conditions as possible. This includes temperature, wind, wind gusts, rain, sunrise, and sunset.
Changeable weather, especially during the winter months, can catch you by surprise. Make sure you are wearing suitable footwear and some waterproof jackets. By getting out in the rain, fog, mist and snow, you will learn to overcome challenges and adapt to the seascape. Another benefit of storms is the number of dramatic skies and the possibility of rainbows.
Tip # 22. Use a sturdy tripod for seascape photography
While a tripod is not strictly necessary for seascape photography, it can be a precious tool with several benefits, especially if you are getting close to the action. A solid tripod is among the most essential pieces of equipment. It’s a false economy to invest thousands in a camera and then purchase a cheap tripod.
Here are some reasons why using a tripod can enhance your seascape photography:
- Stability: Tripods provide stability, which is especially important when shooting in low light conditions or using long exposure techniques. By using a tripod, you can ensure sharp and crisp images, even with slower shutter speeds. This stability lets you focus on composition and fine-tune your settings without worrying about camera shake.
- Long Exposures: Long exposure photography is popular in seascape photography to create smooth, ethereal effects on the water or capture movement in the clouds. See tip ###.
- Precise Composition: Seascape photography requires careful composition to create balanced and visually pleasing images. A tripod lets you precisely frame your shots, make minor adjustments, and keep the camera level. This is especially useful when aligning horizon lines or incorporating leading lines into your composition.
- Focus Stacking: In certain situations, such as when capturing both a foreground element and a distant landscape in sharp focus, focus stacking may be necessary. Focus stacking involves taking multiple shots at different focal points and blending them in post-processing to achieve a greater depth of field. Using a tripod ensures that the camera remains in the same position for each shot, making the blending process smoother and more accurate.
- Patient Waiting: Seascape photography often requires patience and waiting for the perfect moment, such as capturing the ideal wave or the right light. Having your camera mounted on a tripod lets you keep it in position. At the same time, you wait for the decisive moment, saving you from holding the camera for extended periods and potentially missing the shot.
That being said, there may be situations where using a tripod is not practical or necessary, such as when shooting handheld to maintain mobility or capturing spontaneous moments. It ultimately depends on your shooting style, working conditions, and specific creative vision for your seascape photographs.
If you use a tripod, choose one sturdy, lightweight, and easily adjustable to different heights and angles. This will ensure reliability and convenience for your seascape photography adventures.
Many brands offer good quality, and they provide a range of choice of designs. For my work, I use a sturdy carbon and waterproof Sirui tripod. But there are occasions when I want to travel light. Then I use a smaller, lighter travel tripod that fits inside my suitcase or backpack.
Some extra tips for using a tripod:
- If it gets hit by a salty water wave, rinse it with the freshwater or put it in the shower when you return home.
- Dip it into the sand for some centimetres while shooting on the beach. This will help to increase its resistance to shacking and give it more stability.
- You still need to hold it while in the middle of the rushing water.
- Put some oil to fix stiff joints.
- Put your backpack on the hook to make the tripod heavier and more stable. But ensure the wind doesn’t sway your backpack and the tripod.
Tip # 23. What is the best camera for seascape photography?
The “best” camera for seascape photography ultimately depends on your specific needs, preferences, and budget. However, there are several camera options available that can produce excellent results in seascape photography. Here are some factors to consider when choosing a camera:
- Image Quality: Look for a camera with a high-resolution sensor and good low-light performance. A camera with a larger sensor, such as a full-frame or APS-C sensor, generally produces better image quality and allows for more detailed and dynamic range-rich photographs.
- Weather Sealing: Seascape photography often involves shooting in challenging conditions, including saltwater spray, wind, and sand. Opt for a weather-sealing camera to protect it from the elements and ensure its durability and longevity.
- Dynamic Range: Seascape scenes often have a wide range of contrast between the bright sky and darker foreground. A camera with excellent dynamic range capabilities will allow you to capture a broader range of tones and retain details in highlight and shadow areas.
- Autofocus Performance: Consider a camera with reliable autofocus performance, as it can be helpful when capturing fast-moving waves or wildlife in the seascape environment. Look for cameras with advanced autofocus systems that offer fast and accurate tracking.
- Lens Options: Consider the availability and range of lenses compatible with the camera system. Seascape photography can benefit from various lenses, such as wide-angle lenses for expansive views or telephoto lenses for capturing details and compression effects. A range of lens options will give you more flexibility in capturing different perspectives and compositions.
- Handling and Ergonomics: Ensure the camera feels comfortable in your hands and has intuitive controls. You’ll likely be spending long periods shooting seascapes, so having a camera that can easily navigate and adjust settings will make your experience more enjoyable and efficient.
- Budget: Set a budget that aligns with your needs and priorities. Investing in high-quality lenses is as important as the camera body, as lenses play a significant role in image quality.
Some popular camera choices for seascape photography include full-frame DSLRs such as the Canon EOS 5D series or Nikon D850, mirrorless cameras like the Nikon Z7 II, Sony Alpha series or Fujifilm X-T4, and advanced APS-C cameras like the Nikon Z50. However, these are just a few examples, and many other cameras can deliver excellent results in seascape photography.
Ultimately, the “best” camera for seascape photography is the one that suits your needs, preferences, and budget, allowing you to capture beautiful coastal scenes in a way that aligns with your artistic vision.
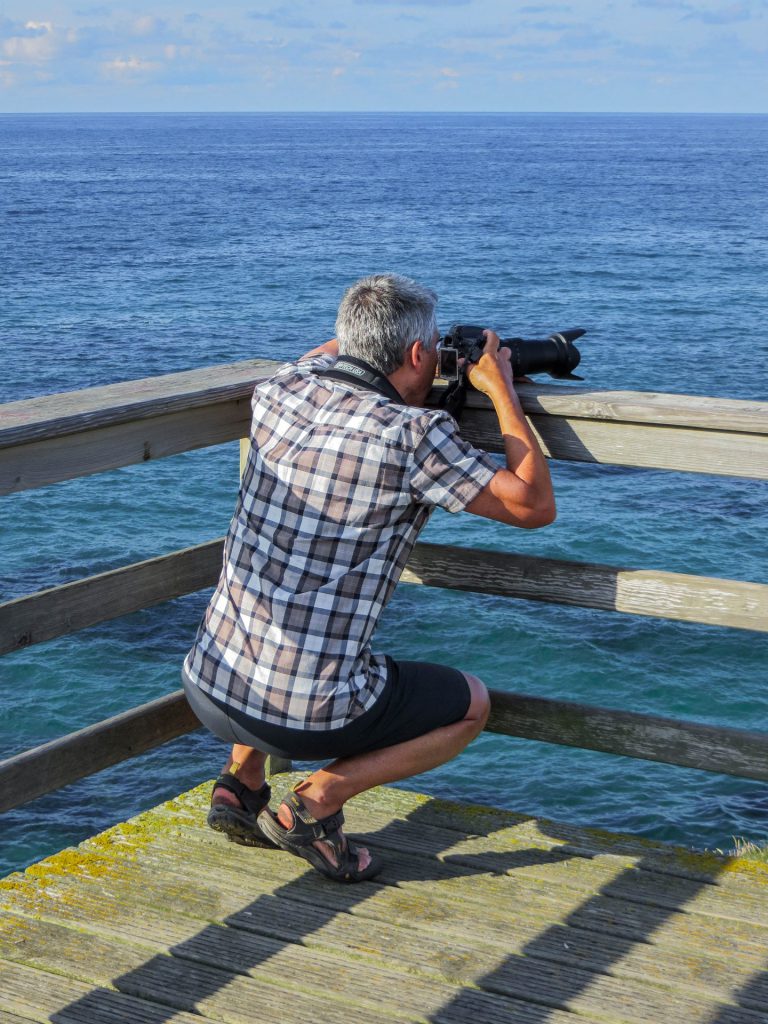
Tip # 24. Chose the appropriate lens
When it comes to lens selection for landscape photography, there are a few key factors to consider:
- Wide-Angle Lens: A wide-angle lens is a must-have for landscape photography as it allows you to capture a broader view and encompass more of the scene. Look for lenses with focal lengths of 16mm to 35mm (on a full-frame camera) or their equivalent on crop sensor cameras. These lenses enable you to capture expansive landscapes, emphasise the foreground, and create a sense of depth in your images.
- Aperture: Opt for a wide-angle lens with a wide maximum aperture, such as f/2.8 or wider. A wider aperture allows more light to enter the lens, which can be beneficial in low-light situations and when you want to create a shallow depth of field for selective focus.
- Image Quality: Look for lenses with excellent image quality, sharpness, and minimal distortion. Consider lenses from reputable manufacturers known for their optical performance.
- Focal Length Versatility: Depending on your shooting style and the type of landscapes you capture, you may also want to consider a zoom lens with a versatile focal length range. Zoom lenses with focal lengths like 24-70mm or 24-105mm (on a full-frame camera) provide flexibility, allowing you to adjust the composition without changing lenses.
- Filter Compatibility: Landscape photography often benefits from using filters, such as neutral density (ND) filters and polarising filters. Ensure the lens you choose has a filter thread or a system compatible with your desired filters. For example, look for lenses with a front element that doesn’t rotate when focusing, making it easier to use graduated ND filters.
- Weight and Portability: Consider the weight and portability of the lens, especially if you plan to hike or travel with your gear. Lightweight lenses can make a significant difference when carrying your equipment over long distances.
Again, the classic approach is to mount the widest lens and rush ahead with snapping pictures. But unfortunately, this can limit your creativity and photography opportunities.
Of course, the wide-angle lens is still a good choice. But other lenses can be helpful too. For example, wide lenses exaggerate the foreground and make all distant objects much smaller than they appear to the naked eye.
But a longer lens squeezes the perspective and avoids excessive attention to the foreground. You can compose a tighter shot or photograph jumping dolphins. Or capture distant sun rays or make a wave your main subject.
It is sometimes best to carry a versatile travel zoom lens; a 24-105mm is a perfect example. I use a very versatile 28-200 mm lens when I have to travel light.
It’s worth noting that lens selection can vary depending on personal preferences and shooting style. For example, some landscape photographers enjoy using telephoto lenses to isolate specific elements or compress the perspective. However, a wide-angle lens remains the most popular choice for capturing the vastness and grandeur of landscapes.
Ultimately, the ideal lens for landscape photography depends on your budget, camera system, specific shooting requirements, and artistic vision. However, investing in high-quality lenses is often a good idea, as they can significantly impact the overall image quality and your ability to capture stunning landscape photographs.
Tip # 25. Shoot in RAW
I will always shoot in raw. This means I can maximise the detail I capture in an image. It gives me greater control over the image and gives me greater control over the image in post-production. It might mean the size is larger, but it’s worth it for the outcome. Shooting in JPG always entails some compression and loss of information, and your camera will automatically apply some edits out of your control. Raw images, out of the camera, are not so vibrant but will be more than compensated by the editing possibilities.
Tip # 26. Post-Processing:
Post-processing is an integral part of seascape photography. It involves using software like Adobe Lightroom or Photoshop to fine-tune the image’s exposure, colour balance, contrast, and sharpness. Then, adjustments are made to bring out the desired mood and enhance the visual impact of the photograph while maintaining a natural look.
Post-processing plays a significant role in seascape photography as it allows photographers to enhance their images, refine the mood, and bring out the full potential of the captured scene. Here are some key reasons why post-processing is important in seascape photography:
- Exposure and Dynamic Range: Seascape scenes often have a wide dynamic range, with bright skies and darker foregrounds. Post-processing allows you to adjust the exposure and tonal range to ensure that the highlights and shadows are well-balanced. By recovering details in the shadows and highlights, you can create a more visually appealing image with a better representation of the scene’s tonal range.
- Colour Enhancement: Post-processing enables you to enhance and adjust the colours in your seascape photographs. You can fine-tune the white balance when setting the black and the white point to achieve accurate colour representation or creatively manipulate it to evoke a specific mood. For example, adjustments to saturation, vibrance, and individual colour channels can help intensify the blues of the water or enhance the warm tones during sunrise or sunset, creating a more captivating and visually pleasing image.
- Contrast and Clarity: Post-processing can enhance the contrast and clarity of your seascape images. Adjusting the contrast can make the scene appear more dynamic and add depth, while increasing clarity can enhance details and textures, particularly in the water, rocks, and other elements. In addition, these adjustments can bring out the delicate nuances of the scene, creating a more visually striking image.
- Spot Removal and Cleaning: Seascape images often have unwanted distractions or imperfections, such as debris on the beach, sensor spots, or lens flares. Post-processing tools, like spot healing and cloning, enable you to remove or clean up these distractions, ensuring a cleaner and more polished final image. This allows you to present the scene in its best form, free from unwanted elements that may detract from the overall impact.
- Cropping and Composition Refinement: Post-processing allows you to refine the composition of your seascape photographs. You can make minor adjustments to the cropping to improve the overall balance, remove distractions at the edges, or experiment with different aspect ratios. Additionally, you can straighten horizons, correct perspective distortions, and fine-tune the overall composition to enhance the image’s visual impact.
- Sharpening and Noise Reduction: Post-processing tools provide sharpening and noise reduction options, particularly useful in seascape photography. Sharpening can enhance the details in the water, rocks, and other elements, making them crisper and more defined. Noise reduction helps reduce the noise or grain present, especially in long exposure or high ISO images. These adjustments result in cleaner, more detailed, visually appealing seascape photographs.
- Creative Expression: Post-processing allows photographers creative expression and personal style. It will enable you to apply artistic filters, add vignettes, or experiment with different tones and effects to convey a specific mood or atmosphere. Using your artistic vision during post-processing can elevate your seascape images and make them unique representations of your creative intent.
It’s important to note that while post-processing can significantly enhance seascape photographs, striking a balance and maintaining a natural and realistic appearance is essential. The goal is to improve the inherent beauty of the scene and create a visually captivating image that accurately represents the emotions and sensations experienced at the time of capture.
Luminar is a precious alternative to Lightroom or Photoshop if the subscription to Adobe is too expensive for your budget, and it is very user-friendly. It will require, for example, only one click to remove sensor spots. Luminar Neo uses artificial intelligence to automate many things for which you would need several steps and clicks in Photoshop or Lightroom.
Tip # 27. Using Photoshop in post-processing
While Adobe Photoshop is not necessary for post-processing seascape photography, it can be a valuable tool for advanced editing and retouching. While software like Lightroom or other dedicated photo editing applications can handle most of the editing tasks for seascape photography, Photoshop offers additional capabilities to enhance your creative possibilities. Here are some reasons why you might consider using Photoshop:
- Advanced retouching: Photoshop provides powerful tools for detailed retouching, such as removing unwanted objects or distractions from your seascape images. It offers precise selection tools, content-aware fill, and cloning capabilities that allow you to remove or replace elements in the scene seamlessly.
- Blending exposures: Seascape photography often captures a wide dynamic range, from bright skies to darker foregrounds. Photoshop’s blending options, such as HDR (High Dynamic Range) merging or exposure blending techniques like luminosity masks, can help you create a well-balanced and natural-looking final image by combining multiple exposures.
- Panoramic stitching: If you capture a series of images to create a panoramic seascape, Photoshop’s Photomerge feature can seamlessly stitch them together, ensuring smooth transitions and accurate alignment. This allows you to capture a wider field of view and maintain high-resolution details.
- Creative editing: Photoshop offers a wide range of creative tools, filters, and adjustment layers that can add unique effects and artistic enhancements to your seascape images. This includes applying textures, creating composite images, adding dramatic skies, or using various blending modes to achieve specific looks.
- Fine-tuned adjustments: Photoshop provides more precise control over specific elements of your image through layers and masks. This allows you to selectively adjust colours, tones, and details in different parts of the seascape, giving you greater control over the final result.
While Photoshop can be a valuable asset for advanced editing, it is optional for all post-processing needs. Many photographers use Lightroom or other dedicated editing software to achieve stunning seascape images. The choice of software depends on your specific requirements, editing preferences, and the level of complexity you desire in your post-processing workflow.
Tip # 28. The use of Luminar Neo in post-processing
Luminar Neo is one of the most advanced software using artificial intelligence. This product is constantly updated, and with each update, more and more features are added or refined. For example, the most recent update added HDR Merge, Focus Stacking and Upscale AI. Luminar Neo can be used as a stand-alone product and also as a plugin for LightRoom or PhotoShop.
To use Luminar Neo for seascape photography, follow these steps:
- Import your photos: Launch Luminar Neo and import your seascape photos into the software. You can do this by clicking on the “+” symbol or using the “Import” option. Next, select the folder or individual images you want to work on.
- Alternatively, start from Lightroom, where you installed Luminar as a plugin and then go to Luminar Neo.
- Adjust basic settings: Once your photos are imported, you can make basic adjustments to improve the overall look. Luminar Neo offers various tools such as exposure, contrast, highlights, shadows, saturation, and white balance. Use these tools to adjust the basic settings according to your preference.
- Enhance colours and tones: Seascape photography often relies on vibrant and well-balanced tones. Luminar Neo provides advanced tools like the Accent AI filter, AI Sky Enhancer, AI Structure, and AI Enhance that can automatically enhance the colours and details in your photos. Experiment with these tools to enhance the visual impact of your seascape images.
- Refine the composition: The composition is vital in seascape photography. Use Luminar Neo’s cropping and rotating tools to fine-tune the composition of your images. You can also experiment with the AI Composition tool, which provides suggestions to improve the overall composition based on the subject and elements in your photo.
- Remove distractions: Sometimes, unwanted elements can detract from the beauty of a seascape. Luminar Neo offers powerful tools like the Erase tool and Clone & Stamp tool to remove distractions such as people, boats, or other objects that may be present in your photos. Use these tools carefully to ensure natural-looking results.
- Apply creative filters: Luminar Neo provides a wide range of creative filters and effects that can add a unique touch to your seascape images. Experiment with filters like Orton Effect, Sunrays, Golden Hour, Dramatic, and various others to enhance the mood and atmosphere of your photos.
- Enhance the sky or replace the sky with a new one and automatically relight the whole scene in balance with the new sky.
- Fine-tune with local adjustments: To further enhance specific areas of your seascape photos, you can utilise Luminar Neo’s local adjustment tools. These tools allow you to selectively adjust particular image parts, such as the sky, water, or foreground. Adjust parameters like exposure, contrast, saturation, and sharpness to achieve the desired effect.
- Save and export: Once satisfied with the edits, save your work within Luminar Neo’s project file format to preserve all the adjustments. If you want to share or use your photos outside Luminar Neo, export them in a suitable format, such as JPEG or TIFF.
Remember, these steps are just a starting point, and the exact adjustments will depend on your preferences and the specific characteristics of your seascape photos. So, explore Luminar Neo’s features, experiment with different settings, and let your creativity guide you to create stunning seascape images.
See also my blog on using Luminar Neo for landscape photography: Luminar NEO post-processing of landscape photos.
More information about Luminar Neo can be found here: Luminar Neo – info and more info about the prices here: Luminar Neo prices.
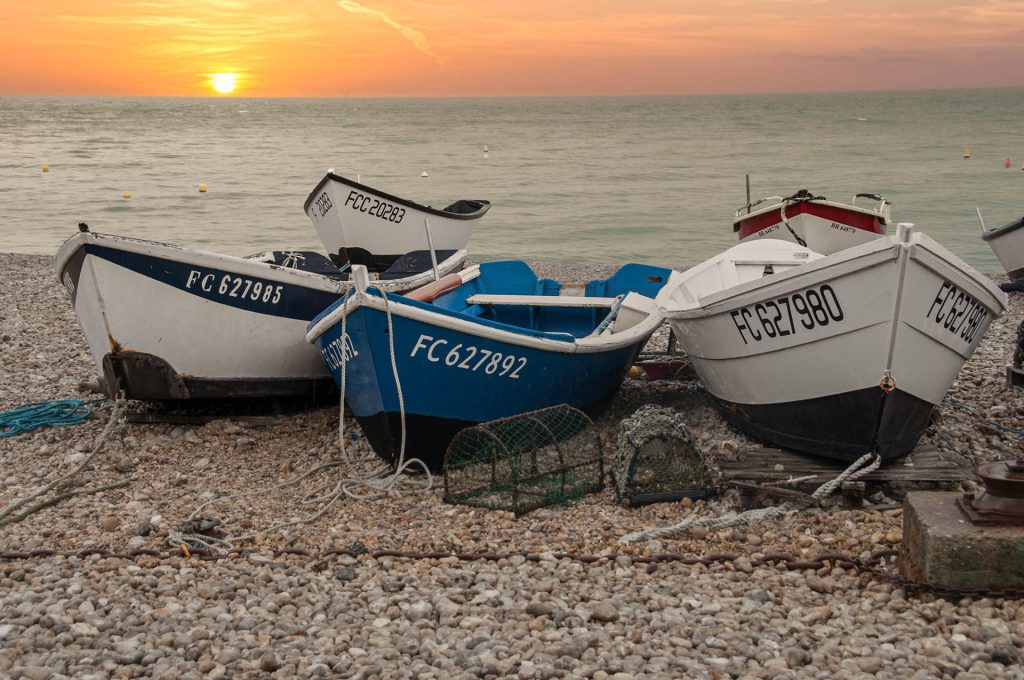
Tip # 29. Create a sense of serenity
Creating a sense of serenity in seascape photography involves capturing and conveying the tranquillity, calmness, and peacefulness associated with the sea. Here are some techniques to help you achieve that:
- Choose the Right Time: Serenity is often associated with quiet moments and gentle atmospheres. Consider shooting during the golden hours, which are the hours around sunrise and sunset. The light is soft, warm, and diffused during these times, creating a serene ambience. The absence of harsh shadows and the beautiful colours of the sky contribute to the overall sense of serenity in your seascape images.
- Seek Calm Waters: Look for areas where the water is calm, such as sheltered bays or lagoons. Calm waters create smooth reflections and a sense of stillness, enhancing the feeling of serenity in your photographs. Extended exposure techniques can further smooth the water’s surface, creating a dreamy and serene effect.
- Simplify the Composition: Keep your composition clean and uncluttered to evoke a sense of tranquillity. Remove any distracting elements that may disrupt the peaceful atmosphere. Instead, focus on a single main subject or focal point that exudes serenity, such as a lone rock, a boat on calm water, or a distant horizon. Simplifying the composition allows the viewer to focus on the scene’s serenity.
- Utilize Negative Space: See tip # 8
- Long Exposure Techniques: See tip # 12
- Soft Colours and Tones: Use a soft colour palette and gentle tones to enhance the serenity in your seascape images. Pastel hues, muted blues, and earthy tones can create a peaceful atmosphere. Please pay attention to the white balance and adjust it to achieve the desired soothing colour tones.
- Include Minimalist Elements: See also tip # 31
- Capture Emotive Light: Pay attention to the quality of light in your seascape photographs. Soft, diffused light can create a serene atmosphere. Look for moments when the sunlight gently illuminates the scene or when soft, subtle rays break through the clouds. These instances can evoke a sense of tranquillity and serenity.
Remember, capturing a sense of serenity in seascape photography is about creating a visual experience that allows viewers to connect with the calmness and peacefulness of the scene. You can create compelling seascape images that evoke a serene atmosphere by carefully considering the time, composition, colours, and light.
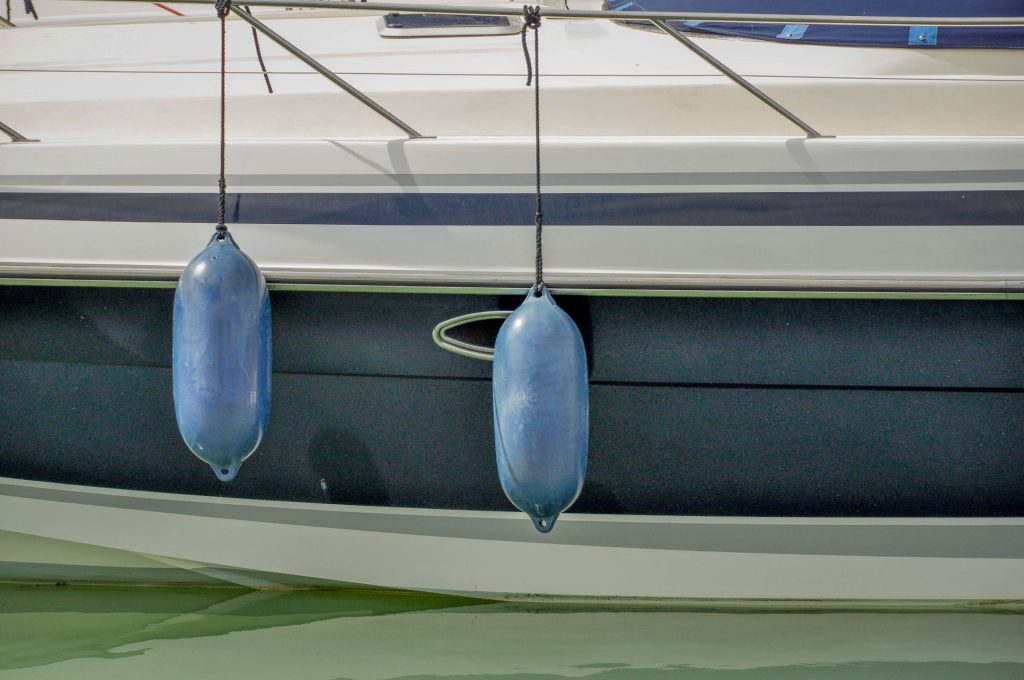
Tip # 30. Turn your seascape into black and white
Using black and white in seascape photography can be a powerful artistic choice that adds depth, drama, and timeless quality to the images. Here are a few ways in which black and white can enhance seascape photography:
- Emphasizing texture and contrast: Black and white photography allows you to focus on the textures and patterns in the scene, such as the rippling waves, rocky cliffs, or clouds in the sky. By removing colour distractions, you can create intense contrasts and enhance the overall visual impact of the image.
- Enhancing mood and atmosphere: Black and white images evoke emotions and create a sense of drama. By stripping away colour, you can emphasise the mood and atmosphere of the scene, such as capturing the brooding and stormy nature of a turbulent sea or the serenity of a calm and peaceful shoreline.
- Simplifying the composition: Removing colour simplifies the composition and helps to draw attention to the essential elements within the frame. It allows you to focus on the interplay of light and shadow, leading lines, and the overall composition of the scene. This simplicity can result in a more striking and impactful photograph.
- Overcoming challenging lighting conditions: Seascape photography often involves dealing with harsh lighting conditions, such as bright midday sun or low-light situations during sunrise or sunset. Converting to black and white can help mitigate the challenges of colour casts or uneven lighting. In addition, it allows you to emphasise the tonal range and highlight the interplay of light and dark in the image.
- Creating a timeless aesthetic: Black and white photography has a classic and timeless quality that can add a sense of nostalgia or evoke a sense of timelessness. It removes the distraction of contemporary colour and can make the image feel more artistic and enduring.
When using black and white in seascape photography, it’s important to consider the elements of composition, light, texture, and contrast to create visually compelling images. Experimentation and practice will help you develop an eye for recognising which scenes lend themselves well to black-and-white conversion and how to bring out the best in them.
See also my blog on the-art-of-black-white-landscape-photography-unravelled-in-14-tips.
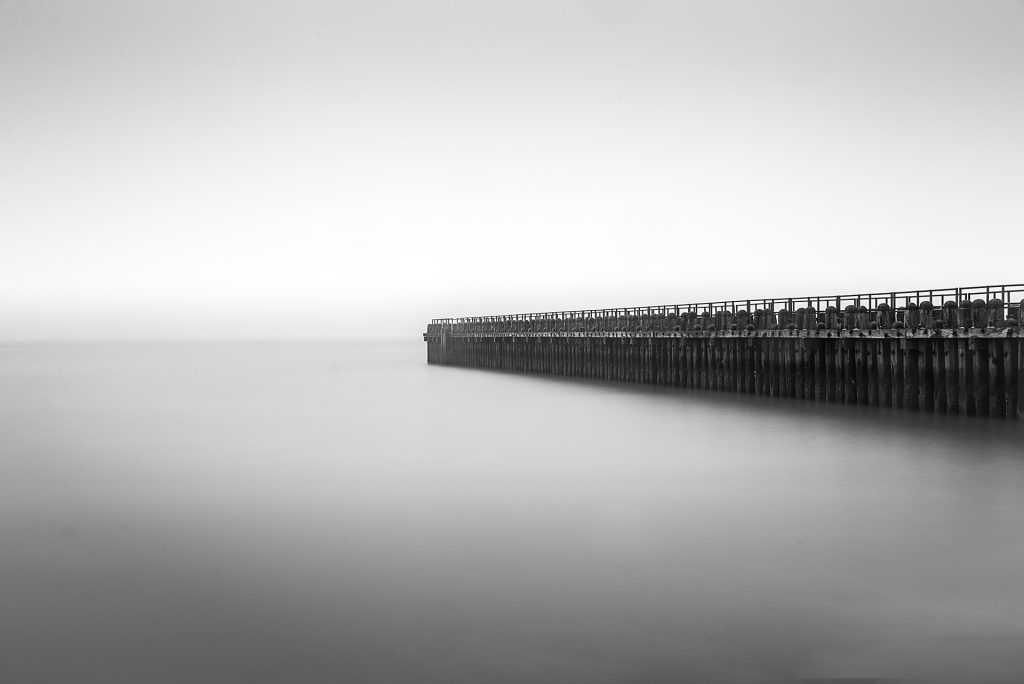
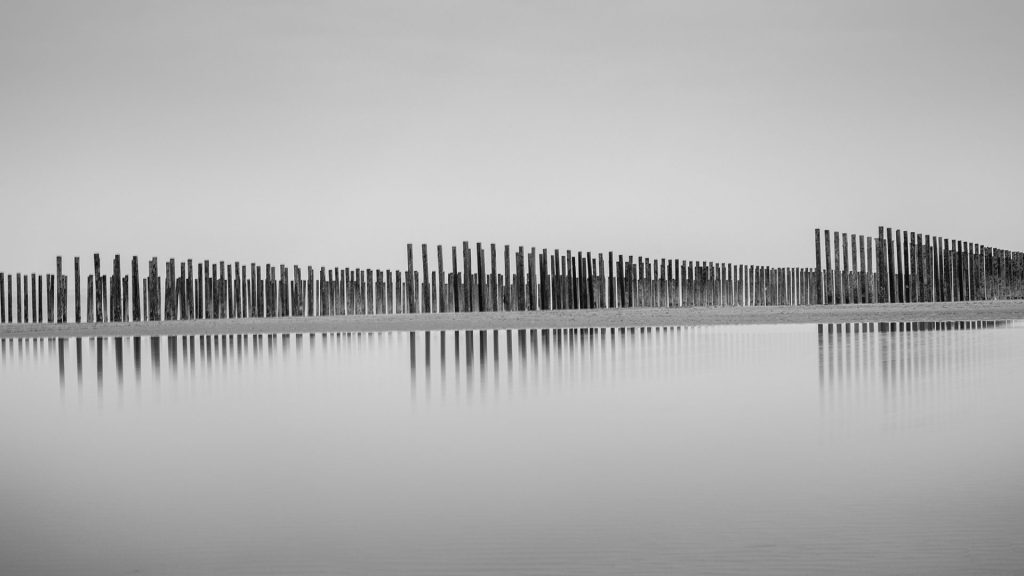
Tip # 31. Go for a minimal fine art approach
Going for a minimal fine art approach can result in stunning and evocative images emphasising simplicity, balance, and a sense of tranquillity. Here are some tips to help you achieve this combination:
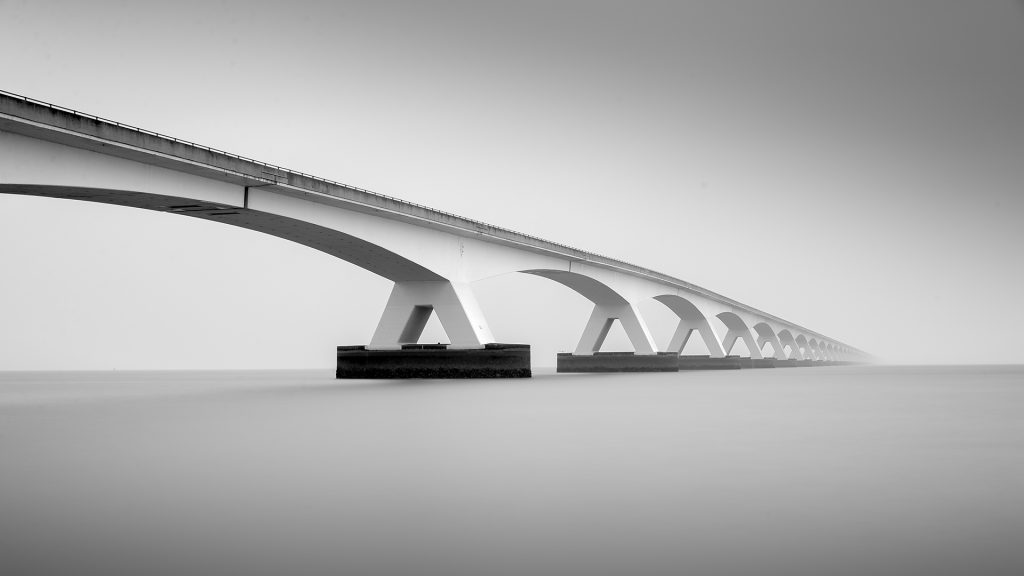
- Simplify the composition: Minimalism reduces elements to their essential forms and creates a sense of visual simplicity. When composing your seascape images, look for clean and uncluttered scenes. Eliminate any distracting elements and focus on the key elements that convey the scene’s essence—whether it’s a solitary rock, a distant horizon, or the interplay of light and water. Keep the composition minimal and allow negative space to create a sense of calm and serenity.
- Embrace symmetry and balance: Minimalism often emphasises symmetry and balance in compositions. Look for opportunities to capture reflections in calm waters, where the horizon line or other elements can be perfectly centred. Symmetry creates a sense of harmony and adds a contemplative quality to the image.
- Pay Attention to Lines and Shapes: Look for strong lines, curves, or geometric shapes in the seascape that can add visual interest to your composition. These elements can lead the viewer’s eye and create a sense of flow or rhythm in the image. For example, incorporate leading lines from the shoreline, jetties, or waves to guide the viewer’s gaze through the frame.
- Seek minimalist colour palettes: Minimal fine art often favours muted or limited colour palettes. Instead, look for soft, pastel tones or monochromatic scenes that enhance the minimalist aesthetic. Subtle shade variations can add depth and dimension to your seascape images while maintaining a serene atmosphere.
- Utilize long exposure techniques: Long exposure techniques can be particularly effective in minimal fine art seascape photography. You can extend exposure times using neutral density filters, resulting in smooth, ethereal effects on the water. In addition, this technique can further simplify the scene by removing distracting details and focusing attention on the essential elements. See tip # 12
- Experiment with minimalist editing: Aim for a minimalist editing approach during post-processing. Keep adjustments subtle and restrained to maintain the simplicity and serenity of the scene. If needed, enhance the tones, contrast, and sharpness, but avoid excessive manipulation that may distract from the minimalist aesthetic.
- Explore Black and White conversion: Converting your seascape images to black and white can enhance the minimalist and fine art qualities. Black and white photography emphasises shapes, textures, and tonal range, allowing the viewer to focus on the composition and form. Experiment with different black-and-white conversion techniques to achieve the desired mood and impact. See tip # 30
Remember that combining seascape photography with minimal fine art is an artistic process, and the style and approach may vary based on personal preferences and creative vision. Develop your unique style and experiment with different techniques to create visually striking and contemplative images that reflect your artistic expression.
Tip # 32. Capture Multiple Images and Blend Them
This tip might not be for you if you don’t use Adobe Lightroom, Adobe Photoshop or another advanced photo editor Like Luminar Neo that allows the use of layers and masks. Still, it can make a significant difference to your seascape photography.
Dealing with waves means that you’re dealing with elements that are constantly changing. Usually, it’s not just one wave in your shot; it’s multiple. Capturing all of them in their prime state can be pretty challenging.
A popular technique to deal with this is capturing multiple images from the same composition. You will likely get waves looking good in different areas by shooting dozens of exposures.
For example, one image might have the perfect water structure in your immediate foreground, another has a nice wave in the middle ground, and a third has a nice splash on a distant rock.
Blending all three images will give you “the perfect” shot. A shot that might not have been possible otherwise.
Tip # 33. Be creative and think out of the box
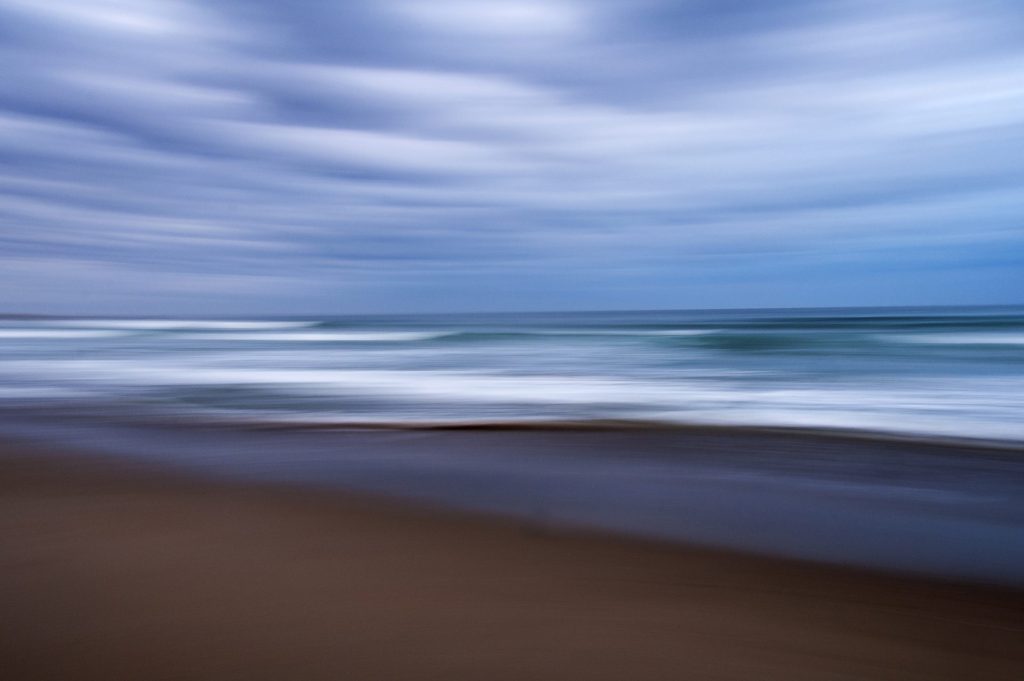
The intended use of blur and motion blur can produce creative and surprising results. Motion blur can be used in various ways. This can be done by photographing moving objects in the landscape with a slow shutter speed, such as clouds and waves moving through the image.
On the other hand, with a static subject, you can also move the camera while the photo is taken. So, move the device up or down while the shutter button is pressed or move from left to right or vice versa. In all these cases, we speak about intentional camera movement (ICM) instead of unwanted camera movement.
Another creative idea is to combine two images of the same scene. One completely blurred and one without blur. With the help of masks in Photoshop, you reveal sharp objects.
Panning (moving the camera horizontally) with moving objects or animals sometimes gives exciting images. At the same time, the background will blur, and there will be some sharpness in the object you follow. If you want the lines or stripes to be straight, do this on a tripod. If you do it handhold, it can add a natural swing.
Tip # 34. Bring lens cleaning tools (wipes or microfiber cloths) and some camera protection
You will soon experience that when you get closer to the waves, your lens quickly gets covered in sea spray. A little water on the front of your lens or filter isn’t probably dangerous for your camera, but it can ruin your image with stains, spots and flare.
That is why I strongly recommend having a couple of microfiber cloths in your pocket. This is something you should have in your backpack.
After wiping off the lens for a while, you will notice that the salty water begins to smudge on the lens and or filter, making the image diffuse and hazy. In this case, use a pre-moistened lens wipe to clean it off. Or take a bottle of water with you. But, again, keep your lens and filter clean not to destroy your photo’s quality.
When you use cleaning cloths to clean your lens, pay extra attention to the sand grains in your cleaning cloth. A tiny grain of sand can make an ugly scratch on your lens.
Depending on the conditions, some people might wish to shield their camera in protective skins but get it with a plastic rain cover or an umbrella. Umbrellas are not that handy when it is windy.
Conclusion about seascape photography:
Seascape photography is unique because it captures the sea’s beauty, power, serenity and surroundings. It showcases the dynamic interplay of light, reflections, textures, and patterns, creating captivating compositions. The images evoke a sense of peace, escape, and a wide range of moods and atmospheres. It allows viewers to appreciate the ever-changing nature of the sea and its connection to the land.
These tips will help you come home with stunning photos of the seaside and enjoy your outdoor adventures.
Let me know about your experiences or remaining questions.
Leave a reply