Introduction
I wrote a blog about waterscapes: waterscape-and-seascape-photography some time ago. In this blog, I’ll discuss a specific aspect of landscapes and waterscapes: waterfall photography.
Embark on a thrilling adventure with waterfalls as they present a unique and exhilarating challenge in landscape photography. Their cascading beauty is a sight to behold, and capturing their dynamic energy in a photograph is a thrilling task. This isn’t just about taking a picture; it’s about capturing the essence of a waterfall, the very spirit of nature. However, this task requires specific techniques and equipment. With the proper knowledge and tools, you can create stunning images that truly convey the essence of waterfalls through your lens.
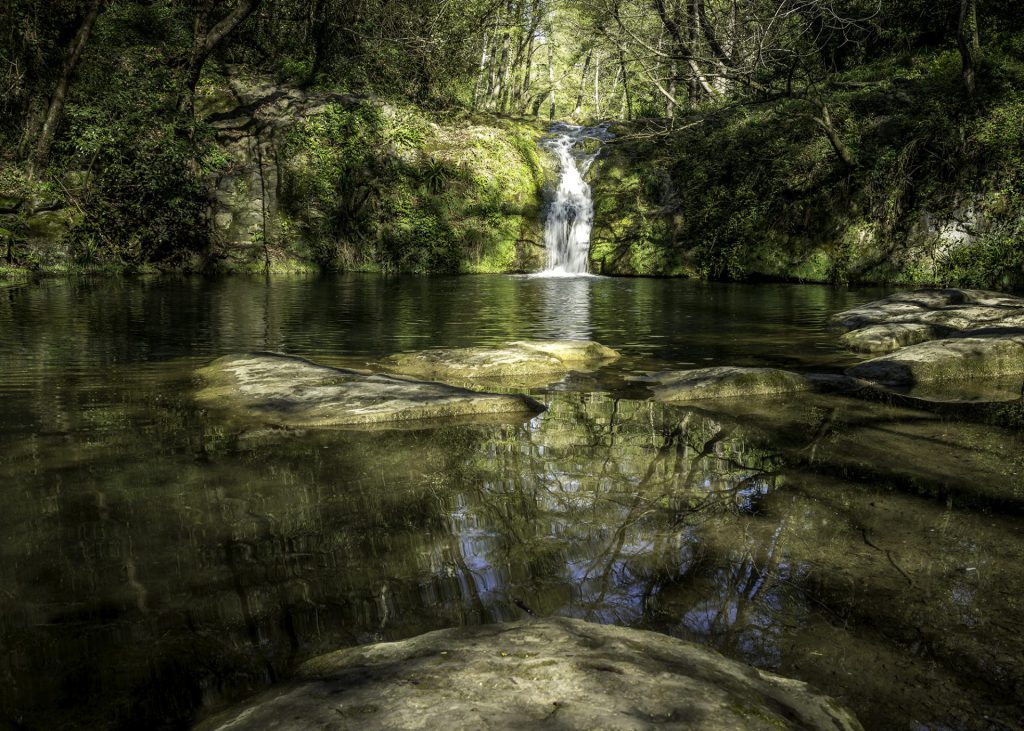
Equip yourself with practical, actionable tips for capturing breathtaking shots of waterfalls. These are not just theoretical concepts but real-world techniques that you can apply immediately. We’ll guide you through the process, from selecting the perfect location and angle to understanding the correct camera settings for capturing the smooth, silky water surface. We’ll also share which settings work best to highlight the force of a vast waterfall. We’ll also provide post-processing knowledge, discuss popular software like Lightroom or Photoshop, and introduce you to an advanced tool called Luminar Neo, which uses artificial intelligence to simplify photo editing. This practical knowledge will immediately enhance your waterfall photographs and boost your confidence, putting you in control of your photography journey.
If you’ve never taken long-exposure waterfall shots, don’t worry – it’s surprisingly easy! With just a few settings and technical aspects to know, you’ll be capturing stunning waterfall images in no time. The rest is all about experimenting and unleashing your creativity.
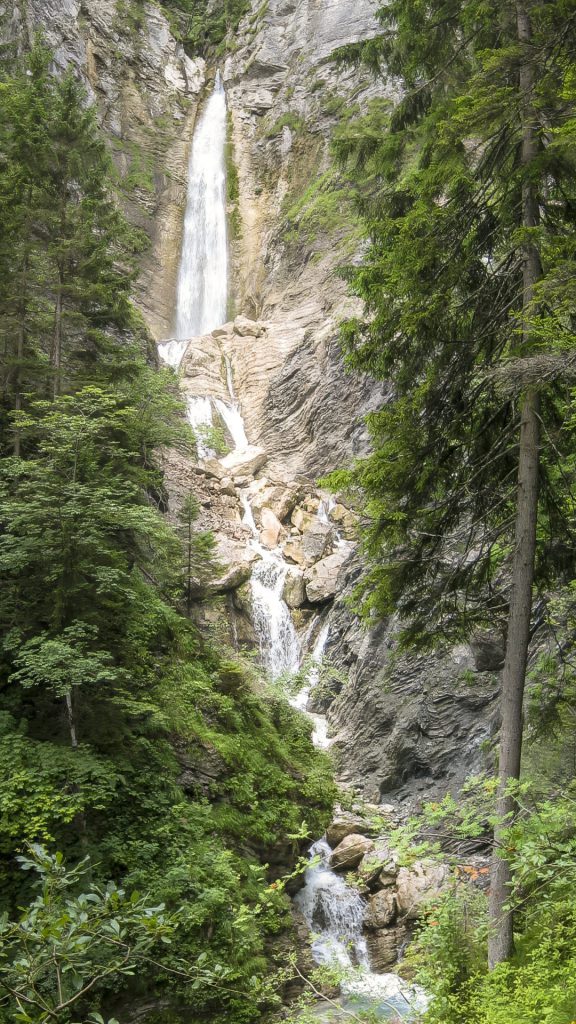
Whether you’re a beginner just starting your landscape photography journey or an experienced photographer looking to enhance your waterfall photography skills, this blog is for you. It’s packed with helpful tips and tricks to take your waterfall photography to the next level.
Content
Tip # 2. A word about your camera:
Tip # 5. Be mindful of your surroundings:
Tip # 6. Choose the right time of the day:
Tip # 7. Choose the right season
Tip # 8. Photograph waterfalls in autumn
Tip # 10. Select a low ISO setting:
Tip # 11. Use a small aperture (High f-stop):
Tip # 12. Bracket your shots if necessary:
Tip # 13. Experiment with shutter speeds:
Tip # 14. Use a timer or remote shutter release
Tip # 17. Edit your waterfall images
Tip # 1. Use a sturdy Tripod:
It’s best to use a longer exposure time to capture the silky-smooth effect of flowing water. A tripod is essential for keeping your camera steady during this extended exposure, thereby preventing any blurriness. If the camera is bumped or moved while the shutter is open, it will result in a blurry shot.
Ensure your tripod is on stable ground and its legs fully extended. Consider using a remote shutter release or the camera’s self-timer function to avoid shaking the camera when pressing the shutter button. Additionally, using a tripod encourages careful consideration of your camera’s placement, which can significantly enhance the composition and framing of your photos.
When choosing a tripod for waterfall photography, you can’t just pick any tripod. It would be best to consider stability and the ability to handle water flow. The tripod you choose should also have low-angle positioning capabilities to enhance the impact of your images by positioning your camera low over the foreground. This can turn a simple waterfall into an impressive photo opportunity. Therefore, take your time and find the right tripod for your photography needs.
I usually use a Sirui-W-2204 Waterproof Carbon Fiber Tripod. It allows me to operate in all weather conditions, even in river beds or on the beach.
Most tripod ball heads can position your camera at a 90-degree angle, allowing you to switch between portrait and landscape orientations for varied compositions. Did you know that using an L-bracket can make your life easier and your work more efficient than ever? Trust me, it’s worth trying!
The only disadvantage of an L-bracket is its size and weight. However, the benefit lies in the ability to set up your tripod in a secure location and effortlessly adjust your camera’s orientation from portrait to landscape mode without the need to readjust the balance of your tripod legs.
When photographing a waterfall without a tripod and using a slow shutter speed, look for a stable surface to place your camera. A flat rock near the waterfall can be an excellent option.
In certain situations, focusing your camera lens by looking through the viewfinder may be difficult. To address this issue, activate your camera’s live view mode, use autofocus, and set a large aperture. These adjustments can help reduce the chances of taking an out-of-focus picture.
Newer and more modern cameras can also connect to your smartphone via a brand-specific app, and you can manipulate all the settings from your phone; your smartphone also acts as an additional viewfinder.
One final tip: If your lens or camera is equipped with image stabilisation or vibration reduction, turn it off using a tripod.
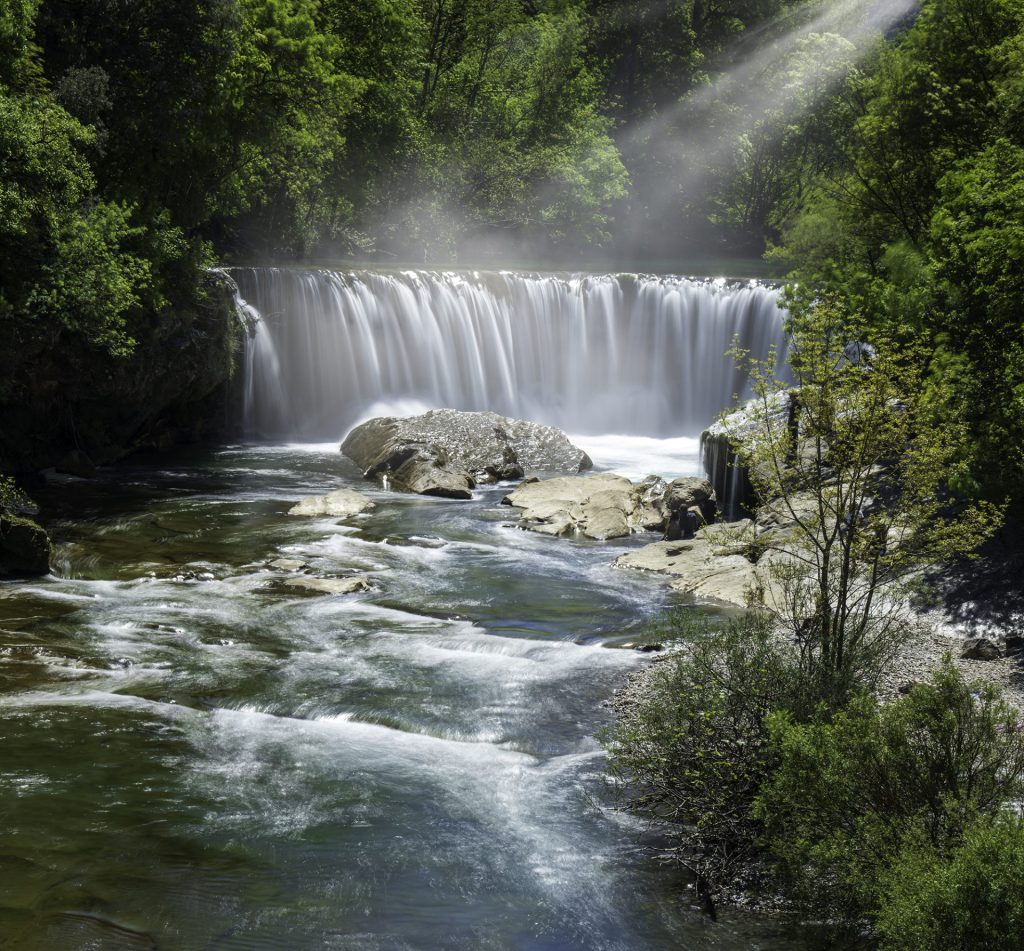
Tip # 2. A word about your camera:
To truly embrace the art of waterfall photography, begin with a camera that has your complete mastery over its settings. The essence lies not in the extravagance of your equipment but in its ability to adapt to your creative vision, allowing shutter speed, aperture, and ISO adjustments. The most sophisticated camera is the one you carry with you, ready to seize the moment’s magic.
In my journey, I have transitioned from a full-frame DSLR to the more agile and resilient Nikon Z7 II. This mirrorless, lighter, weather-resistant, and more compact camera surpasses my previous Nikon D810, aligning seamlessly with my exploratory nature.
While smartphones might not traditionally be the tools of choice for capturing the ethereal beauty of waterfalls, they also have their place in this realm—many lack manual modes for detailed control, particularly in shutter speed. However, the ‘live photos’ feature, despite its limitations in direct exposure control, opens a window to creativity for those wielding iPhones. This gap is further bridged by third-party applications like Slow Shutter Cam for iPhone and Camera FV-5 for Android, which offer the power to manipulate exposure times. Such tools democratise the art, allowing everyone to delve into the enchanting world of waterfall photography, regardless of the gear in hand.
Keep your camera dry. When taking pictures of waterfalls, it’s essential to work with the water instead of against it. Water is a dynamic element that can add beauty to the landscape, but you do not want it on your camera equipment or lens. Interactions with the water create some of the most captivating waterfall images. The search often takes us to the heart of streams or pools, where our connection with nature is strongest.
Preparation is critical to safeguarding your equipment in this water ballet. One might consider the humble yet practical umbrella a bulwark against the mist, though it requires careful handling amidst the whims of the wind. Alternatively, the prudent photographer may turn to the trusted rain cover. This shield can take many forms – a simple plastic bag, a shower cap, or a purpose-crafted cover, each serving to enfold your camera and lens in a protective embrace. Adding to this defence is the lens hood, a sentinel against the droplets that seek to mar the lens’s clear eye.
Amidst these precautions, remember to tread lightly when changing memory cards or batteries under the open sky. The elements are unforgiving, and caution is your ally.
Your lens, the window to your artistic soul, may need frequent tender care. A soft microfiber cloth or a lens pen becomes an essential companion in your journey, ensuring each frame is unblemished by the errant droplet. It’s a ritual to check and cleanse your lens or filter after each capture, ensuring that no unwelcome guest distorts the scene you seek to immortalise.
In this delicate balance with nature, we find not just images but stories, emotions, and a deeper connection with the world.
Tip # 3. What lenses to use?
Wide-angle lenses offer a wide field of view, allowing you to include foreground and distant background elements in your composition. They also let you get close to the cascades and capture everything in one scene. This combination helps create images with depth and a sense of grandeur.
Additionally, wide-angle lenses magnify foreground elements in your photos, such as leading lines, and they do a great job of hitting the viewer over the head with these subjects.
On the contrary, a telephoto lens, also known as a long-zoom lens, produces an optical illusion called lens compression. This effect makes the background seem much closer to the foreground.
Positioning an object, such as a person, in front of a waterfall and using the zoom function creates the impression that the waterfall is significantly larger.
It is beneficial to step away from the waterfall to a sufficient distance for optimal impact. This allows you to look back and zoom in without excluding parts of the scene.
Tip # 4. Dress for success
Photographing waterfalls and rapids can be a rewarding yet challenging experience. Prioritising your safety, camera gear, composition, and personal well-being is crucial. Don’t let inappropriate clothing hinder you from capturing the perfect shot.
Ensure you wear suitable clothing and footwear based on the terrain and weather conditions. Depending on the location, you might need to hike, climb, or wade through water to reach your desired spot. Bring essential items such as a hat, sunglasses, sunscreen, and insect repellent as necessary.
Proper footwear is critical for two reasons: temperature and traction. Consider the advantages of rubber boots, which offer flexibility when shooting in water. Water shoes can be enjoyable if the water temperature is not too cold. However, if the water is chilly, having neoprene in your boots is essential to keep yourself warm.
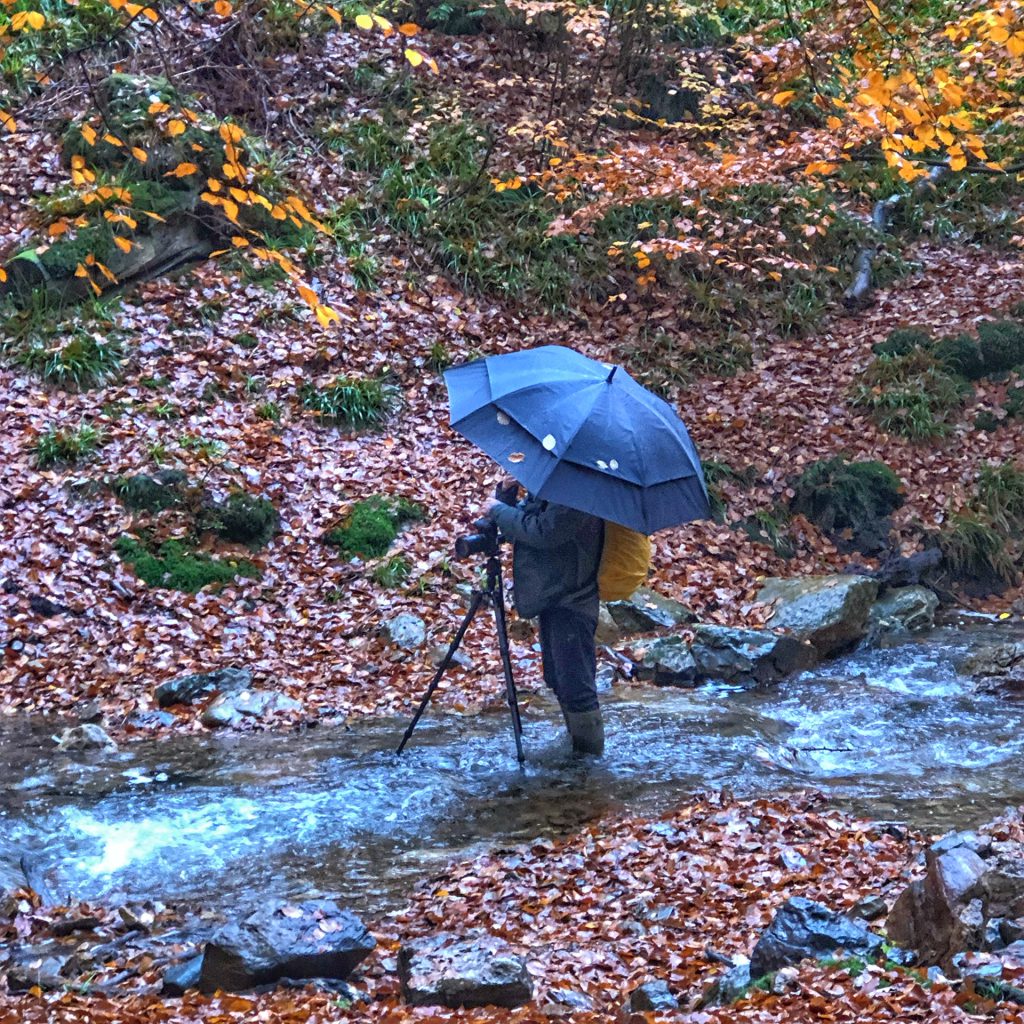
Tip # 5. Be mindful of your surroundings:
When exploring areas near waterfalls or rapids, always make safety your number one priority! The terrain can be tricky with slippery rocks and quickly changing water conditions. Keep these tips in mind:
- Stay Alert: Always be conscious of your environment and mind the possibility of flash floods in narrow canyons or falling rocks.
- Suitable Footwear: Wear sturdy, non-slip shoes to maintain your footing.
- Handle Equipment with Care: Secure your gear correctly — I’ve personally lost lens caps and filters to those slippery rocks!
Stay safe, and keep enjoying the great outdoors responsibly!
Tip # 6. Choose the right time of the day:
Some believe they should wait for a sunny day before venturing for waterfall photography. However, sunny days can pose challenges when capturing waterfalls. The intense brightness will lead to faster shutter speeds, whereas achieving a desirable effect often requires slower shutter speeds. Remember that capturing water in harsh light will be challenging when searching for an appropriate location. Intense sunlight has the potential to swiftly compromise a waterfall photograph due to the presence of solid shadows and reflections in the water. These reflections may manifest as small white dots in your shot. Opt for shooting in a softer light to achieve a pleasing and atmospheric photo. Consider going out earlier or later in the day, but avoid sunny conditions around noon, especially in an open clearing.
Golden Hour Magic: Early morning and late afternoon provide soft, warm light that enhances the colours and textures in your images. The angle of the sunlight during these times also reduces harsh shadows, allowing for more balanced exposures.
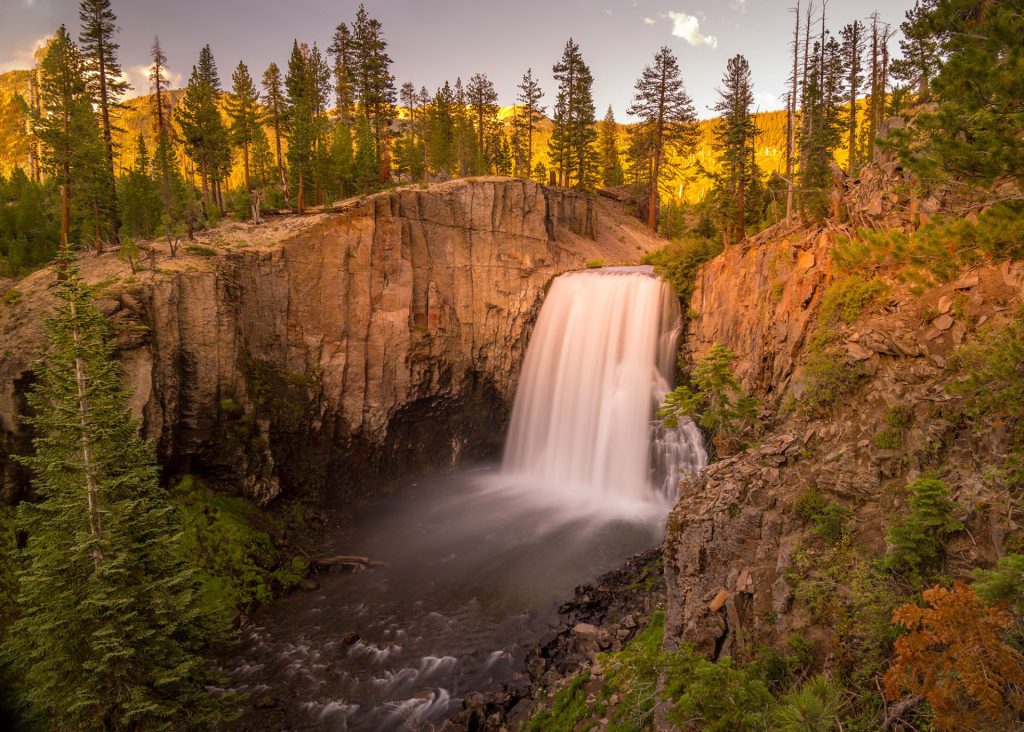
“Amber Cascade Serenity“, captured during the golden hour, this photograph is a symphony of nature’s majesty and tranquillity. The central waterfall, a dynamic burst of white, plummets into the heart of the image with a soft ferocity framed by the rigid grandeur of the cliffs. The subdued light bathes the scene in warm amber tones, lending the trees a fiery aura contrasting with the fall’s cool mist. The long exposure creates a silken texture in the water, emphasising movement amidst the stillness of the surrounding forest and rock. (Guy, 2023, USA)
Try shooting on overcast days when the sun won’t influence the scene to get even light conditions. Clouds help you produce an even exposure and prevent waterfalls from being partially in sunlight and partially in the shade. If you shoot on a sunny day, ensure the light is consistent across the entire waterfall and use an ND filter to reduce the amount of light on your sensor.
I also noticed that you get a much better colour when overcast, so mossy rocks and autumn leaves stand out. When the sky is dull and cloudy, try to minimise its presence as much as possible for a more pleasing composition.
In one of my previous blogs, I gave more information about the weather: weather-and-landscape-photography
Tip # 7. Choose the right season
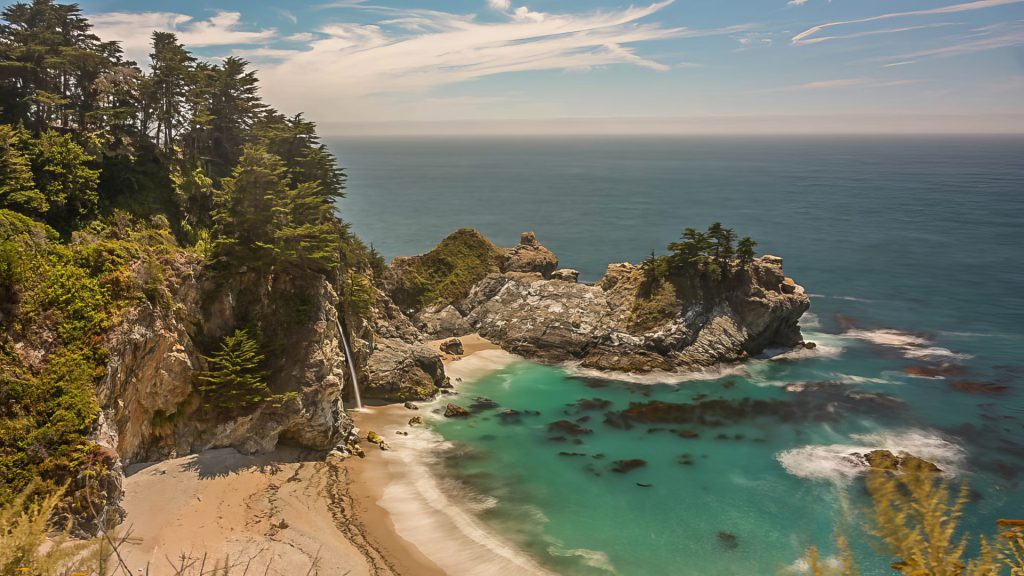
During dry spells, waterfalls often dwindle to mere trickles. In recent years, the impact of climate change has become increasingly evident, with many waterfalls I’ve visited exhibiting only a faint trickle or even running completely dry during the height of summer. However, as winter draws to a close and spring arrives, particularly when the snow is melting, the likelihood of encountering robust cascades dramatically improves. Similarly, following heavy rainfall, within a day or so, the chances of witnessing flowing waterfalls significantly increase. Check locations and weather reports before
leaving.
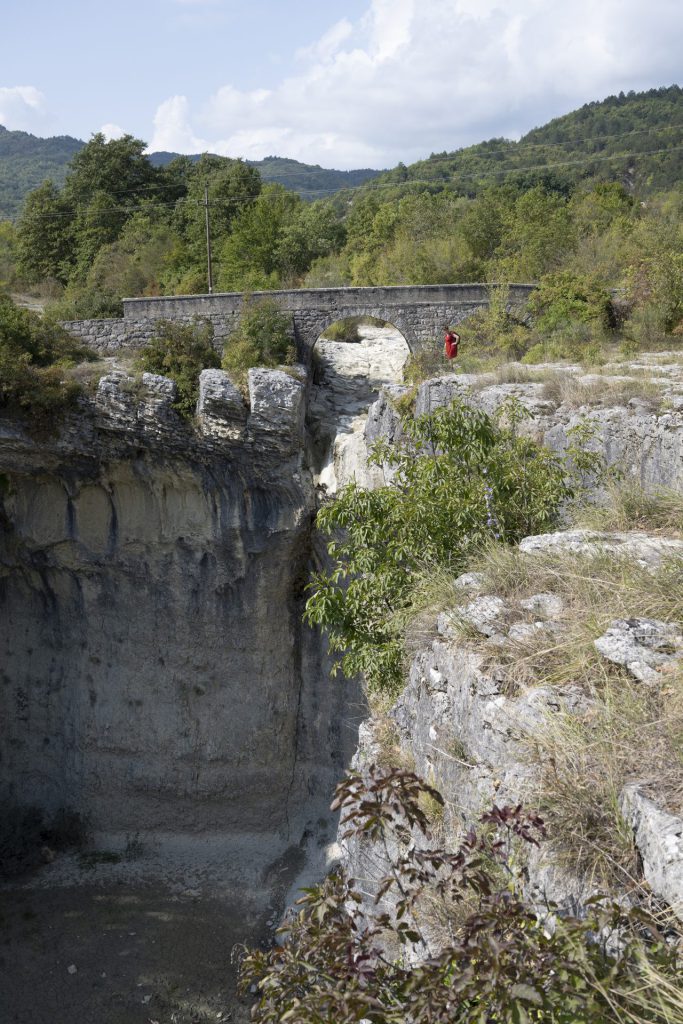
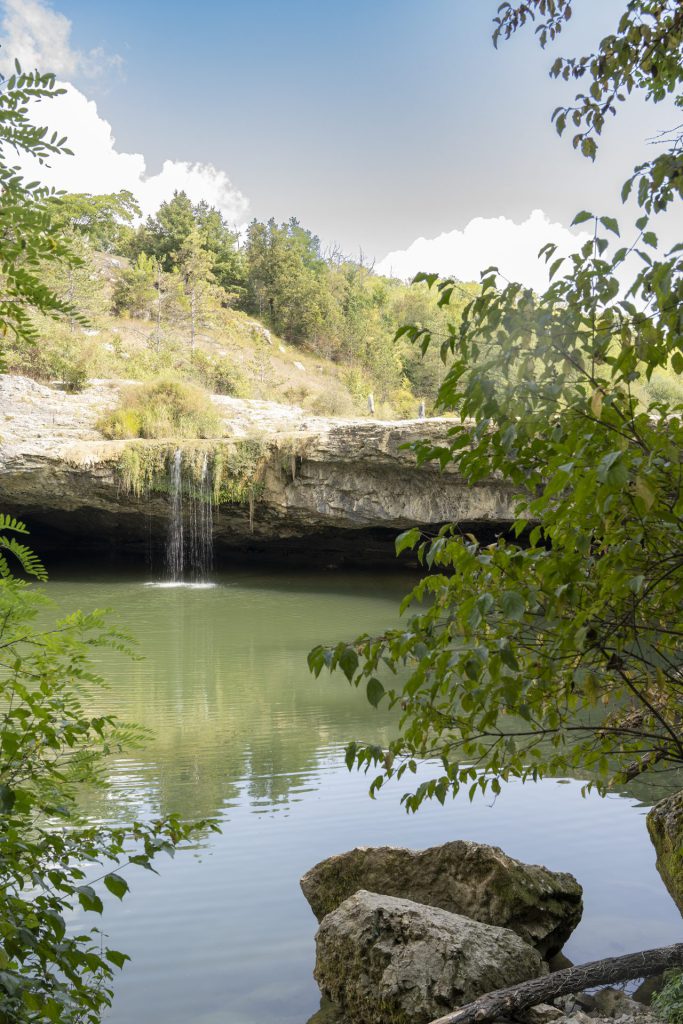
“Trickle Falls”. In September 2021, while exploring Istria, I encountered another waterfall (Zarecki)). What I anticipated to be a grand spectacle of cascading water spanning meters in width turned out to be a modest trickle gently meandering over the edge. The contrast between my expectations and the reality of only small quantities of water delicately making their way down the rock face was striking. (Guy, 2021, Croatia)
Tip # 8. Photograph waterfalls in autumn
As an avid waterfall photographer, I strongly recommend setting aside time to capture waterfalls adorned with vibrant colours during autumn. The cooler tones of the waterfall beautifully contrast with the warm hues of the foliage, creating a captivating visual symphony. Please pay close attention to the changing colours of the leaves, as they may vary from region to region. The vibrant autumnal hues of
the leaves typically endure for only a few weeks before transitioning to less appealing shades of brown.
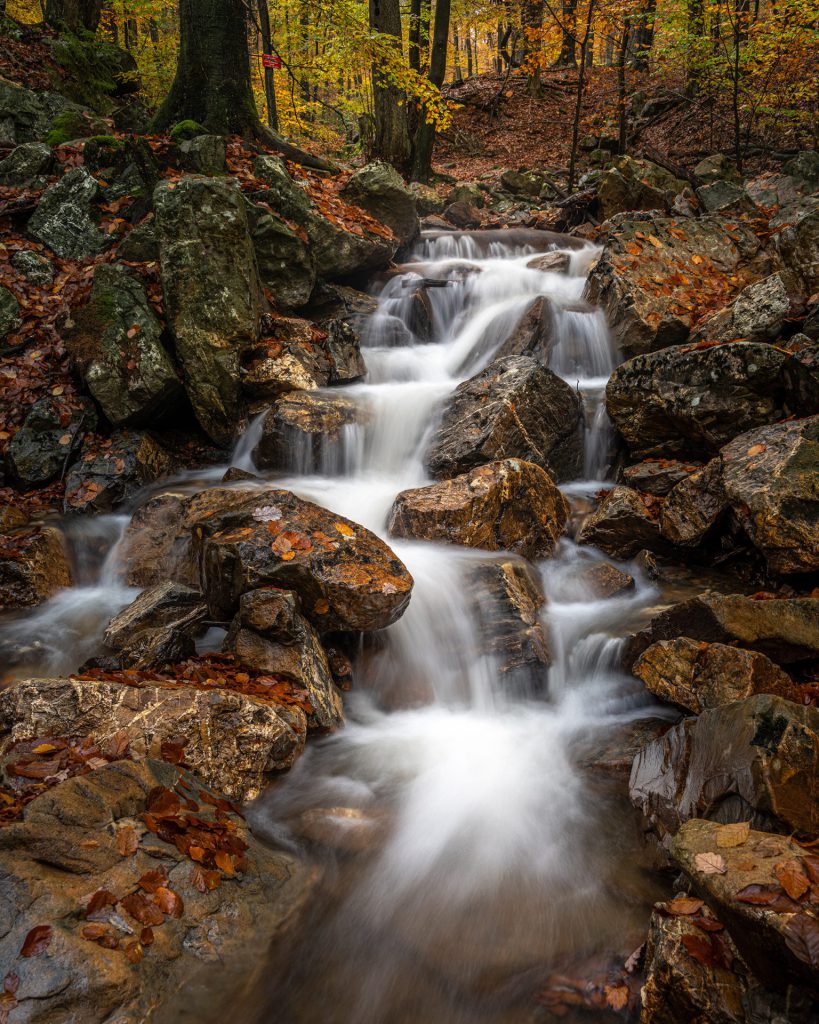
The photograph “Autumnal Veins” depicts a forest brook flowing through a rocky terrain, illuminated by the amber glow of autumn. The slow shutter speed used in the photograph gives a silky texture to the water, which contrasts with the rough edges of the rocks. The autumn leaves, spotted like fire among the grey stones, add to the transient quality of the scene. The photograph captures a moment that showcases nature’s quiet grandeur and the passage of time. Light and motion create a dynamic yet harmonious scene that balances movement and stillness. (Guy, 2023, Belgium).
Tip # 9. Get low
Especially in quiet rivers with smaller rapids, if you go low enough with your camera, you can show an impressive waterfall and include the colours of the surrounding nature.
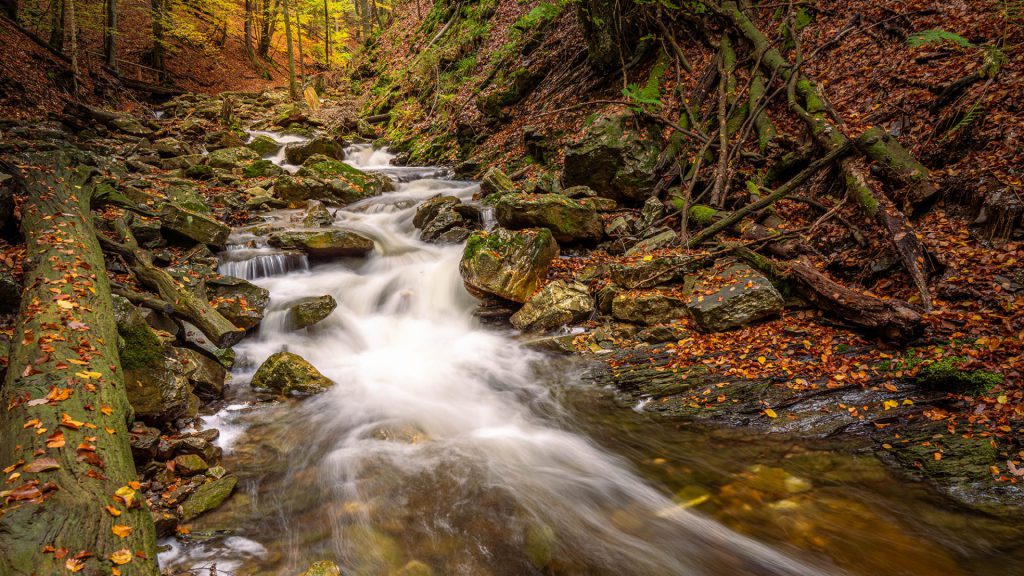
“Autumn Serenade” is a picturesque photograph of a small woodland waterfall surrounded by lush autumn foliage. The camera was positioned low and close to the water’s surface, capturing the energetic cascade of water flowing over moss-covered rocks. The soft, diffuse lighting enhances the vividness of the autumn hues and adds an ethereal quality to the tranquil scene. The composition leads the viewer’s eye through the image, inviting contemplation and appreciation for nature’s beauty. (Guy, 2023, Belgium)
Tip # 10. Select a low ISO setting:
A lower ISO setting decreases your camera sensor’s sensitivity to light, leading to reduced image noise (grain). It also allows the shutter speed to be slower without overexposing the image. Begin with a low ISO, such as 64, 100, or 200, to preserve image quality (as your camera permits). Lower ISO settings contribute to cleaner and sharper photos, particularly in areas with shadows or darker tones.
Using filters while working at the lowest ISO might not be necessary for longer exposures. See tip # 15 for the use of filters.
You can adjust your ISO settings to achieve different shutter speeds. At higher ISOs, don’t be overly concerned about noise in the water; it can be easily eliminated during post-processing.
Tip # 11. Use a small aperture (High f-stop):
A small aperture (e.g., f/8 to f/16) will allow less light to enter your lens, resulting in a longer shutter speed. This is crucial for creating the smooth, flowing effect of the water.
While using a small aperture for longer exposures, be mindful of your desired depth of field. Consider the elements in the foreground and background that you want to be in focus. Sometimes, a mid-range aperture like f/11 strikes a good balance.
Tip # 12. Bracket your shots if necessary:
Take a series of shots with different exposures (bracketing) to ensure you capture the scene’s dynamic range. This can be useful for merging multiple exposures in post-processing to retain details in both highlights and shadows.
Exposure bracketing involves taking multiple photos from the same position but using different shutter speeds, ISO, or aperture to change the brightness or darkness of each image. Afterwards, you have to blend those images in post-processing via Lightroom or Photoshop Adobe so that the result keeps all the details in the dark part of the image without the bright parts (water, sky, etc.) looking too white.
Waterfall scenes often have a wide dynamic range, with bright highlights in the water and potentially dark shadows in surrounding rocks. Bracketing your shots ensures you capture details in both extremes, allowing for blending in post-processing if needed.
Another reason to take at least a second exposure is when you have to photograph in windy conditions, and the leaves on the trees and plants move, turning into a blur. After capturing the main shot of the waterfall, look at your photo to check if the plants appear fussy or blurred due to their movement. Taking a second faster exposure without moving the tripod and camera is necessary then. These two exposures can then be blended using layer masks in Photoshop to get the desired outcome.
Focus stacking is a photographic technique for achieving a greater depth of field (DOF) than would be attainable with a single exposure. It entails capturing multiple images of the same scene, each with a slightly different focus point. Subsequently, these images are merged using software like Lightroom or Photoshop to produce a single composite image where all elements appear sharp and focused.
Tip # 13. Experiment with shutter speeds:
When taking photos of waterfalls, slower shutter speeds are recommended to capture water’s smooth and silky appearance, which can be loved or hated. I love it. The optimal shutter speed depends on the water’s velocity and the desired outcome. Experiment with various shutter speeds, ranging from just a fraction of a second to several seconds, to find the most suitable one for your scene.
Capturing waterfalls with photography can produce stunning images, and the shutter speed you choose can significantly affect the outcome. Here’s a breakdown of good shutter speeds to consider depending on the effect you want to achieve:
1. Freezing the Motion: Use a fast shutter speed to capture every droplet and splash with sharp clarity. This typically means setting the shutter speed at 1/500th of a second or faster. Fast shutter speeds are great for highlighting the power and drama of a waterfall.
2. Slight Blur for Movement: To show motion while retaining some texture in the water, try a shutter speed between 1/60th and 1/125th of a second. This speed will blur the water slightly, giving it a dynamic feel without smoothing it completely.
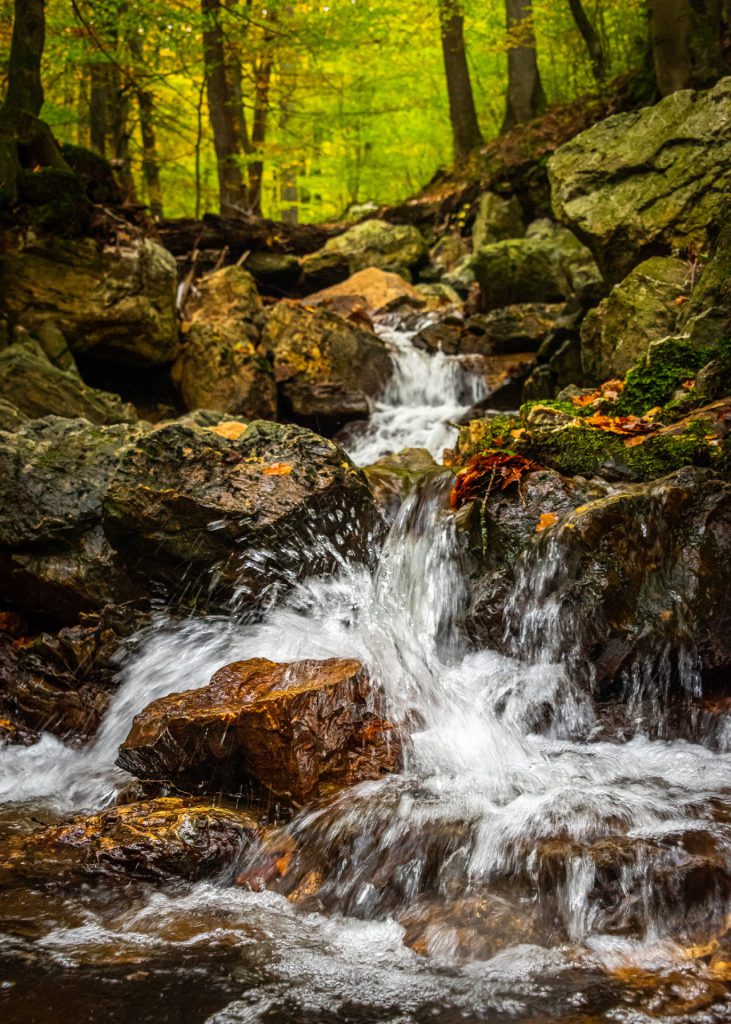
This photograph, “Rustic Cascade”, captures the rustic charm of a small waterfall nestled within a dense forest. The waterfall, the focus of this image, appears vibrant and lively as it tumbles over a series of reddish-brown rocks, each glistening with moisture and adorned with a sparse sprinkling of fallen leaves. The water’s movement is frozen in time but slightly blurred, so droplets are still visible. This gives a textural contrast between the flowing water’s smoothness and the rocks’ ruggedness. The contrasting textures and colours bring the scene to life, making the viewer feel as if they can almost hear the water’s gentle rush and feel the dampness of the forest air. (Guy, 2022, Belgium)
Silky Smooth Water: For that classic, smooth, flowing water effect that many photographers seek, a slow shutter speed is necessary. Depending on the water’s speed and available light, this could be anywhere from 1/15th of a second to several seconds. Typically, shutter speeds of 1/2 second to 5 seconds work well. This prolonged exposure creates a smooth, milky appearance as the water moves over the falls.
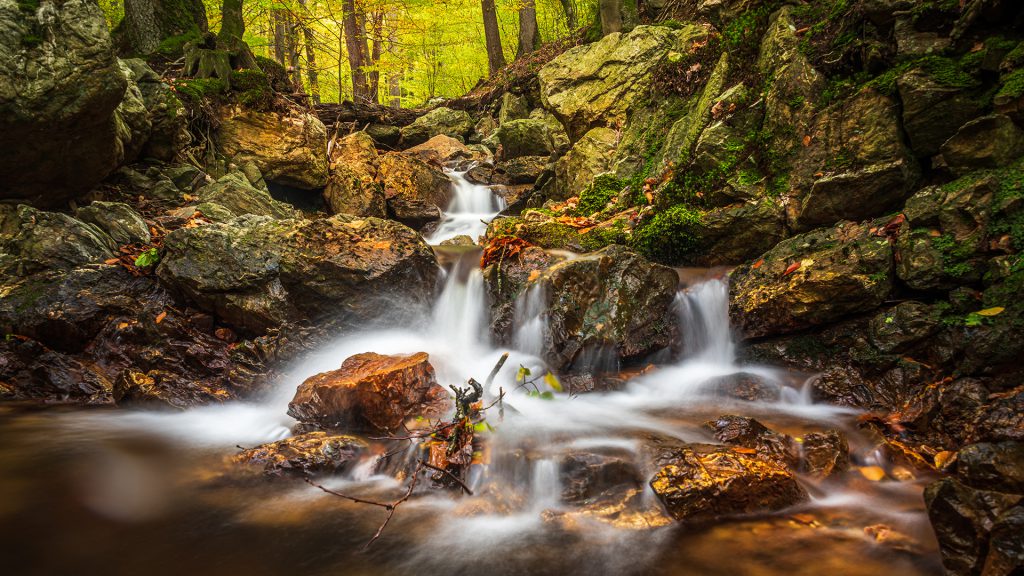
The photograph “Whispers of a Woodland Stream” captures the tranquil flow of a forest stream amidst rugged, moss-covered rocks. A gentle cascade is the focal point, its misty veil lending a dreamlike quality to the scene. Autumn leaves, in various stages of decay, add seasonal hues to the predominantly green and brown palette. Above, the trees form a verdant canopy, hinting at the shift from summer to autumn. The motion blur of the water suggests a timeless flow, contrasting with the stability of the rocks. The extended exposure technique brings a sense of peaceful movement, while the clarity of the surroundings adds depth and texture. Rich, natural colours convey the forest’s vibrancy in transition, while a balanced composition guides the viewer’s gaze through the scene’s elements. (Guy, 2022)
4. Very Long Exposures: For an ethereal look, especially under lower light conditions like dawn or dusk, you might go for 10 seconds or more prolonged exposure. This will not only smooth the water but also capture the movement in clouds and trees if it’s windy, adding to the dreamy quality of the scene.
When using slower shutter speeds, it’s essential to use a tripod to stabilise your camera and prevent any unwanted blur from camera shaking (see tip 1). Additionally, depending on the lighting conditions, you may need a neutral density (ND) filter to achieve longer exposures without overexposing your photo. ND filters reduce the light entering the lens, allowing for longer shutter speeds even in bright conditions.
Please do not view the mentioned shutter times as a fixed rule; instead, use them as a starting point. Due to significant variations in light conditions, water levels, and speed, you may need to experiment with the shutter speed to achieve the desired effect. I typically begin with a setting based on my experience. However, depending on the current conditions, I continuously adjust the shutter speeds—making them faster or slower—until I achieve the desired effect. Also, take more than one image with the same settings because as the water flow constantly varies, the result may also look different each time.
When you capture the movement of water with a slow shutter speed, you will automatically see more white in your image. White or lighter spots shifting throughout your image create exciting lines. But, when a bright light shines on this, or if your shutter speed is too slow, this white part of the photo often becomes too white and is no longer pretty. So, it is a question of just long enough and not too long.
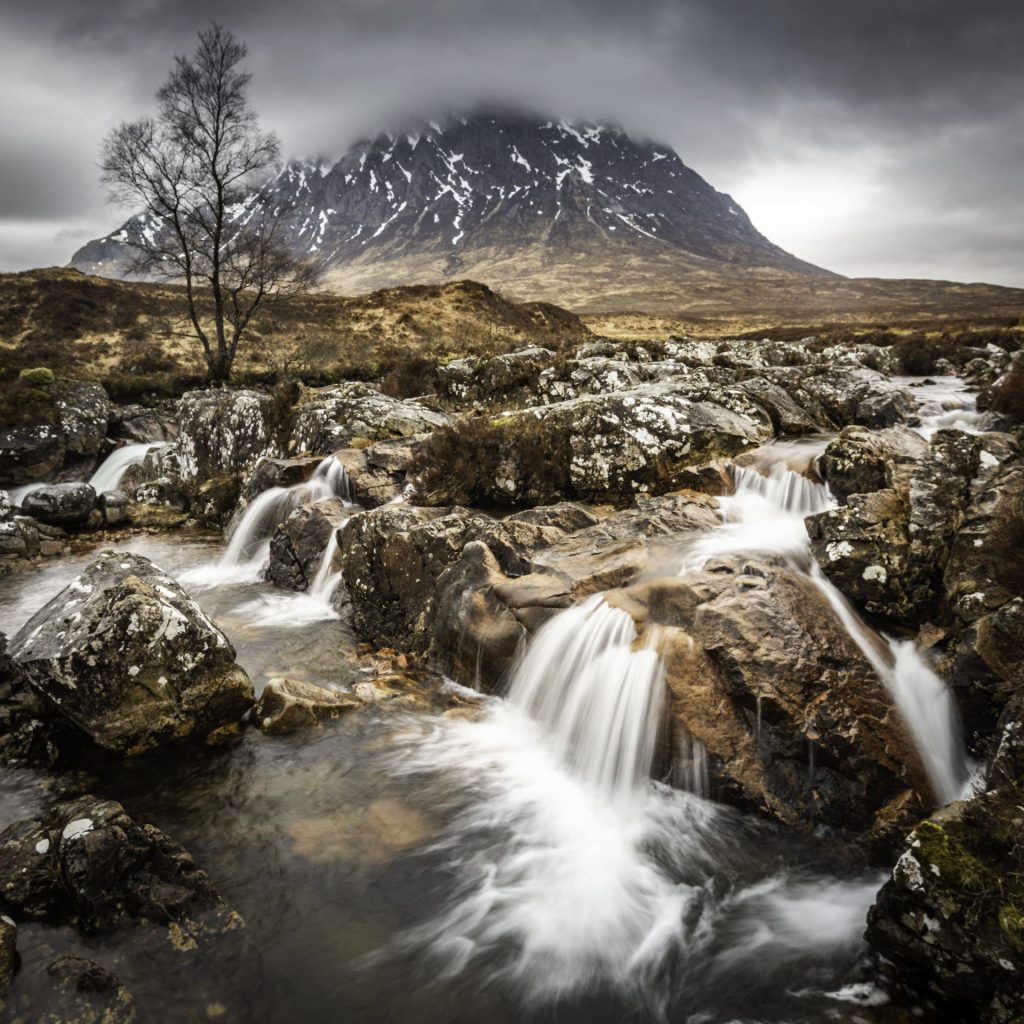
“Highland Pulse” vividly captures the raw and untamed beauty of the Scottish Highlands (Glencoe). The foreground is dominated by a rugged, dynamic stream, tumbling over rocks in a series of miniature waterfalls that create a lively, frothy spectacle. The soft, flowing water is beautifully rendered with a long exposure, giving it a ghostly smoothness that contrasts with the harsh, jagged rocks. In the background, the majestic mountain stands stoic and imposing under a moody, cloud-filled sky, adding a sense of enduring grandeur to the scene. The landscape’s muted colours, dominated by browns and greys, evoke the chill of a typical highland atmosphere. The composition is balanced, with the eye being naturally drawn from the turbulent waters in the foreground up to the mountain peak in the distance. The choice to capture the movement of water with a long exposure adds an element of serenity and a magical quality, contrasting with the static and rugged mountain. (Guy, 2018, Scotland)
Tip # 14. Use a timer or remote shutter release
Even with your camera securely mounted on a tripod (tip#1), there is always a risk that pressing the shutter button may cause slight movements in both the body and lens, which could lead to motion blur in your waterfall photos.
To mitigate this risk, it is crucial to use your camera’s built-in timer feature. A 2-second delay is typically sufficient, but a delay of 5 or 10 seconds may be necessary if you use a long telephoto lens.
Alternatively, you can trigger the shutter without direct contact using a cable shutter release or a wireless remote. The newest cameras can also be controlled and triggered through a smartphone app, like SnapBridge for Nikon (which exists for iOS and Android). Other brands have similar possibilities.
If you don’t have a mirrorless camera but instead use a DSLR, employing the mirror lock-up function can effectively decrease vibrations. This function raises the camera’s mirror before the exposure, minimising internal movements. With a DSLR, you have to cover the viewfinder to avoid light leaking into the camera through the viewfinder.
Combining these techniques can significantly enhance the sharpness of your waterfall photos and other long-exposure shots. It’s crucial to experiment with various settings and equipment to discover the optimal setup for your specific shooting conditions or to establish your workflow.
Tip # 15. Use filters:
If you find it challenging to slow your camera adequately using ISO and aperture, filters are crucial to reduce the incoming light reaching your sensor. An ND filter is particularly effective in diminishing the light entering the lens. This, in turn, allows for extended shutter speeds even in bright conditions without negatively impacting the colours in the scene. This capability is precious for attaining longer exposures, resulting in a smooth and silky effect on water surfaces and the blurring of rapid motion. You can utilise ND filters depending on the lighting conditions and the desired impact (See tip 13)
Neutral density filters have various strengths and are especially useful in bright conditions. They enable you to extend your exposure time without the risk of overexposure. A 3-stop or 6-stop ND filter is commonly used in waterfall photography.
It is advisable to avoid windy weather conditions whenever possible. Due to the prolonged exposure times used in waterfall photography, wind can introduce chaos into your photos. Any trees or plants near the waterfall that sway in the wind while you employ a slow shutter speed will appear blurry in your photograph.
Consider investing in a few filters, such as a circular polariser to reduce reflections and enhance colours and a neutral density (ND) filter for long exposure photography, particularly for waterfalls or capturing motion.
When I don’t have to travel that light, I will take my square Lee filters, including gradient ND filters (LEE 100 Filter System – (leefilters.com) or my similar Kasefilters armour 100 mm system, but with magnetic filters. Recently, however, I found an excellent alternative when travelling light using magnetic circular filters from Kase, a very compact and light solution.( https://kasefilters.eu/filter-sets/magnetic-circular-filter-sets/) The Kase filter sets include ND and CPL filters, a magnetic adapter ring, a magnetic lens cap and a filter bag. Depending on the lens filter set, there are different sizes and functions. Some consider this a drawback since you need filters of different sizes for different lenses. But you probably only take one lens since you want to travel light.
A polariser can reduce reflections and glare, especially in wet environments. Additionally, it assists in looking beneath the water’s surface, unveiling rocks, foliage, and other details. The greater the polarisation of the scene, the more effectively it penetrates through the water.
Additional benefits of employing a circular polariser filter include:
- Polarisation is an effect that cannot be replicated in post-processing.
- Circular polarisers typically decrease exposure by approximately one stop, enabling longer shutter speeds by reducing the amount of light entering the lens.
- Colour enhancement—When light is polarised, colours appear more vibrant. This augments colour saturation, particularly in foliage and blue skies, adding vibrancy to your images.
Mastering the use of filters in photography requires time and experimentation. It’s essential to accept that honing this technique involves repetition and practice. Particularly with potent filters, autofocus systems may pose challenges. Consistent practice is critical to developing muscle memory to employ filters seamlessly without excessive deliberation over settings.
You can explore my three-part blog series for further insights on using filters: tips-filters-landscape-photography-part1, part2 , part3.
Tip # 16. Compose carefully:
Don’t get too caught up in the settings for waterfall photography. The most important thing is to ensure you get the basics right: light, framing, and composition. Include exciting foreground elements and use leading lines to guide the viewer’s eye through the image. Experiment with different angles to find the most visually appealing composition.
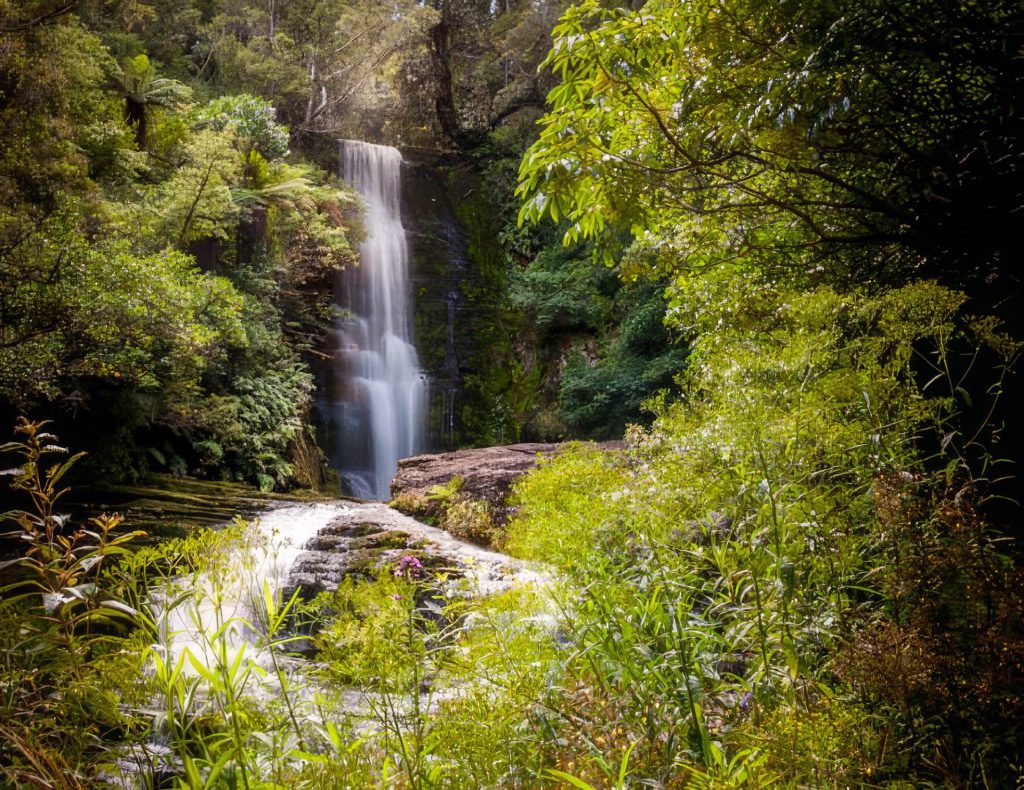
“Whispering Cascade” presents a serene and almost otherworldly depiction of nature’s elegance. Centred in the image, the waterfall pours its silky waters from a height framed by abundant greenery. The light filtering through the canopy above lends a soft glow to the water and illuminates the leaves, enhancing the overall ethereal quality of the scene. The slow shutter speed technique here allows the water to appear as a continuous, smooth veil, contrasting beautifully with the crisp texture of the surrounding vegetation. The composition, while slightly central, effectively draws the viewer’s eye straight to the waterfall, making it the undeniable focal point of the piece. (Guy, 2013, New Zealand)
Look for exciting rocks, branches, or foliage in your composition. These elements can provide context and scale to your photos. Experiment with different angles and perspectives to find the most compelling composition.
Look at the way water flows through the scene and the surrounding environment (trees, for example), and take care of the edges of your frame.
Look for leading lines for captivating waterfall compositions. These lines within the scene guide the viewer’s eye from the foreground to the background, creating a sense of depth. To discover leading lines, take the time to explore your chosen waterfall from different angles.
Spend enough time exploring the surroundings to find an interesting composition. Try photographing from high above, through trees or bushes, behind the waterfall, or just above the stream for a more unusual and creative viewpoint.
Foreground rocks, bridges, and interesting plants all help to give your photo context. This gives the viewer a better sense of where you were and allows them to “explore” the scene visually, creating a more engaging shot. A well-placed person can make a focal point that might otherwise be lacking. People in the scene can also give your photo a sense of scale. However, I have to admit that most of the time, I try to avoid all those tourists taking selfies.
Consider also shooting in landscape orientation even when the waterfall tends to be tall. This will force you to take in more of the surroundings and be more creative with framing the scene.
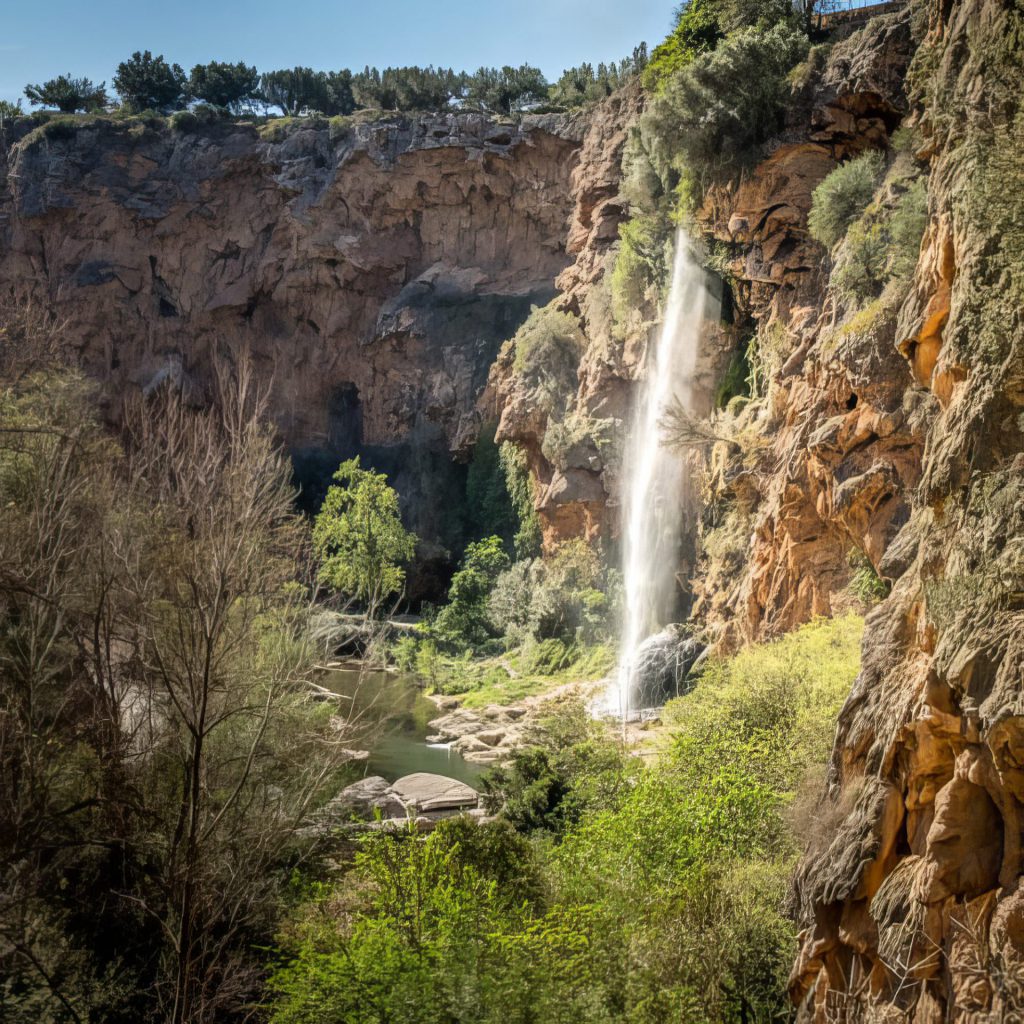
When photographing streams, be sure to study each element in your composition. Take a practice shot and study the image in your LCD. Magnify. Look around. You aim to find any element in your image that does not belong there. Once you see something, ask yourself these questions:
- Can I frame it out of the scene?
- Can I remove it by hand from the scene? Often, pieces of fallen branches are caught in the rapids or pinned against a rock that is easy to remove and strengthens the image.
- Is stream debris preventing a clean, unobstructed flow from the front to the back of your frame? Then, move a little bit.
- If nothing of the above helps, could post-processing help me?
If even post-processing cannot save the day, move up or downstream and look for other opportunities.
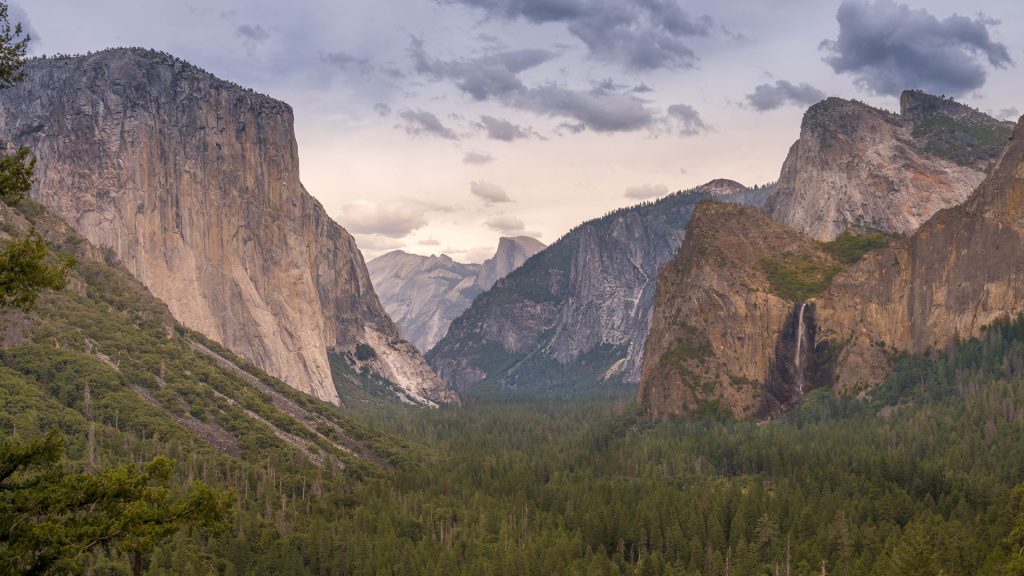
“Majesty of the Valley”: This photo showcases the breathtaking Yosemite Valley, captured with a wide lens that embraces its expansive grandeur. The left side of the frame is dominated by El Capitan, a monumental granite monolith that rises starkly against the sky. Its sheer cliff face is a testament to geological time and the forces of nature. To the right, Bridal veil Fall gracefully plummets, its mist catching the light and adding a sense of movement to the stillness of the cliffs. In the distance, the iconic Half Dome can be seen, its distinct shape recognisable even in silhouette. The valley floor is carpeted with a dense forest of pine trees, and their deep greens provide a rich base to the towering cliffs. Overhead, a dramatic sky with clouds tinged by the sun’s soft glow because of the late afternoon light offers a dynamic and changing atmosphere to the scene. In this photograph, the choice was not to focus on the waterfall centrally, but it is still an integral part of this expansive view. (Guy, 2023)
Tip # 17. Edit your waterfall images
Landscape photography often benefits from maintaining a natural appearance; thus, when utilising photo editing software, it is essential to remember that minor post-processing adjustments generally yield significant improvements. While each photo has unique requirements, subtle tweaks to saturation levels, exposure, shadows, highlights, and sharpness can significantly enhance your waterfall photos.
My workflow begins with importing my photos into the Lightroom catalogue. For most images, I typically commence with some general adjustments. Even meticulously composed and exposed photographs can be elevated with post-processing magic. Start by scrutinising the composition and making any necessary adjustments. Simple cropping can enhance the overall balance and focal point of your image.
During the post-processing phase, my initial step involves checking whether adjustments are needed for white balance and exposure. I commonly set the contrast to +25, highlight adjustment to -100, and shadow adjustment to +50. Additionally, I apply texture (+10), clarity (+15), and vibrance (+25). While these settings serve as a starting point for most of my photos, it’s important to note that they are merely guidelines and can be tailored for each image. Adjusting the white balance ensures more accurate colours.
Once the general adjustments are satisfactory, I move on to local adjustments using various selection and gradient tools. Dodging and burning, which I consider essential techniques in photo editing, allow me to achieve precise control over exposure, enhance depth and dimension, guide the viewer’s eye, fine-tune tone and contrast, and foster creative expression. Adding a hint of contrast can give your image an extra pop, making it visually striking.
Lastly, I enhance the sky by combining reduced exposure, heightened brightness, and haze removal within a sky selection. This technique promptly reveals more detail in the sky.
It’s important to note that post-processing is tailored to each image. While these fundamental settings provide a starting point, adjustments may vary based on individual photos.
Even if you meticulously keep your lens clean and dry, tiny droplets can still land on it without your notice. You must manually remove each splash in Lightroom, but Luminar Neo simplifies this process. By clicking “Remove Dust Spots” in the Erase menu, you can eliminate all specks with a single click. This saves time and reduces the risk of any specks remaining unnoticed.
Very recently, a new AI-powered tool was added to Luminar Neo. “Water EnhancerAI” helps you adjust and refine the colour of any body of water. Let the AI identify water in the frame or specify areas for selective adjustments. Enrich the blue tones of seas and pools, adding vibrancy. Play with green tones, making rivers and lakes accentuate lush scenery. Adjust the appearance of the water by refining its brightness, contrast, and depth to meet your exact preferences.
For those who are interested, I have a dedicated blog on some of the possibilities for landscape photographers of Luminar: using-Luminar-Neo-in-post-processing-of-landscape-photos
Adding a hint of contrast can give your image an extra pop, making it visually striking.
Incorporating a subtle vignette that darkens the edges of the frame creates a natural spotlight effect, guiding the viewer’s eye toward the central focus of the image. Dodging and burning techniques can influence three-dimensionality.
Nevertheless, it is crucial to avoid excessive editing.
Tip # 18. Try black and white
Black-and-white photography can be an excellent way to capture waterfalls. Removing colour lets you focus on the scene’s shape, texture and contrast. Experiment with different techniques and compositions to create unique black-and-white waterfall photos.
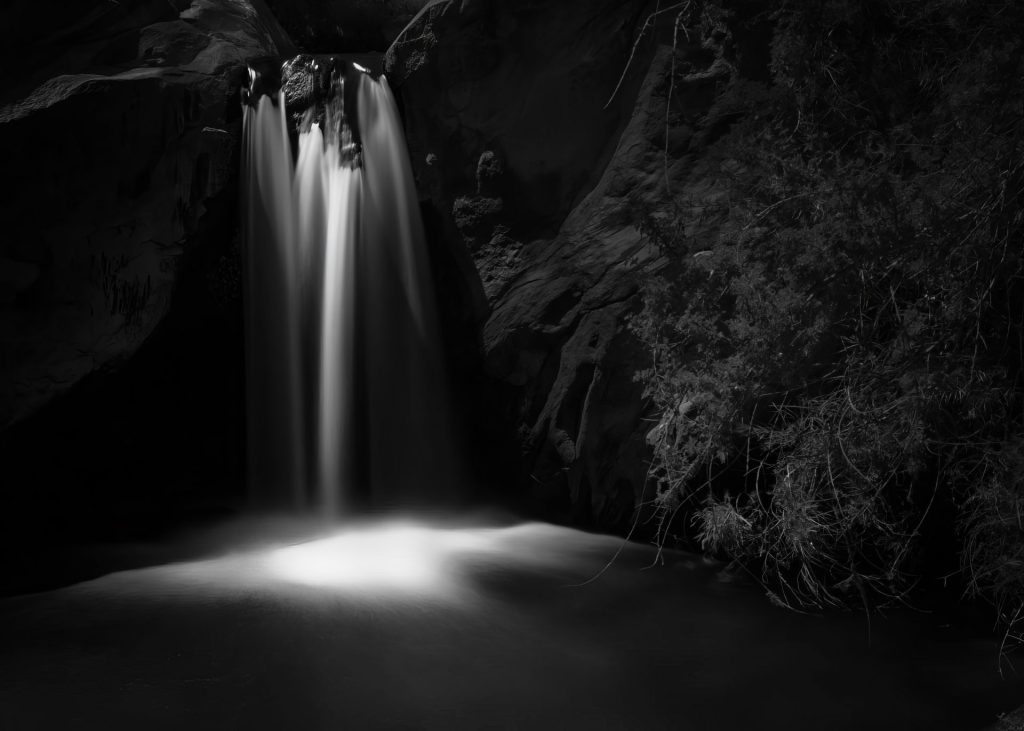
Transforming your waterfall photos into black and white can provide numerous advantages:
- Increases contrast and drama: Black-and-white photography can enhance the contrast between the dark rocks and white water, creating a more dramatic effect.
- Simplifies composition: Black-and-white photography can remove distractions such as colour, putting the focus on the shape and lines of the waterfall.
- Creates a nostalgic mood: Black-and-white photography can create a nostalgic or vintage atmosphere, complementing a waterfall’s natural beauty.
- Brings emphasis on texture: Black-and-white photography can highlight the texture of the water and rocks in the photo, creating a more tactile feel.
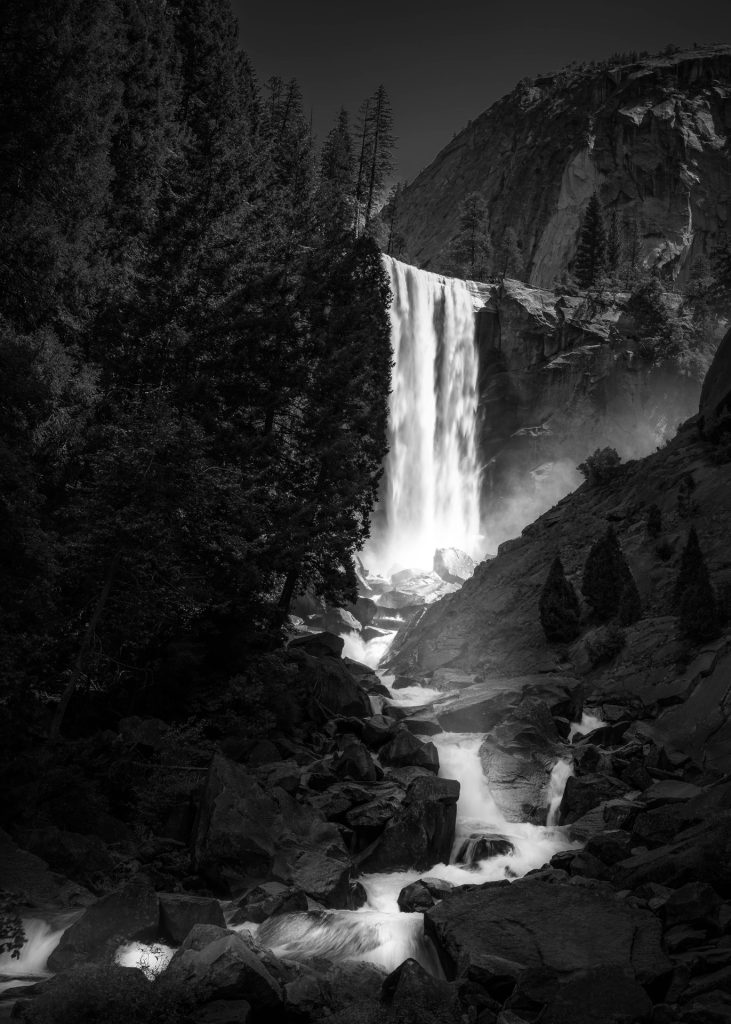
“Monochrome Majesty” is a stunning black-and-white photograph that captures Vernal Falls’s raw power and elegance. The absence of colour focuses the viewer’s attention on the textures and contrasts within the scene—from the misty spray of the falls to the rugged, angular boulders below. Towering conifers stand sentinel on either side, their dark silhouettes framing this display of nature’s force. The play of light and shadow, alongside the cascading water, creates a dynamic yet timeless image that encapsulates the essence of the wild. This piece is an example of landscape photography that uses monochromatic tones to enhance the subject’s natural drama and beauty. The composition is meticulous, and the choice to omit colour magnifies the impact of the natural forms and the intensity of the water’s flow. (Guy, 2023, USA)
Some inspiring black and white photographers:
- Ansel Adams: https://www.anseladams.com/
- Michael Kenna: Michael Kenna
- Edward Weston: https://www.westongallery.com/
Conclusions
Waterfall photography can be challenging yet rewarding for photographers of all levels. This blog post shares 18 practical tips for capturing stunning waterfall shots.
By following these tips, you can take your waterfall photography to the next level and capture stunning images you can be proud of. Always be patient and experiment with different techniques to find what works best for you. Happy shooting! I am keenly interested in hearing about your experiences or any practical problems you may have encountered. As always, feel free to leave a comment or ask a question below
Leave a reply