Introduction
The cold and darker conditions might seduce you to stay inside close to the fireplace. But it would be a pity to store your camera just because summer and autumn are over. Winter is such a great time for capturing some spectacular landscape images. Snow and frost will instantly transform a landscape and on top of that simplify the picture and they will make any view look beautiful. If the light is right, you can get some truly fantastic winter shots. And even when the light is low, there are always occasions to discover soft and magnificent scenes.
Winter will create special conditions and photo opportunities that you wouldn’t otherwise get. New conditions also mean special challenges to take into account and it takes some practice to master.
If you’re looking for ideas and inspiration for the cold and snowy winter season ahead, read on for my photo tips and ideas for winter photography.
I hope you will find it useful!
Content
- Tip #1.Gear and more
- Tip #2. Start with the weather forecast before leaving home
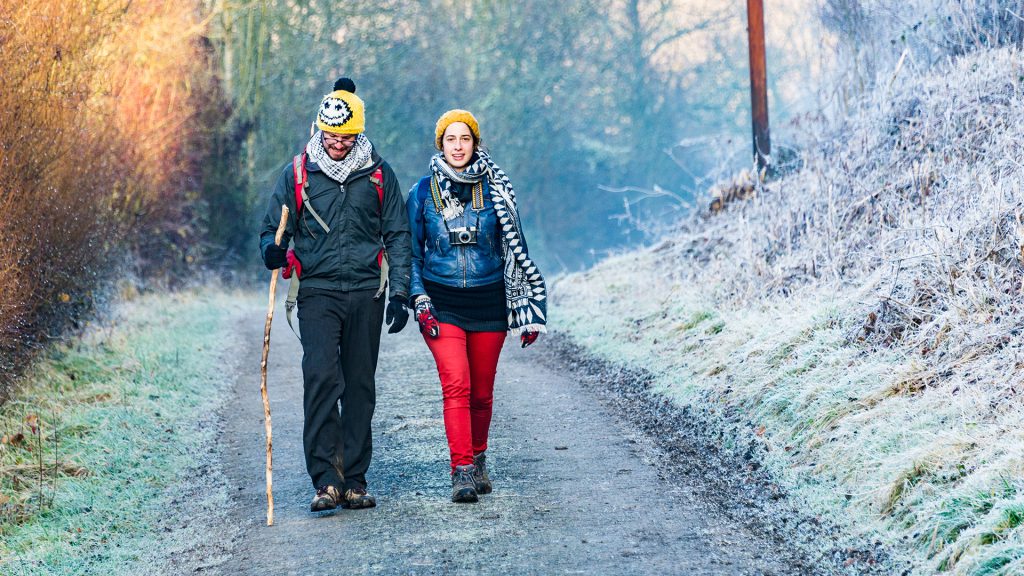
- Tip #3. Add scale by adding people
- Tip #4.Use Negative Space in your winter landscapes
- Tip #5.Photograph during blue hour, sunrise, sunset…
- Tip #6. What settings to use for your winter landscapes?
- Tip #7. Setting the white balance for better snow landscape photography
- Tip #8. Act fast
- Tip #9. Play With Perspective.
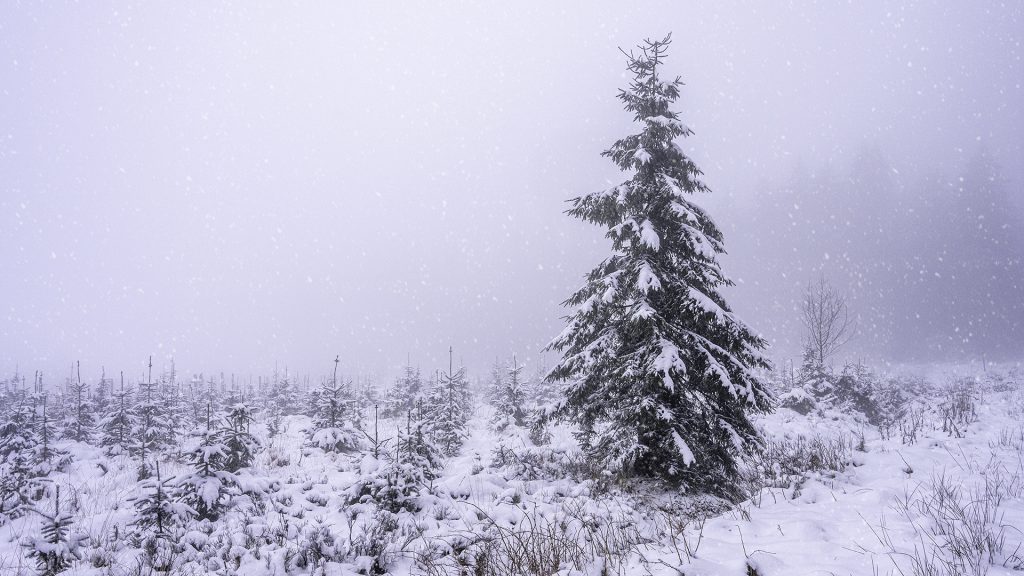
- Tip #10. Capture the falling snow
- Tip #11. Use winter fog in your landscape photo’s
- Tip #12. Take macro photos to capture winter in details
- Tip #13. Look for contrast
- Tip #14. The use of filters
- Tip #15. Black and white winter landscape photography
- Tip #16. Be creative and create a portfolio or series of photos
- Tip #17. Post-processing
Tip # 1. Gear and more
Camera and lenses
The type or brand of your camera is not that important and the number of lenses that I will take with me will depend on whether I’ll be hiking and for how long. But a wide lens and a long lens are always standard in my bag. I use a Nikon D810 and a Nikon Z_7_II for my landscape photography.
Whatever camera you will use, it is important to take care of the transition between warm and cold and vice versa to avoid condensation and mould build up over time. It can even cause the LCD to malfunction. You should try to give your camera time to acclimatise from indoors to outdoors slowly. This does not mean that you have to move in slow motion. But one should allow the camera to adjust to the ambient temperature slowly by keeping the camera with lens cover in a bag or cover for a while when moving into a warm area. It is best to leave your camera in the bag for some time to warm up before taking it out. When you move from outside into the cold outside, keep the camera close to your body. Make sure that the temperature in your car is not too high while driving from your home to your photo destination or store your camera bag in the boot of the car as far as possible from the heating.
If your camera might get wet because of rain or snow, bring it indoors and wrap it in a dry towel. And once again let it in the towel for quite some time and let the towel absorb all the moisture. It is not a problem to remove the battery and memory card before putting the camera in the bag or a towel.
If you go out during rain or snowstorms, investing in a good snow or rain cover might be a good idea. It will keep your camera and lenses dry during the photoshoots, minimizing the chance of liquid residue getting close to the electronic parts of your camera. A plastic bag will work as well of course. An umbrella is only useful when there is not too much wind. Moreover, you have your hands full so you have to operate the camera with one hand. You could attach an umbrella to your tripod, but this would increase the risk of shocks and blurry photos. That is why I sometimes attach my umbrella to the straps of my backpack so that I have my hands free. But if the wind gets too strong, the umbrella has to be closed again.
A lens hood can help you protect your lens from the low sun but also a bit from falling snowflakes or raindrops.
Batteries
You have probably already experienced that batteries lose their power faster when exposed to low temperatures. The battery life will probably be less than 50% than you are used to in normal conditions. Even when not in use, they will still lose their charge. My advice is therefore to keep enough spare batteries warm in your pocket close to your body heat.
Staying dry and warm
During winter you will have to keep dry and protect yourself from the cold and the wind and wear the appropriate clothing. My secret is to wear different layers and if necessary thermal base layers. Synthetic fleeces or wool are a better option than cotton. As your extremities are susceptible to frostbite, do not forget a hat, warm socks, a scarf, and gloves.
During cold weather, it is always a challenge to adjust the camera buttons in low temperatures. The right pair of gloves can do wonders. I have to admit that I am still searching for the best results. If it’s not too cold, fingerless gloves can be an option allowing your fingertips to be free whilst keeping the rest of your hands warm. If not, you have to pull off your warm gloves on and off to manipulate your camera. Well-insulated and waterproof shoes or boots are also a must.

When the photographer gets wet, cold, freezing and starts shivering this can create camera-shake with as a result unsharp photos. If you are out and your body can’t wait to get inside again, you are probably not in the right mindset to take pictures regardless of how great the conditions are. So, these are all the more reasons to take good care of yourself.
Invest in ‘stability’
In wintertime, most of the time the level of light will be less and days are much shorter. This means that the use of a stable tripod is sometimes inevitable. I keep repeating that a good tripod is a worthy investment in my blogs. Make sure to place it on stable ground. I use a Sirui W extreme series tripod for my snow hikes.
Pick a good camera bag
The purpose of your camera bag or backpack is to carry your equipment, protect it from shocks and drops with the necessary amount of padding and protect it from rain or snow. That is why a good rain cover is extremely important. Backpacks can resist a few drops but not a downpour.
Extras
Some extra room in your bag for some extra stuff like heat warmers, fully charged phone snacks, drinks etc. might be useful. When you consider walking and setting up in the dark, or the near-dark a small LED torch, or even a head torch to allow you to operate completely hands-free can also be super useful.
When you are photographing in cold weather, some snowflakes might find their way to your camera’s lens and disturb the view. Because your camera will be cold the snowflakes will probably not melt and they can be brushed or blown off with an air blower. These blowers sometimes come with a little brush. The brush when dry and cold can also be useful.
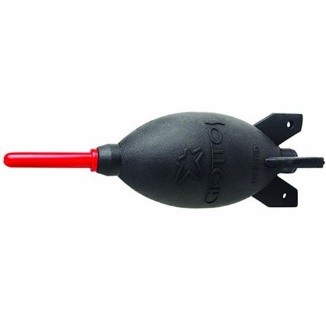
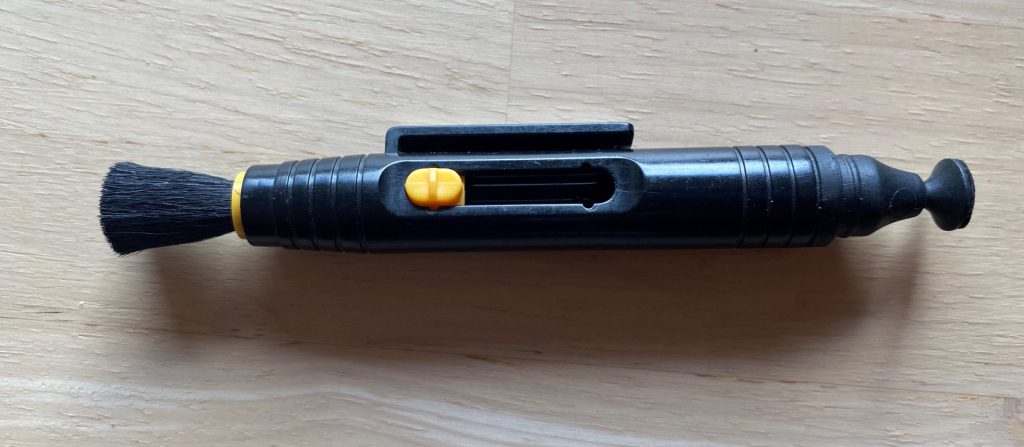
Do not brush them off with your hands because the warmth could melt the snowflakes and leave you with fingerprints or stains on your lens.
Tip # 2. Start with the weather forecast before leaving home
Before setting off for any winter photography adventure, you should always check the local forecast to make sure conditions are just right and safe. Blue skies are wonderful for creative moments in the snow, but even light snow can be fun to play around with. Even in the dullest and misty, icy conditions, there is always something possible for the brave photographer.
Additional reading on the weather can be found in my blog ‘weather and landscape photography‘
Remember that winter weather can always turn by the moment. So, bring extra layers, some food, an emergency kit, etc. in case the weather turns for the worst. Don’t panic about a snowstorm before setting out. Just be safe and make smart decisions! Do not go out alone in a desolate area or at least inform somebody where you are heading to and when you are supposed to be back.
Several tracking apps are available that use your phone GPS function. That can be very helpful to retrieve your car after you have been turning and turning around and lost directions.
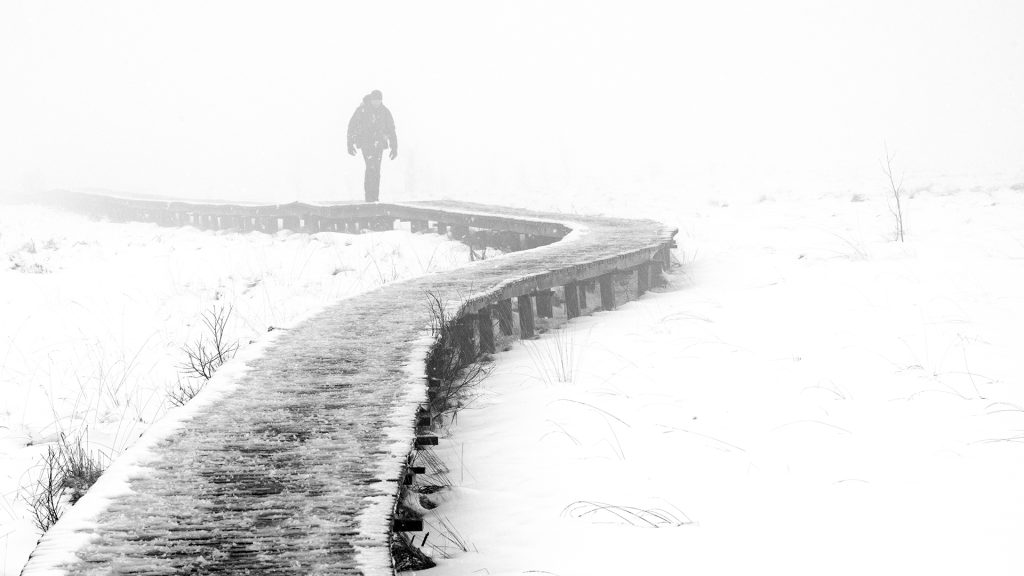
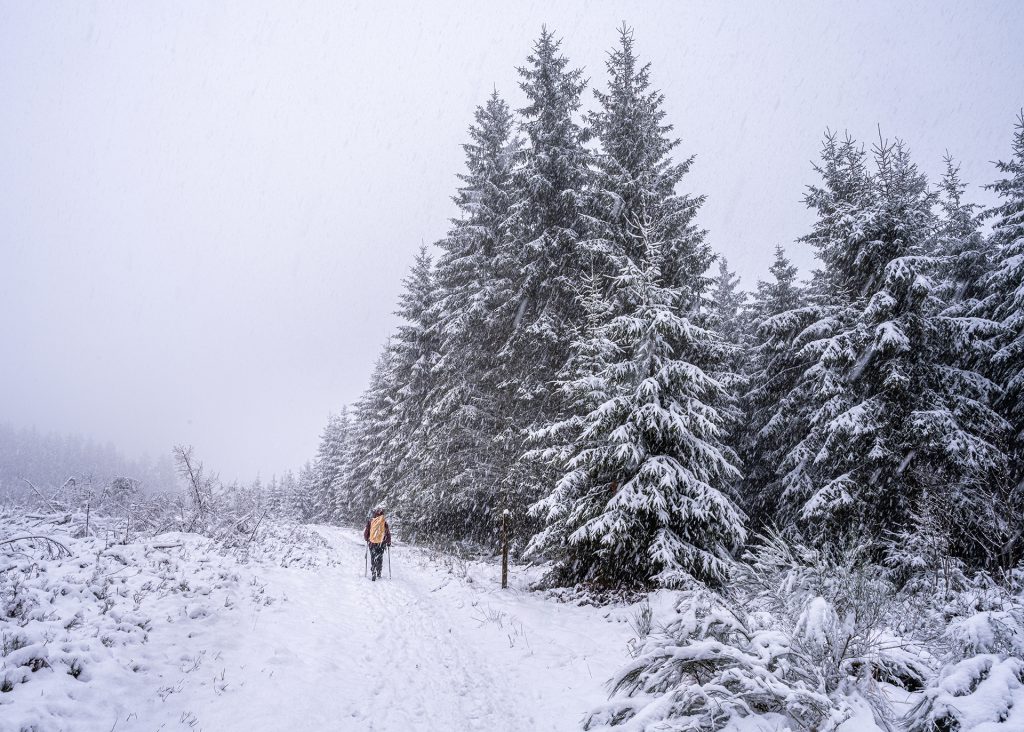
Tip # 3. Add scale by adding people
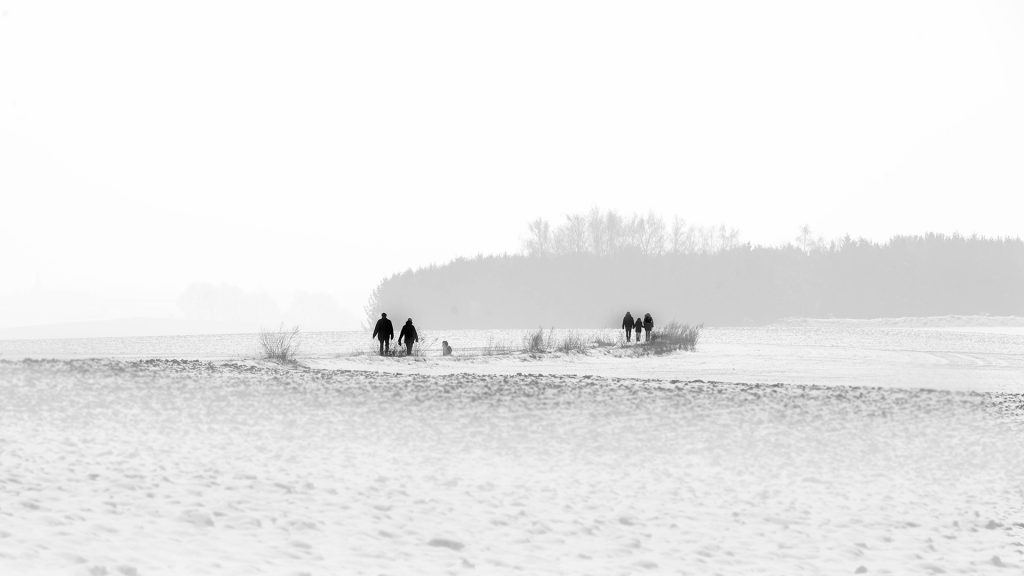
Like in any summer landscape, adding people into the shot can add a sense of place, scale, and interest. Does the person add value or detract from the wintery scene? Does it give the viewer an idea of how large your mountains or trees are? If they don’t improve your overall composition, forget about it.
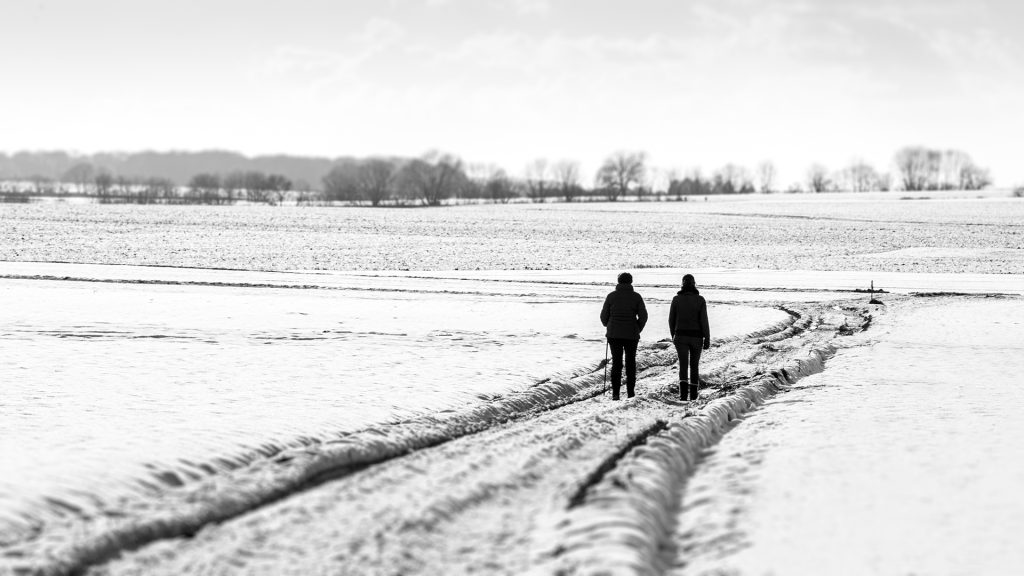
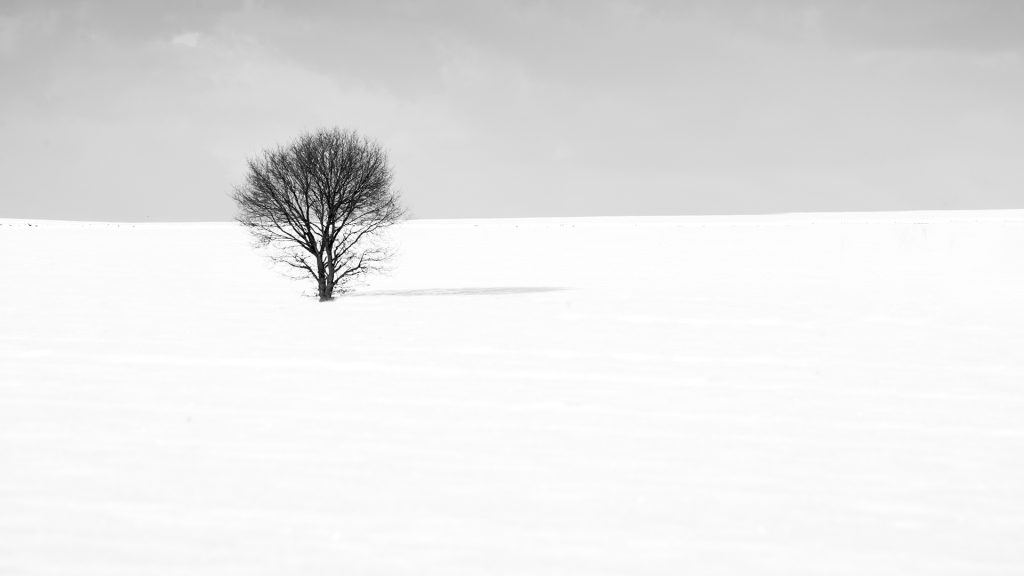
Tip # 4. Use Negative Space in your winter landscapes
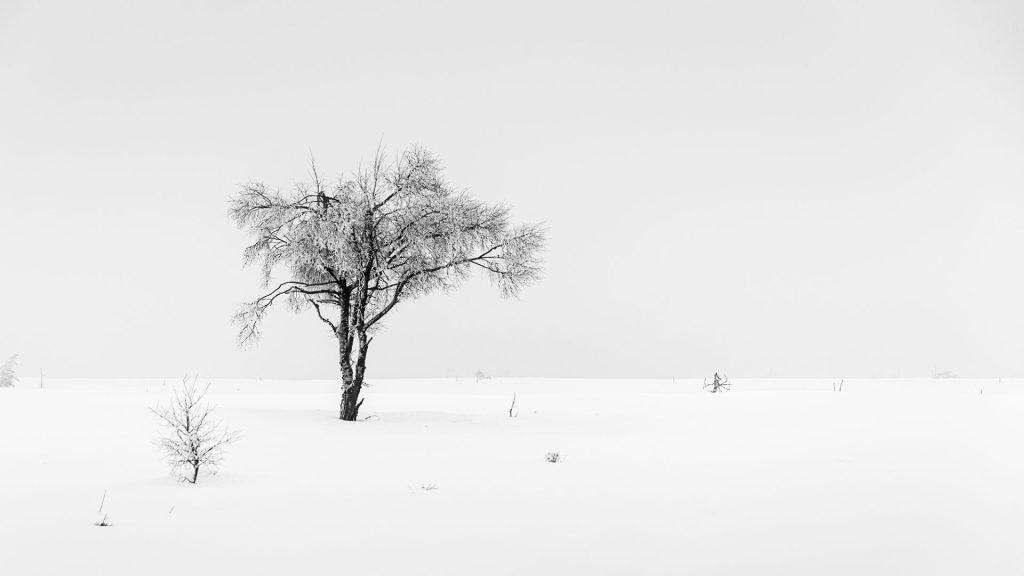
With an abundance of monochrome weather in the wintertime, using negative or empty space can often be striking. So, use the available white space to your advantage. When composing winter landscape photography, add a subject in the scene that adds depth to the photo. This can be a person, a tree, a rock, a building… Empty (negative) space can be minimalist and powerful.
Tip # 5. Photograph during blue hour, sunrise, sunset…
The blue hour is the period just before sunrise and just after sunset. The sun will set below the horizon and the world turns blue. The light changes rapidly, lasting only 20-30 minutes. There is still enough light to shoot, although nothing is lit directly. This makes the light very soft. This makes sunrise and sunset a great time to capture photos of the mountains and other landscapes.
During wintertime, the sunrise and sunset can be a lot more dramatic than usual. For those like me, who like to sleep longer they are lucky that in winter, the sun rises much later in the day and sets much earlier.
Morning lights are usually colder than the lights of a sunset. Probably the best combination is morning fog with the first signs of a sunny day. The first sunrays can brighten the whole scene, and make mist look like it’s glowing.
The whole point is to work with winter’s light and use it to your advantage and capture some beautiful winter scenes.
Tip # 6. What settings to use for your winter landscapes?
One of the most challenging aspects of winter landscape photography is getting your settings right. Playing around with your camera’s exposure in the wintertime can be a good exercise to learn to know or to understand your camera behaviour.
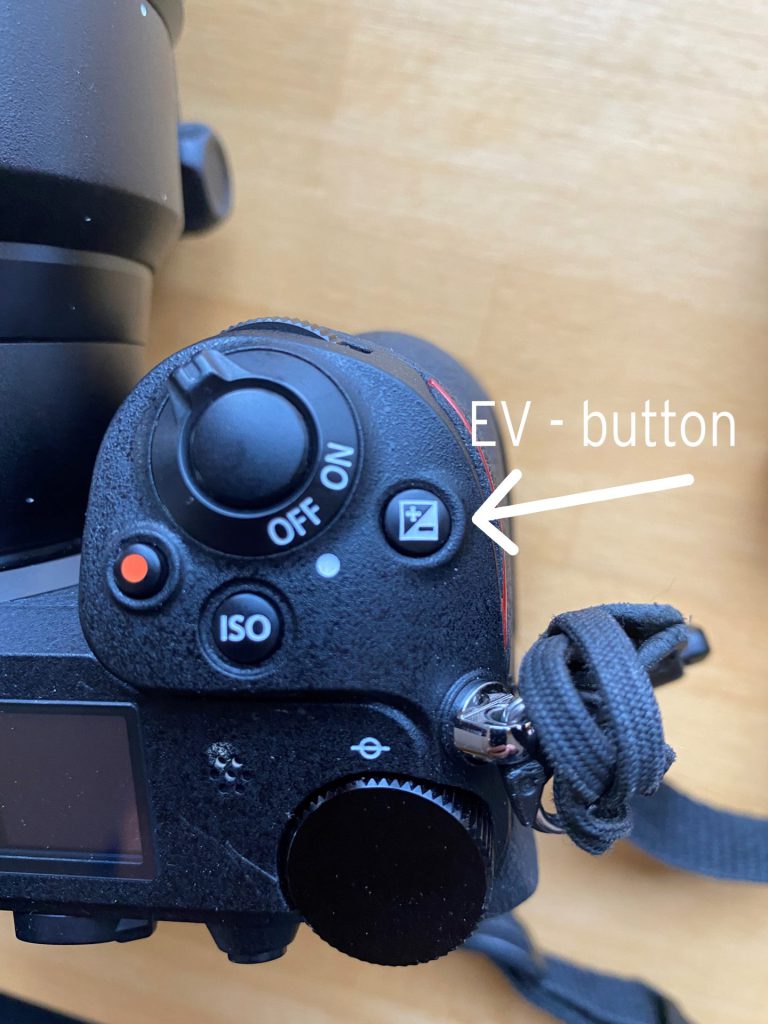
Relying on your camera set to auto-exposure can result in some disappointing, tonally grey or dull shots. The glare from the snow will confuse your camera, causing it to read the light in the scene wrong. It will see a lot of white and will try to tone this down. In many cases, you end up with underexposed and grey pictures. To avoid that, just add positive compensation. That means adding around +1 stops or exposure value with your EV button or via the menu. (EV means exposure value) The exact amount will vary depending on the amount of snow and light. Make a test shot and check on the histogram to see if your exposure is correct. It is also useful to activate the high lights function to see whether or not the high lights are being blown out.
A winter landscape image can benefit from being a stop or two brighter. Just avoid clipping the highlights.
Choosing an ISO can be tricky. When you use too high of an ISO, noise especially in the shadow areas could become an issue I usually use an ISO as low as possible although modern cameras deal much better with noise.
Another problem when photographing snowy landscapes can be caused by your camera’s autofocus system. If you focus on the grey sky or white snow surface, the system can work poorly or not at all because there is no detail or contrast. This leaves you with two options, either disable autofocus and focus manually or find a zone where there is detail and contrast and then apply focus lock (AF-L). after which you point the camera back to your original composition and press the shutter button.
In my blog 14-tips-for-sharper-landscape-photos, you will find interesting tips to get tag sharp photos.
In my blog tips-for-the-novice-landscape-photographer, you will find more information on compositions and camera settings in general.
Tip # 7. Setting the white balance for better snow landscape photography
It is possible to choose your white balance in the camera or to adapt it in post-processing when you shoot in RAW. Both options work well. If you only shoot jpegs, you have less room for manoeuvre in post-processing and it has to be more accurate in-camera.
You will agree with me that winter is cold, so a beautifully” cold white balance” looks best. Do not overdo it otherwise you will end up with a completely blue image. Experiment, see what you get and decide what looks best.
When you shoot in RAW you can leave the white balance on automatic and use the temperature slider in Lightroom or Photoshop to move back and forth between warm and cool effects to your liking.
Tip # 8. Act fast
Snow comes and goes. That means it can blow in fast and melt just as quickly. Trees with thick snow can become drabby in an instant. Big drops can fall into your neck or onto your camera and lens. One of the most important winter photography tips is to act fast when snow is fresh and not wait too long. So, you can get the shots you deserve for being out there. And avoid all trampled scenes because of many walkers.
Just be patient with the sun. Sometimes the sun can go behind a cloud, changing your light metering drastically. Wait and experiment with natural lighting once the sun comes back out.

Tip # 9. Play With Perspective
In your winter landscape, you will find several natural elements that could be shot in a variety of ways and can be used as lead-in lines or as a focal point. That means you have plenty of opportunities to explore perspective. When shooting low and including some snow very close to the lens you can add a blurry foreground.
Those who are into drone photography can find incredibly dramatic and beautiful views from a higher perspective.
As in other seasons, the rules of composition remain an important tool for creating a pleasing image.
Tip # 10. Capture the falling snow
Including the falling snowflakes in your compositions can be a great way to enhance your winter shots. When you want to capture that consider using a telephoto lens and shoot at a shallow aperture (consider f/4.5-6.3). Set up the fastest shutter speed that you can (1/400 of a second or faster) if you are hoping to freeze the action. Having large and slightly blurred snowflakes in front and behind your subject will create that special feel. To photograph gently blurred streaks of snow, use a tripod and a long exposure to slow the snowflakes down.
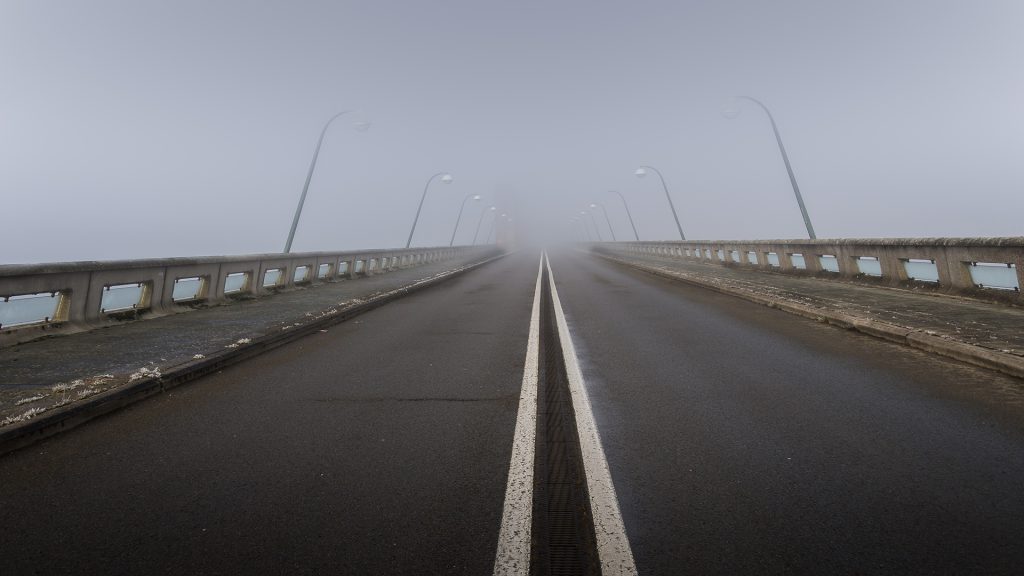
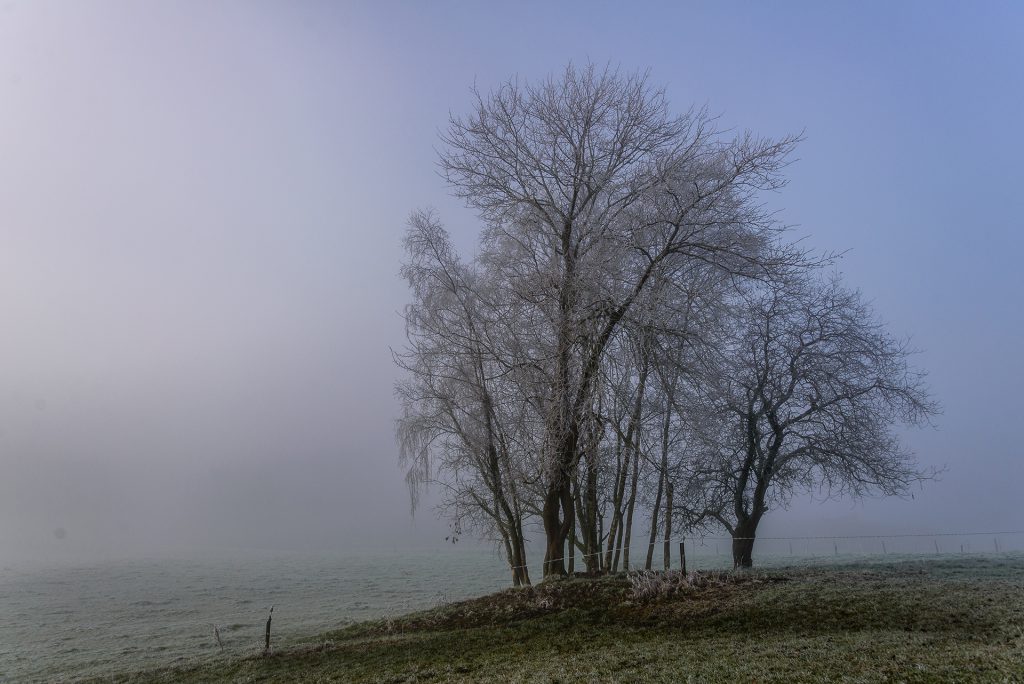
Tip # 11. Use winter fog in your landscape photo’s
Winter photography tips are not just about snow. Glistening snow is beautiful, no doubt about that but snow and fog is even a better combination. White powder on the fields and trees, greyish-white haze in the sky above. Nature could not look more mystical.
For example, you can use winter fog as a mysterious background. It enhances the lonely and cold side of winter. Fog or mist can make disturbing background elements invisible and simplify the photo to your advantage.
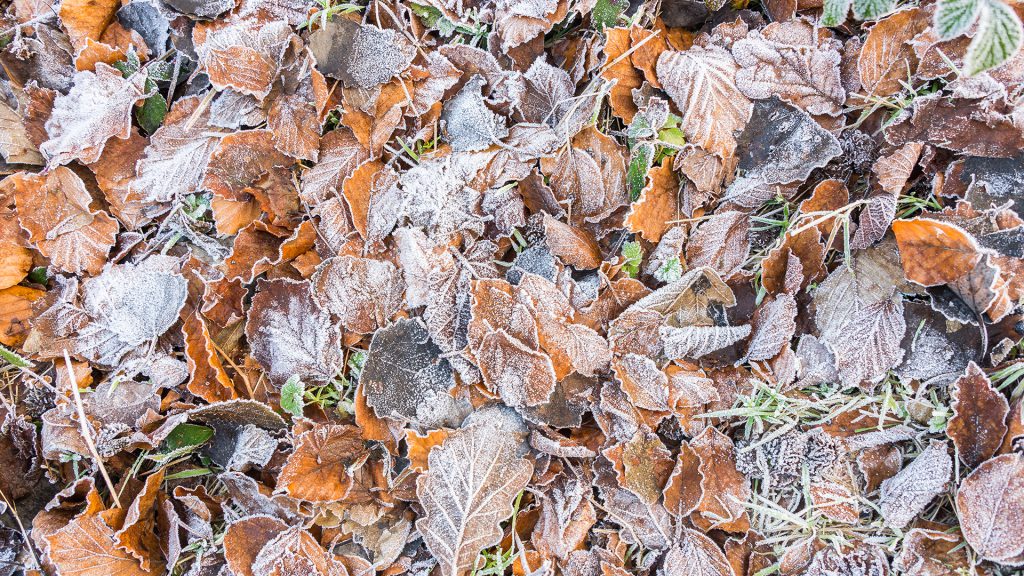
Tip # 12. Take macro photos to capture winter in details
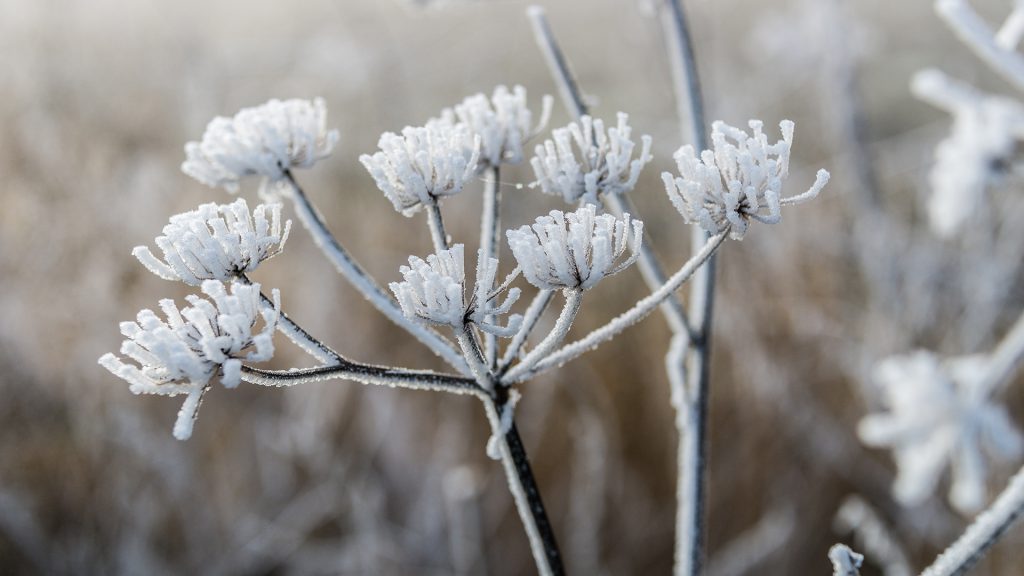
Details of frosted flowers on a cold and misty winter day, Guy, 2016.
To capture winter in your landscape photography you do not have to stick to wider vistas. A very creative way is to focus on the beauty of winter by looking at details. One of the best ways to do that is to photograph snowflakes or frost in nature. If you want to get really close, you should take your macro lens. But also with other lenses, there are plenty of details to be captured.
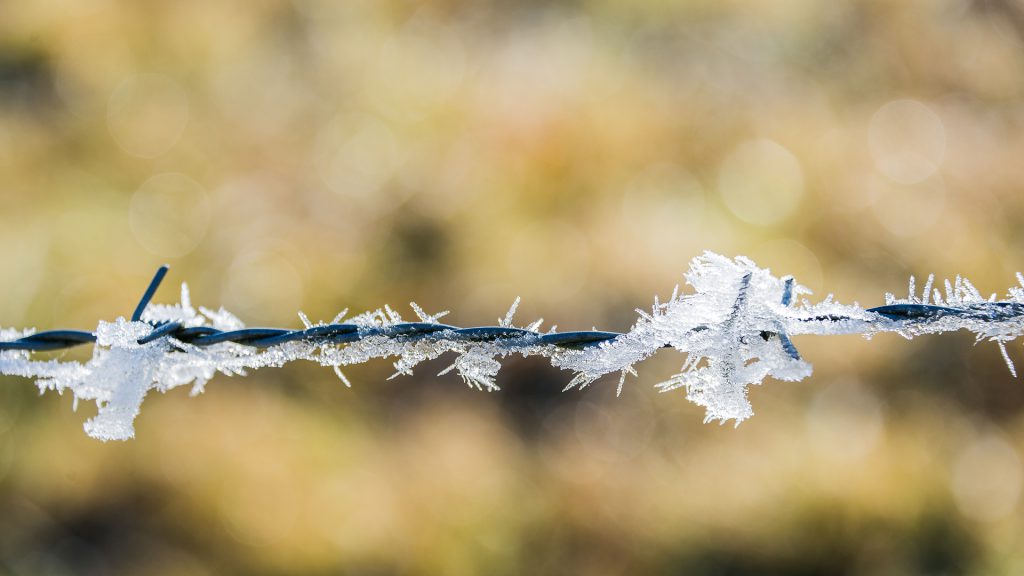
The ice crystals on this barbed wire enhance the barbed wire effect and the sun coming from behind creates a bokeh effect in the background, Guy, 2016.
Frost can be found anywhere and always looks stunning. Combined with sunshine, it can result in breathtaking photographs.
Focussing with a longer lens on details or structures will also give interesting views.
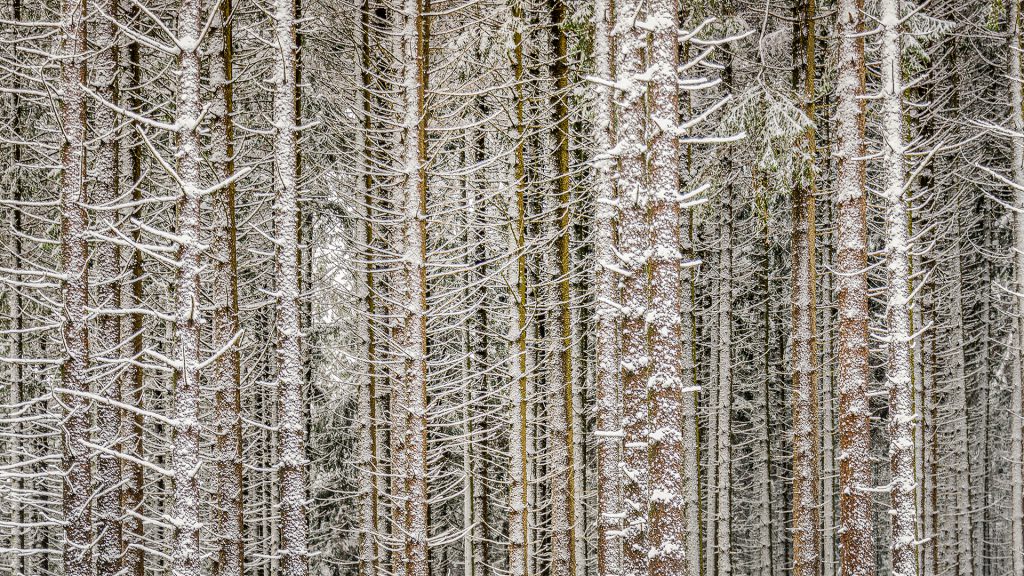
A closer look at stems of pine trees covered with snow offers an interesting pattern., Guy, 2017.
Tip # 13. Look for contrast

In white winter landscapes, any little bit of colour can stand out and make a photo remarkable. Consider using a colourful jacket or umbrella in a snowstorm to add contrast to an otherwise overcast photo. When the landscape is completely white: white trees, white lakes, white mountains, and (normally) a white sky it can become a challenge to find a compositional focal point, as nothing catches the eye.
The trick is to look for contrast. This can be colour contrast, where you find a splash of red, blue, or green against the white background. But it can also be tonal contrast, such as a splash of darkness against the bright snow like a darker tree against a white backdrop. So, look for something that is standing out from the white blanket.
Without a focal point, the viewer’s eyes would have no place to rest, which would make it a bad shot.
Luckily, contrast is rather easy to find on snowy days, because it will catch your eye just the same as it’ll catch a photo viewer’s eye.
Perhaps there’s an autumn leaf laying on top of a thin layer of snow, or maybe it’s a few skiers or hikers wearing red jackets, or a dark mountain, or rock surrounded by white. Just find a dominant colour or dark tone in the otherwise white landscape, then use the usual composition techniques (rule of thirds, leading lines, etc.) to make it a better picture.
Tip # 14. The use of filters
I use fewer filters in winter photography than in other seasons, yet I usually take grey gradient filters with me for those moments when the dynamic range gets a bit too wide. This could happen if you want to shoot the sunset and the sky is still very bright.
A polarizing filter helps to dampen reflections on snow or thawing water. It also makes for more intense colours, such as in the sky, if it is blue at least.
In my 3-part blog on the use of filters, you will find more information about filters: part 1, part 2, part 3
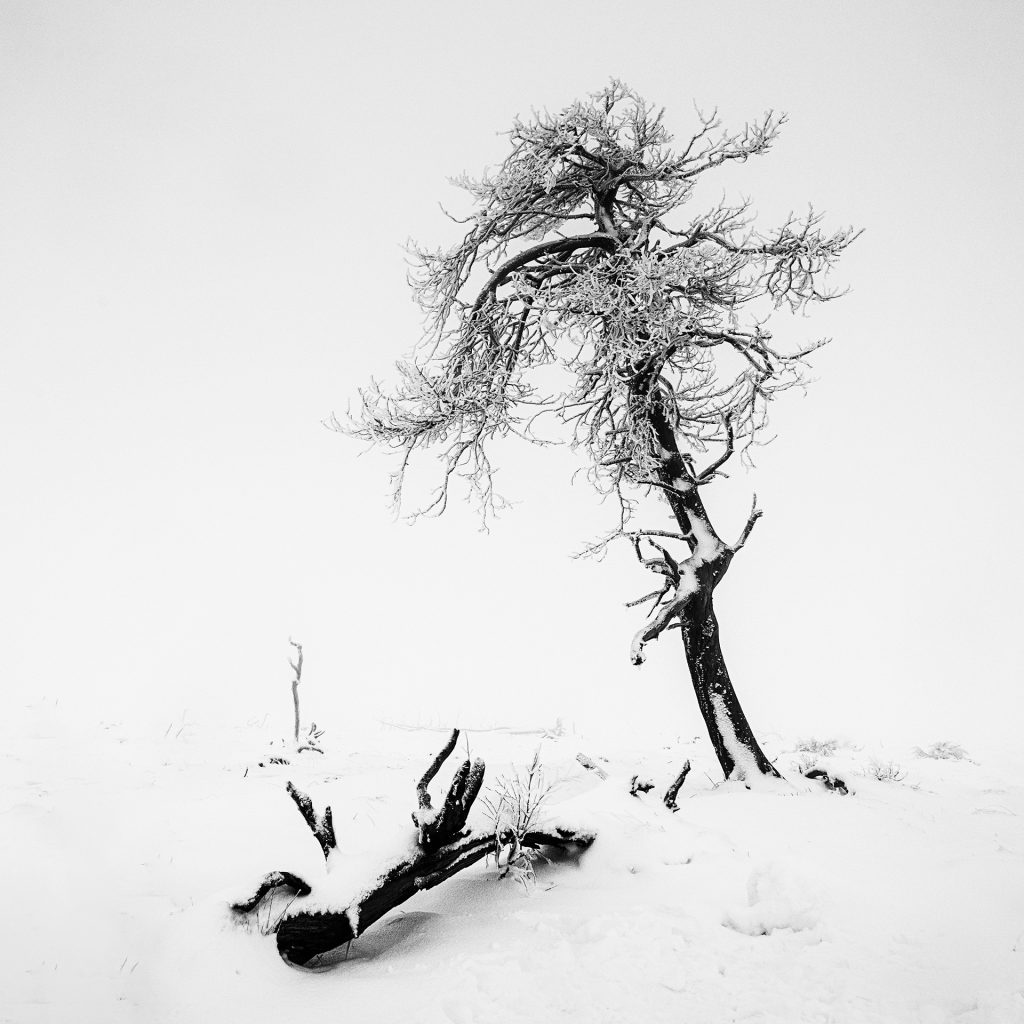
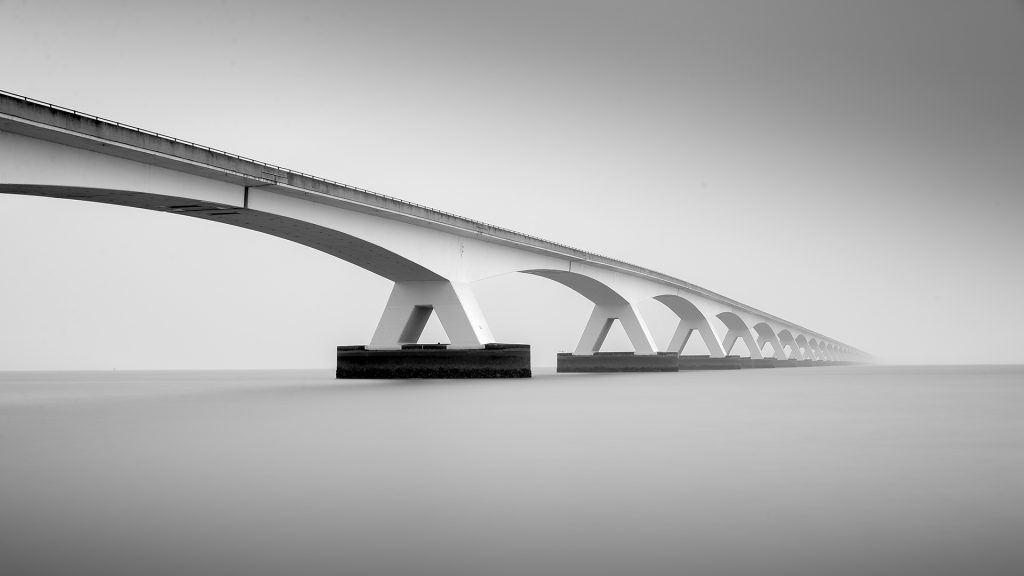
Tip # 15. Black and white winter landscape photography
In winter landscapes most of the time there is already less colour present. So why not turn your pictures to black and white in post-processing to create minimalistic landscapes.
Do have look at my blog black and white photography: the-art-of-black-white-landscape-photography.
Additional reading material can be found in my blog on fine-art-landscape-photography as well as in minimalism-in-landscape-photography

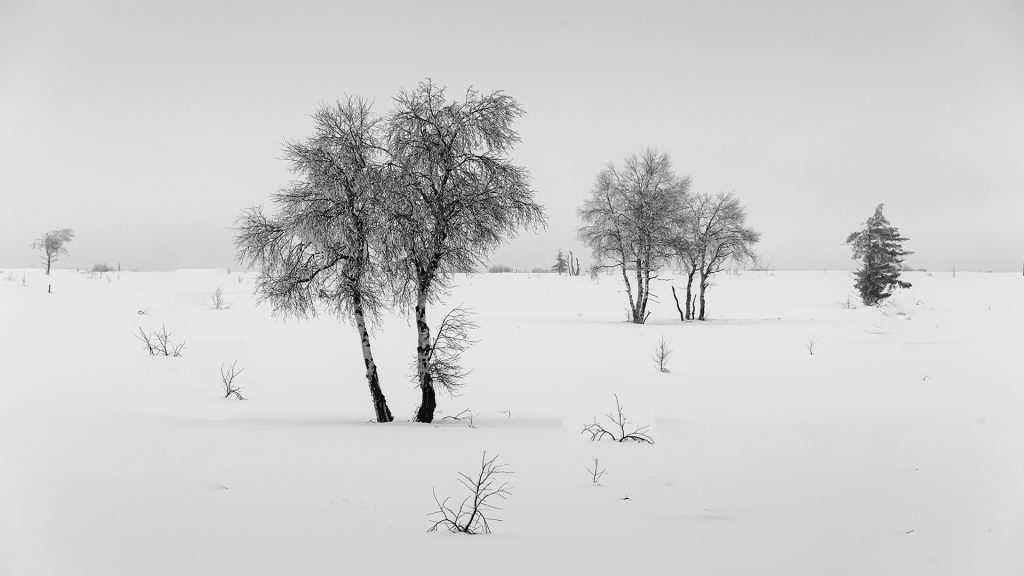
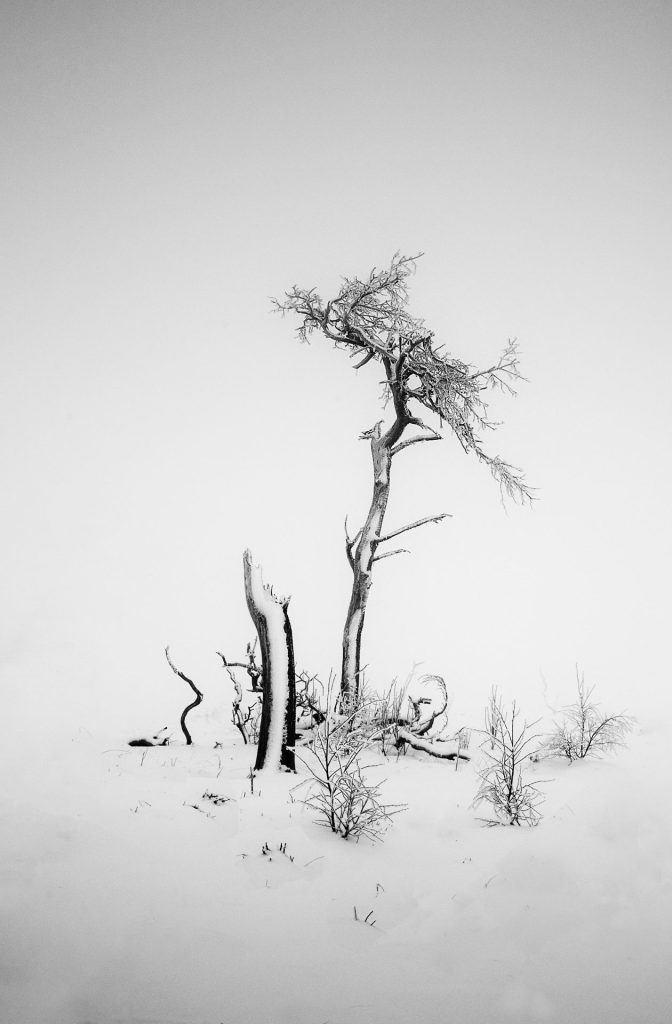
Tip # 16. Be creative and create a portfolio or series of photos
By a portfolio, I mean a coherent whole of several images. The coherence can be expressed through style or story. A possible approach could be a reportage about your favourite nature reserve or a certain species or a subject, all images with the same characteristic, etc.
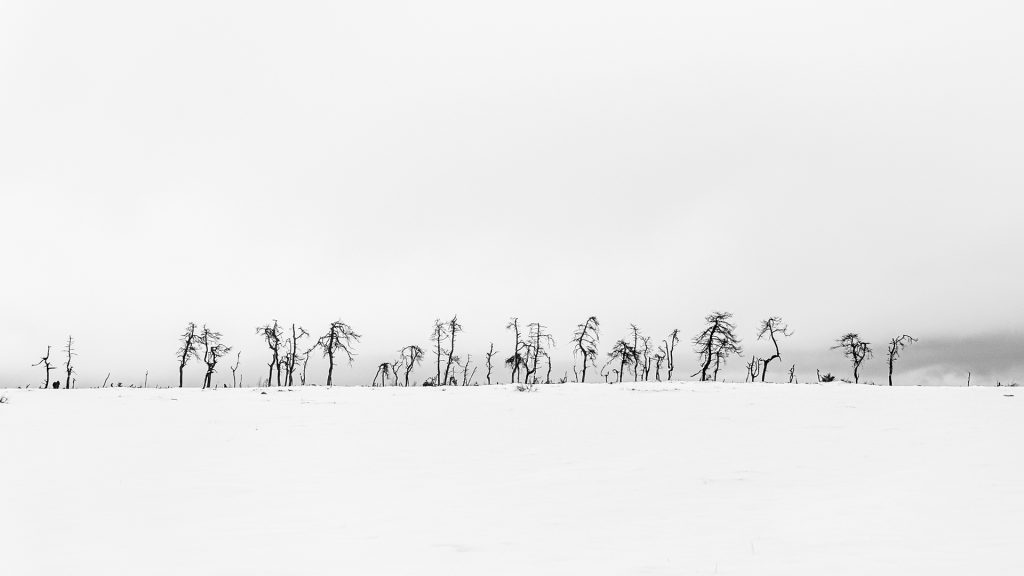
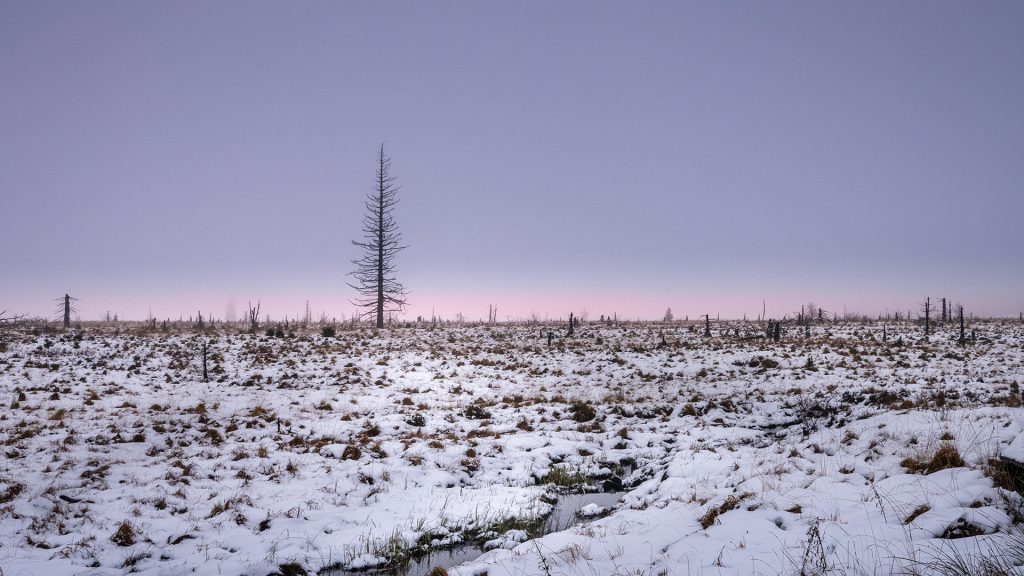
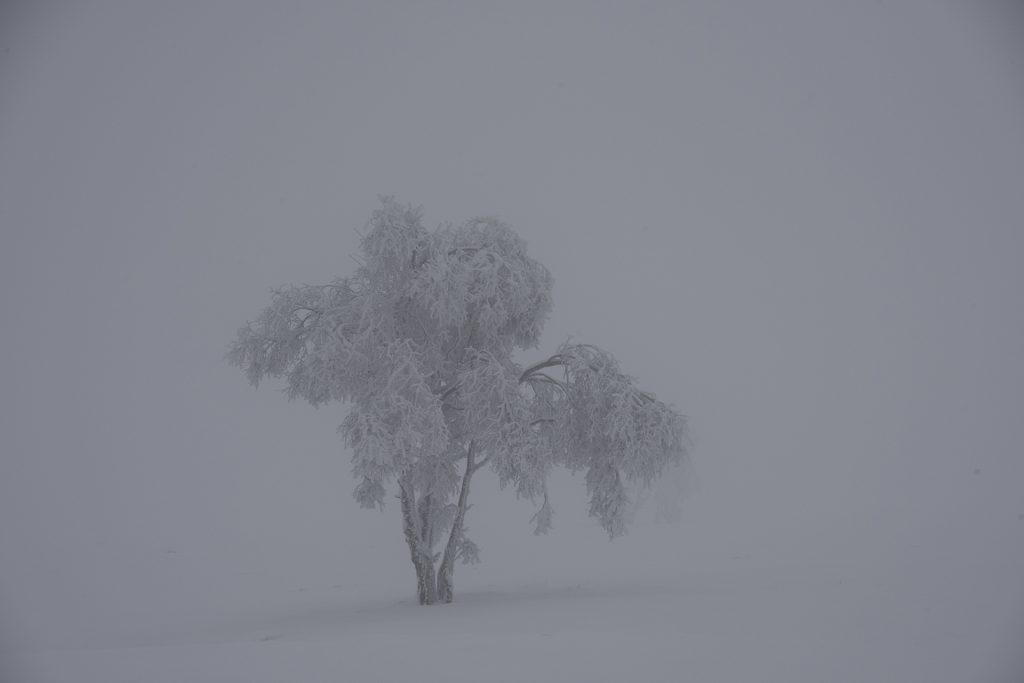
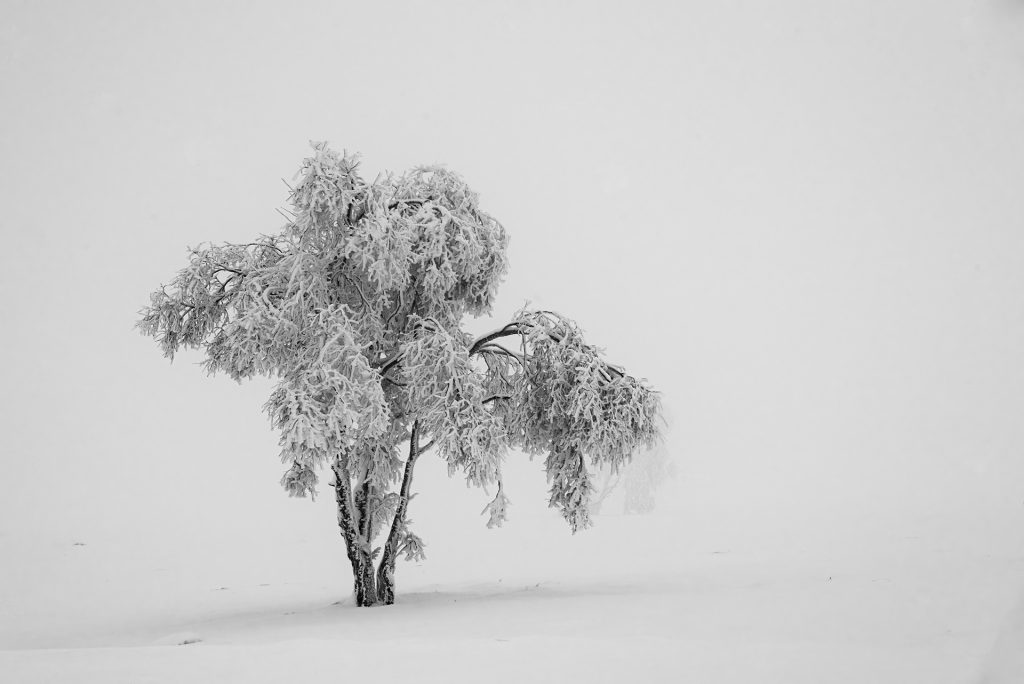
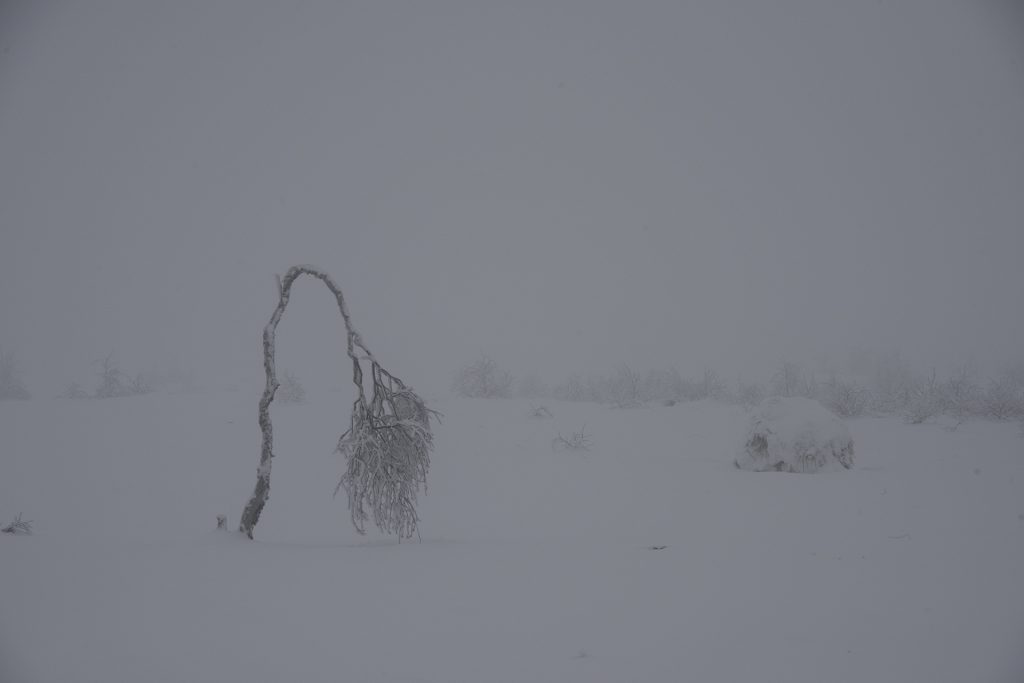
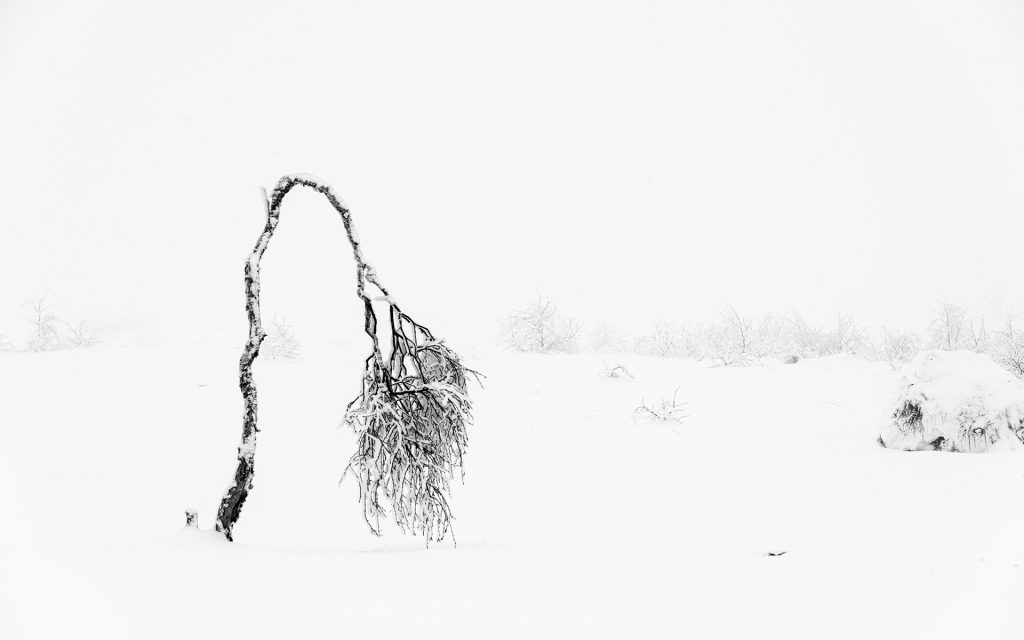
In the example below I have put together 6 photos taken on the same day in the same area in East Belgium (Baraque Michel). It was very cold, there was fresh snow and a lot of mist. Not much fun for the photographer, but it resulted in a nice minimalist series of six images that gives all the credit to the trees. Because of the fog, little of the background is visible, simplifying the image. The image was converted to black and white in post-processing and the contrast slightly increased with the help of luminance masks in Photoshop because the fog blurred everything a bit.
In this area, several forest fires devastated the forest more than ones and young birch trees try to pioneer the area again. The fierce climatic conditions, however, make it difficult for them to survive age, weather, fire and human interference. Nevertheless, even the damaged trees, with broken wings (branches), express great appeal to the eyes. Standing tall in the snow and the mist or even laying down, they look like pen drawings, with graphic simplicity and beauty. Throughout the series of photos, you can also see the evolution of a proud standing tree to a completely broken trunk lying in a bed of snow.

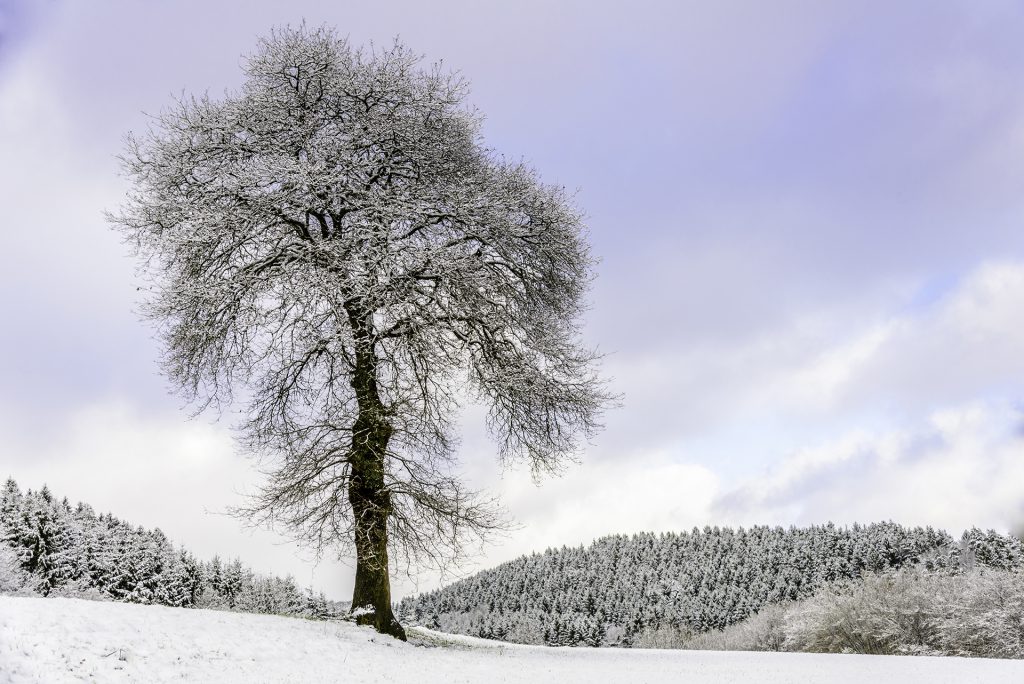
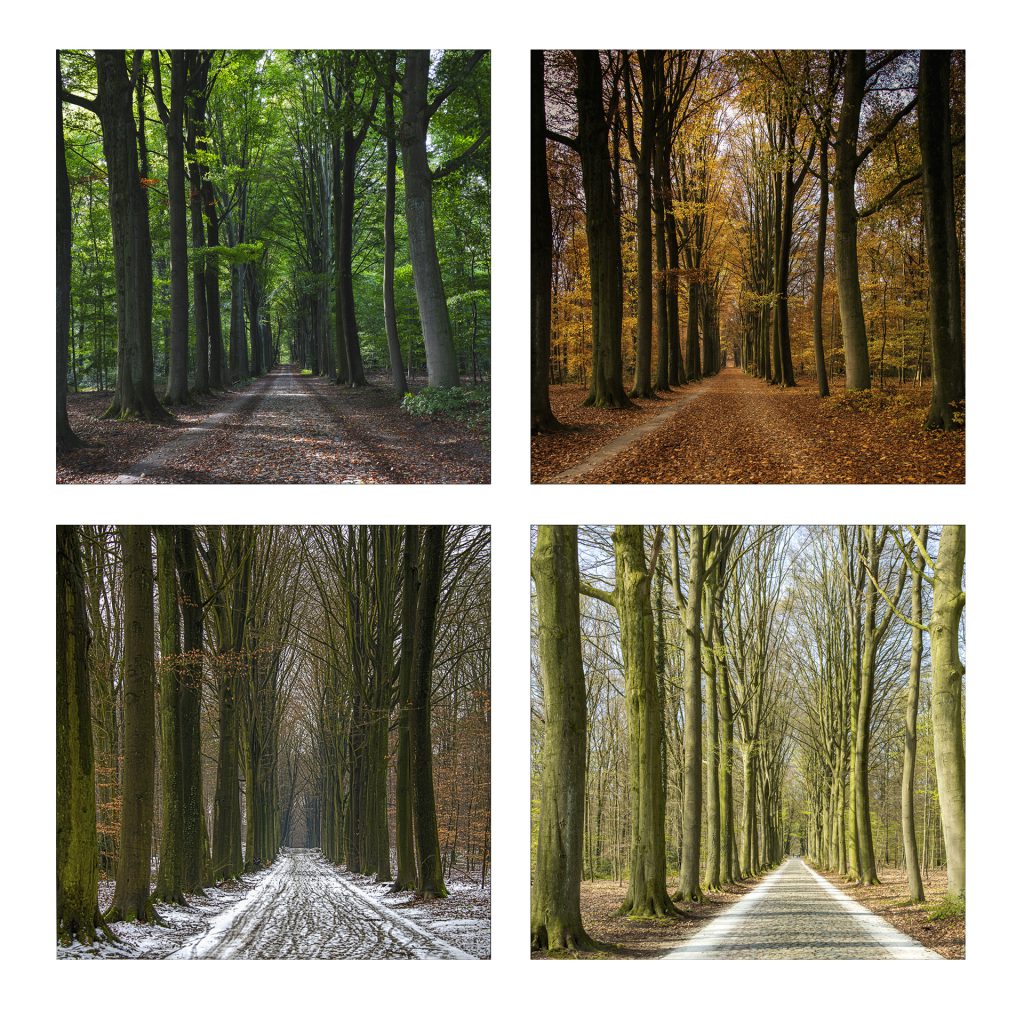
Another possibility is to revisit the same scene in different seasons:
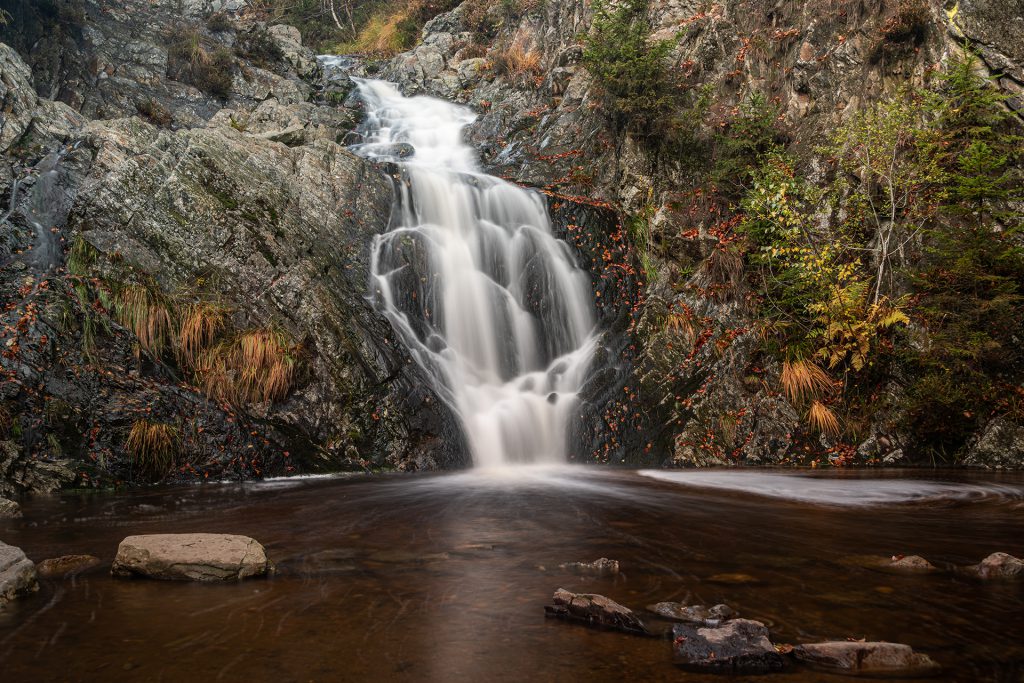
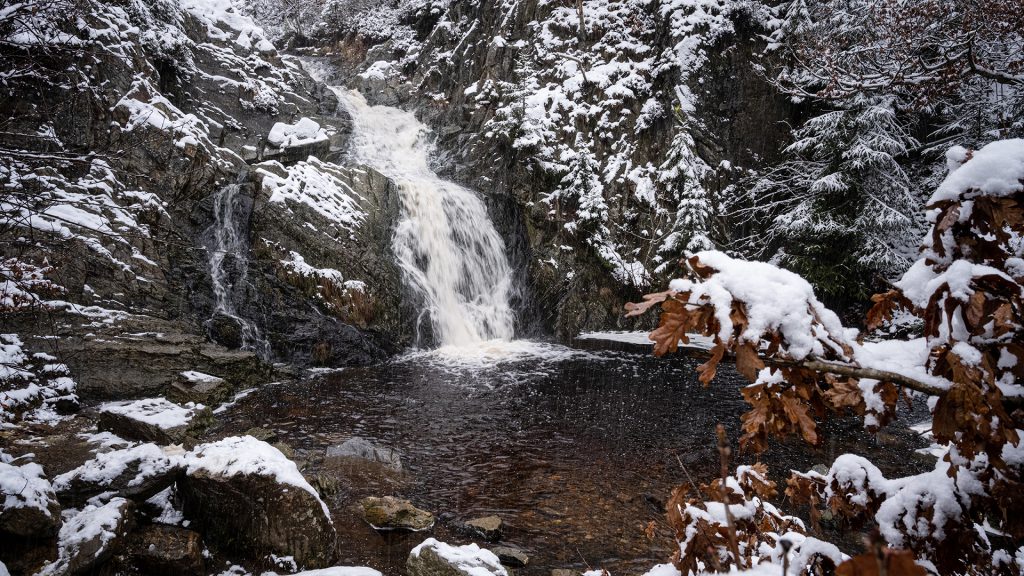
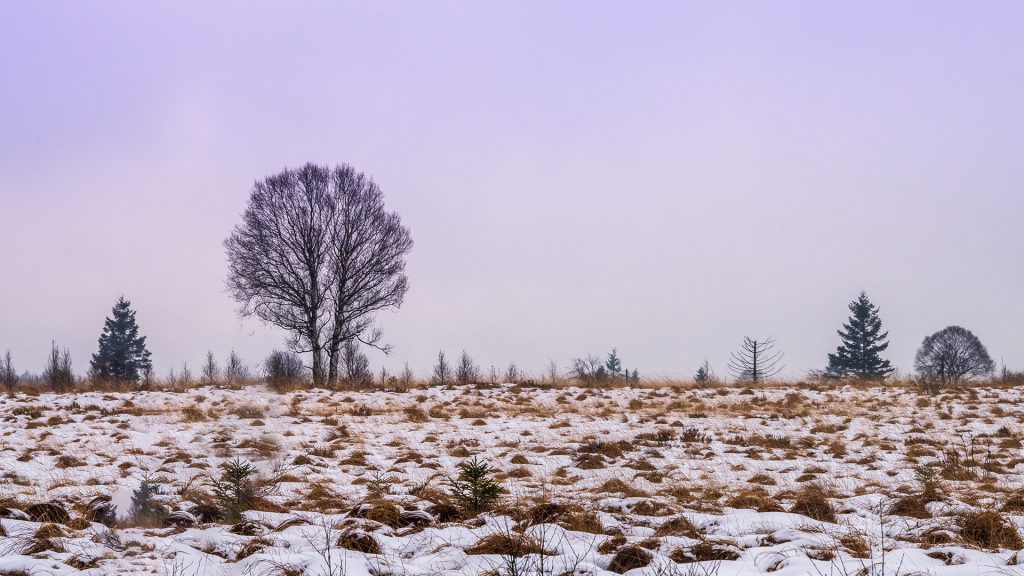
In the four photos below, you see the same landscape from the same perspective in the 4 seasons.
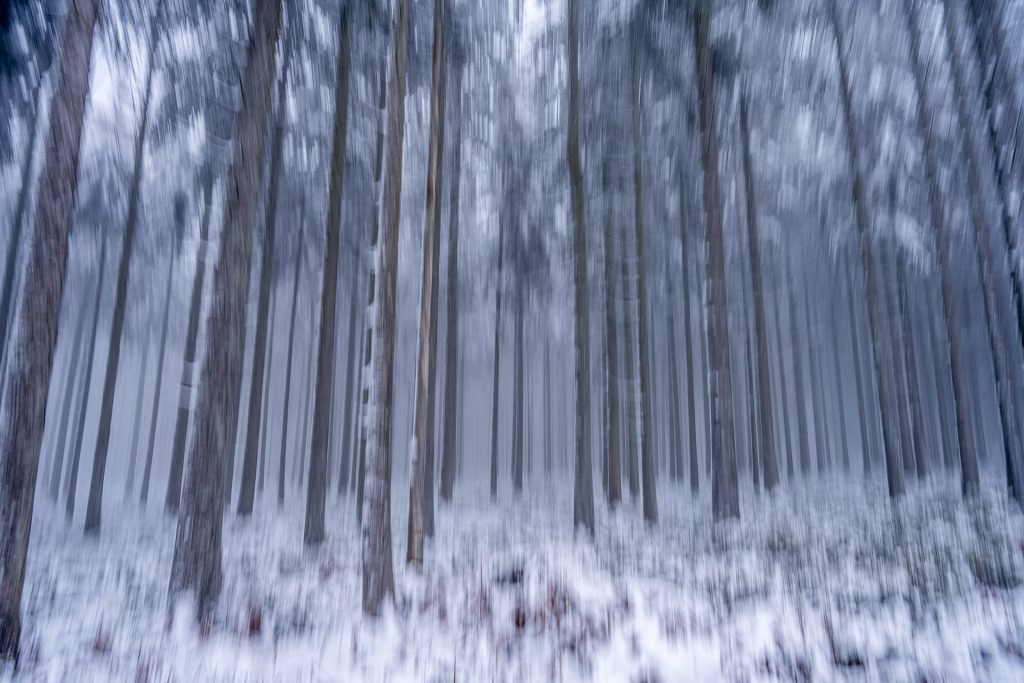
Another creative idea might be to experiment with intentional camera movement. In forest areas, this will mostly mean that you choose a longer exposure and while pressing the shutter button you move your camera upwards in line with the tree trunks.
Tip # 17. Post-processing
As already mentioned, the most important thing to do in post-processing is to set the white balance correct to avoid unnatural colour casts, set white and black points and adjust some contrast. I use both Lightroom and Photoshop plus plugins like Silver-efex-pro (nik collection dxo), BW-artisan-pro-X-2022_panel
Conclusions
Winter is coming, or already here. I hope that I could convince you to go out in winter with your camera.
Take with you some of our winter landscape photography tips, and experiment with them to get outstanding images.
Please leave a comment or question here below.
Leave a reply